Let me tell you about the day everything changed for one of my students.
His name was Marcus. He was seven years old and he was the kind of kid who could not sit still for more than five minutes. Getting him to focus on anything was a daily challenge. His teachers talked about it at every staff meeting.
Then one afternoon we did a planter craft project.
Marcus pressed his little hands into the soil, pushed a seed down with his finger, and patted the dirt on top. Then he looked up at me with the most serious expression and said, “Now I have to water it every day, right?”
He did. Every single day for three weeks, that boy was the first one to check on his plant. He watched it sprout. He watched it grow. And when the basil leaves were big enough to pinch off, he smelled them and announced to the whole class that it smelled like pizza.
That project did something for Marcus that no worksheet ever could. It gave him responsibility. It gave him patience. And it gave him something to be genuinely proud of.
That is exactly what this craft does for kids.
Now, if your little ones have recently fallen in love with working with their hands and you are looking for more clay based projects to try alongside this one, make sure you check out our post on 20 Fun Air Dry Clay Crafts for Kids it is packed with ideas that pair beautifully with this project.
But right now, let’s get our hands in some soil and make something that will keep growing long after craft time is over.
Why a Herb Garden Planter Craft Is So Good for Kids

This project is special because it sits right at the intersection of crafting and science. In other words, it does double duty.
On one hand, kids get to decorate and personalize their own planter. That is the craft side. On the other hand, they get to plant real seeds, care for a living thing, and watch it grow over time. That is the science and life skills side.
Together, these two things create an experience that is genuinely memorable.
As a teacher, I have always believed that the best learning happens when kids are doing something real. Not pretending. Not practicing on paper. Actually doing it. Planting a herb garden is as real as it gets. The seed goes in the soil. The water goes in the pot. The sun does its work. And days later, something green pushes up through the dirt.
No textbook can replicate that feeling.
Furthermore, herb gardens are wonderfully practical. The herbs your kids grow can actually be used in the kitchen. Basil goes on pasta. Mint goes in lemonade. Chives go on eggs. When a child sees their plant being used in a meal, the pride they feel is absolutely priceless.
So beyond the craft itself, this project teaches responsibility, patience, observation, and a love of nature. All wrapped up in one fun afternoon activity.
What You Will Need
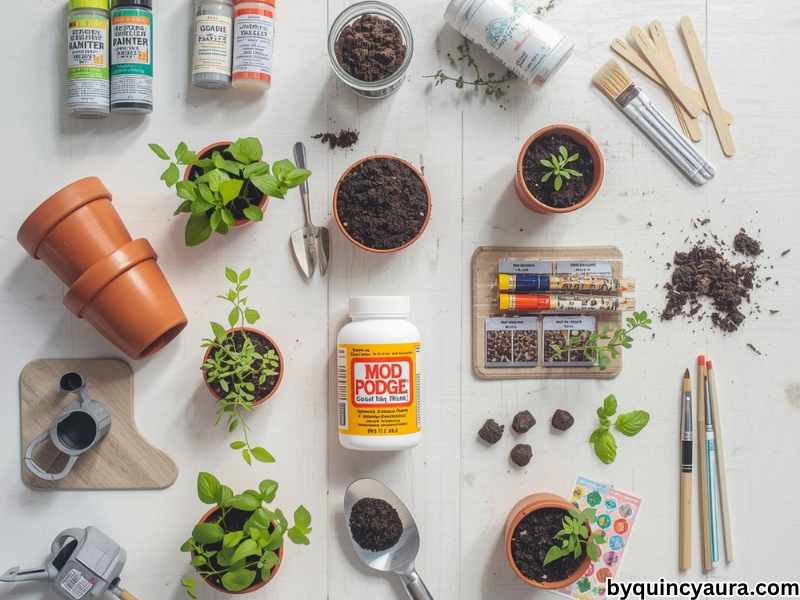
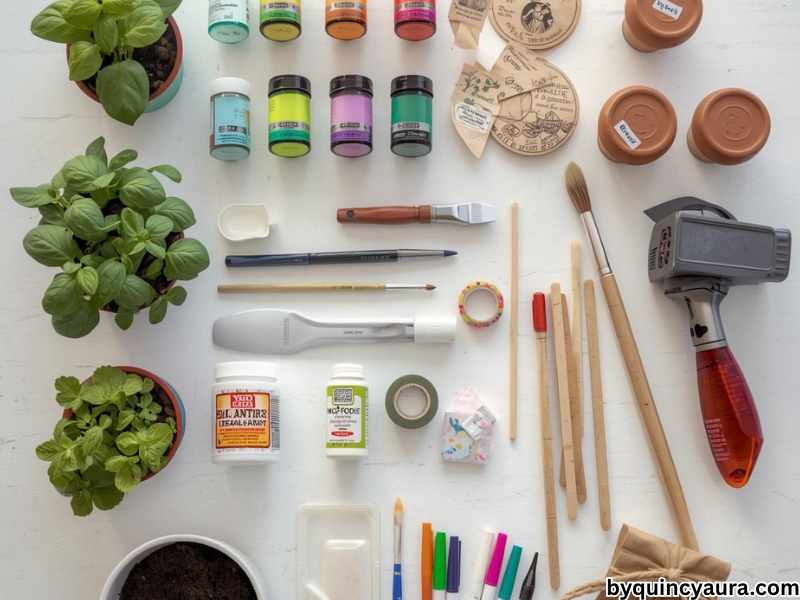
Here is your full supply list. Everything here is easy to find and very affordable. Most of it can be picked up at your local Dollar Tree, Walmart, or garden center.
Small terra cotta pots: These are the classic choice and they work beautifully. They are available at Dollar Tree for about a dollar each. Get one per child plus a few extras. Alternatively, you can use plastic cups, tin cans, or small wooden boxes if you prefer.
Acrylic paint: For decorating the outside of the pots. Any basic craft store set works well. Get a good range of colors so kids have plenty of choices.
Paintbrushes: A few different sizes. Wider brushes for base coats and thinner ones for details.
Mod Podge or outdoor sealer: For sealing the painted pots and making them weather resistant. If the pots will live outside, use an outdoor sealer specifically. For indoor herb gardens, regular Mod Podge is fine.
Potting soil: A small bag of all-purpose potting mix is all you need. This is available at any garden center or Walmart for just a few dollars.
Herb seeds or small herb seedlings: Seeds are the most affordable option and give kids the full growing experience from start to finish. Basil, mint, chives, and parsley are all easy to grow and very beginner friendly. However, if you want faster results, small seedlings from a garden center are a great alternative.
A small trowel or spoon: For scooping soil into the pots.
A watering can or spray bottle: For the initial watering and for ongoing care.
Wooden craft sticks or popsicle sticks: For making herb markers to label each pot. More on this in a moment.
Markers or paint pens: For writing on the craft stick herb markers.
Optional extras: Stickers, washi tape, foam letters, or stamps for decorating the pots. These give younger kids more ways to personalize their planter without needing to paint.
Setting Up Your Workspace
Before the kids come to the table, spend about ten minutes getting everything ready. A little preparation makes the whole experience run much more smoothly.
Cover your table with a plastic tablecloth or old newspapers. Both paint and soil can make a mess, so protecting your surface is important here.
Set out one terra cotta pot per child. Next to each pot, lay out a piece of parchment paper for them to paint on, this prevents paint from getting directly on the tablecloth.
Put the paints in the center of the table where everyone can reach them. Set out the brushes and any extra decorating supplies.
Keep the soil and planting supplies separate from the painting supplies for now. You will bring those out in the second half of the project, once the pots are painted and dry.
Also, put on some background music. This might sound like a small detail, but trust me music makes every craft session feel more fun and relaxed. In my classroom, we always had music on during creative time. The kids worked better and stayed calmer as a result.
Now bring the kids in and let the fun begin.
Step by Step Instructions
Step One: Plan Your Design
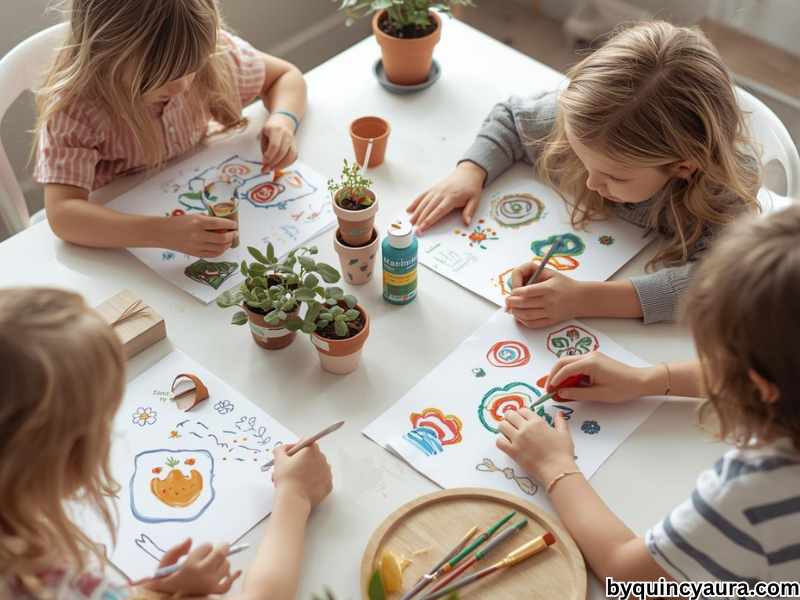
Before anyone picks up a paintbrush, take a few minutes to plan.
Ask each child what colors they want to use and what kind of design they have in mind. Do they want stripes? Polka dots? A rainbow? Their favorite animal? Their name? Flowers? Abstract shapes?
For toddlers, this planning step can be very simple just ask them to pick two or three colors they like. That is enough of a plan for little ones.
For older kids, however, this planning step is really valuable. Encourage them to think about their design before they start. Some kids like to sketch it lightly on paper first. Others prefer to just go for it. Both approaches are completely fine.
The important thing is that each child feels ownership over their design. This is their planter. It should look like them.
Step Two: Paint the Base Coat

Start with a base coat…one solid color painted over the entire outside of the pot.
Show the kids how to use long, even strokes to cover the surface smoothly. Work from top to bottom and make sure to get into any grooves or textured areas on the pot.
For toddlers, painting the base coat is usually enough of an activity on its own. Their little hands will cover the pot in overlapping strokes and the result will be charmingly imperfect and beautiful.
For older kids, the base coat is just the beginning. Once it dries, they can add patterns, details, and designs on top.
Let the base coat dry completely before moving on. This usually takes about twenty to thirty minutes depending on how thickly the paint was applied. While waiting, this is a great time to prepare the herb markers more on that in step four.
Step Three: Add Patterns and Details
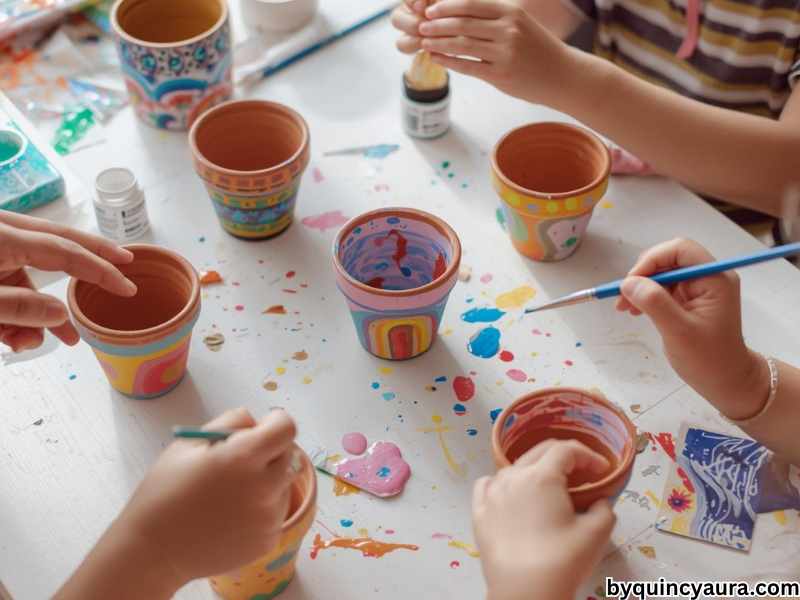
Once the base coat is fully dry, it is time to add the fun details on top.
This is where every pot becomes completely unique. Here are some ideas to inspire your kids:
Polka dots made with the end of a paintbrush dipped in a contrasting color are always a hit. Stripes painted with a thin brush look clean and graphic. Handprints pressed onto the side of the pot in a different color are meaningful and charming. Flowers, butterflies, rainbows, and suns work beautifully on round pots. For older kids, geometric patterns, ombre effects, or even tiny painted scenes look absolutely stunning.
Encourage kids to cover the whole pot rather than leaving large unpainted areas. Fuller designs tend to look more intentional and polished in the end.
Once all the details are done, set the pots aside to dry completely. This second drying stage usually takes another twenty to thirty minutes.
Step Four: Make the Herb Markers
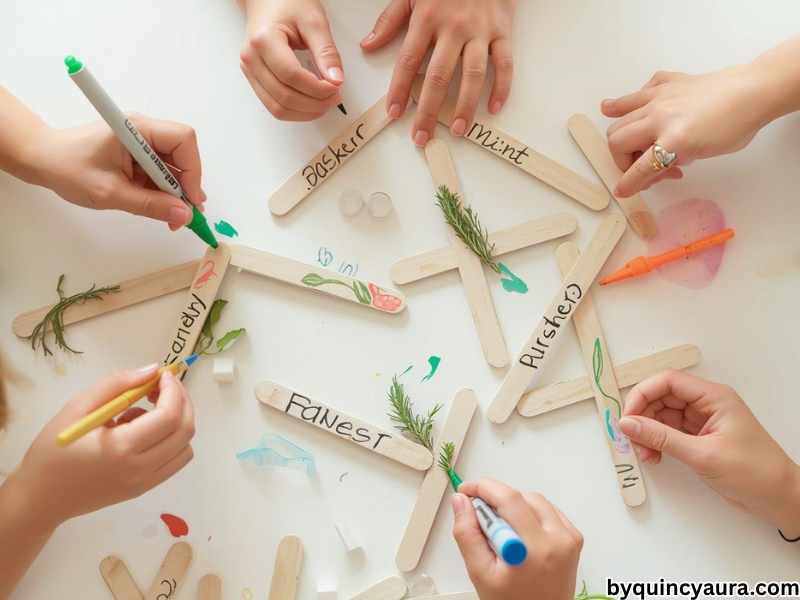
While the pots are drying, it is time to make the herb markers.
Take one popsicle stick or wooden craft stick per herb you plan to plant. Use a marker or paint pen to write the name of the herb on the stick. For younger kids who cannot write yet, you can write the name and let them decorate the stick with colors and patterns.
For a really polished look, paint the top half of the stick in a bright color first and let it dry. Then write the herb name on the painted section in a contrasting color. The result looks intentional and lovely.
Older kids can also draw a small picture of the herb on the stick, a little leaf for basil, a sprig for rosemary, or a simple flower for chives. These illustrated markers look absolutely charming and make the finished herb garden feel truly handcrafted.
Set the finished markers aside until the planting step.
Step Five: Seal the Painted Pots
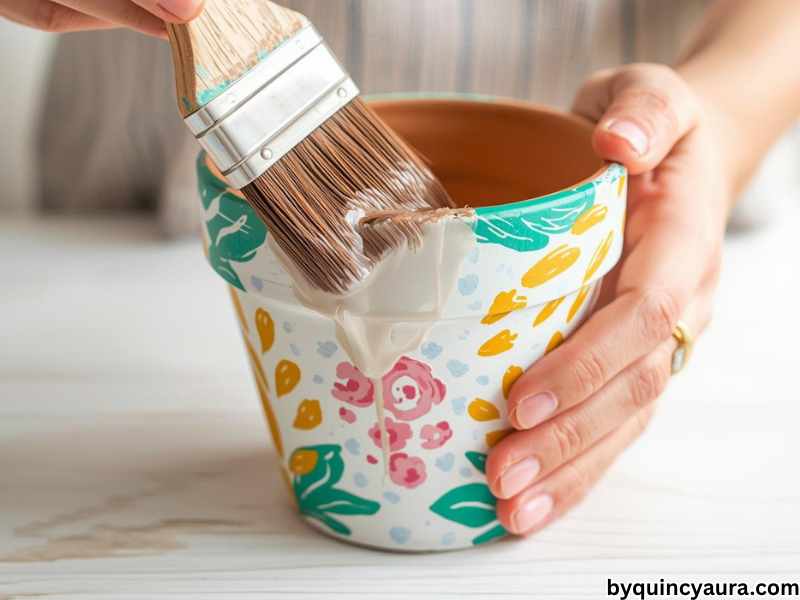
Once the pots are fully painted and dry, apply a coat of Mod Podge or sealer over the entire painted surface.
This step is important for two reasons. First, it protects the paint from chipping and peeling when the pot gets wet during watering. Second, it gives the finished pot a beautiful polished look that elevates the whole project.
Use a wide brush to apply an even coat all over the outside of the pot. Avoid getting sealer on the inside of the pot since this is where the soil will go.
Let the sealer dry for at least thirty minutes before moving on to the planting step. Some sealers require a full hour, so check the label on your specific product.
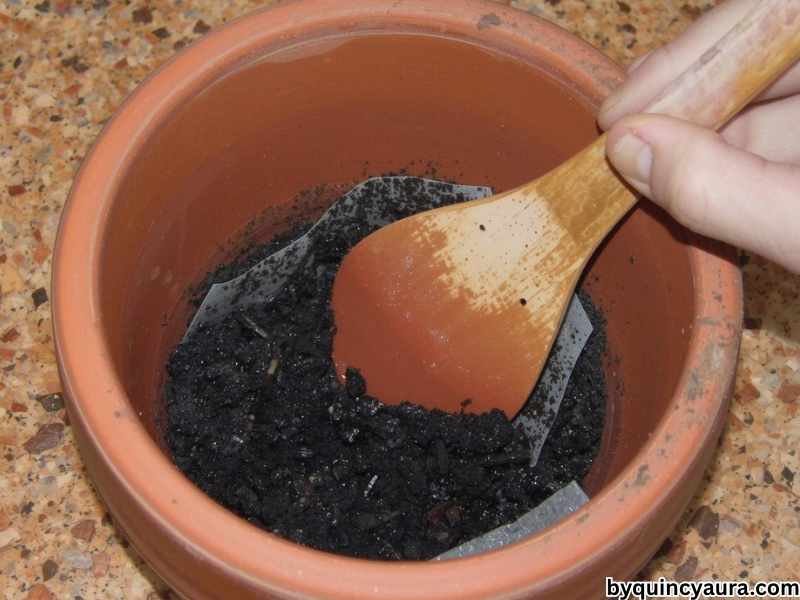
Step Six: Add Drainage and Soil
Now comes the planting part and this is where the kids really get excited.
First, if your terra cotta pot does not already have a drainage hole in the bottom, place a small piece of paper towel or a coffee filter over the inside of the drainage hole. This prevents soil from falling out while still allowing water to drain through.
Next, fill the pot about two thirds of the way with potting soil. Use a small trowel or spoon to scoop the soil in. Let the kids do this themselves, scooping soil is deeply satisfying for children of all ages.
Press the soil down gently with your fingers to remove any large air pockets. Then add a little more soil if needed so the pot is filled to about an inch below the rim. This gap at the top prevents soil from washing out when you water.
Step Seven: Plant the Seeds or Seedlings

This is the most exciting step of the whole project. And also the messiest. Embrace it.
If you are using seeds: Make a small hole in the center of the soil about half an inch deep using your finger or a pencil. Drop two or three seeds into the hole, planting a few seeds increases the chances that at least one will germinate. Cover the seeds with soil and press down gently.
If you are using seedlings: Make a hole in the center of the soil wide enough to fit the root ball of the seedling. Gently remove the seedling from its container, place it in the hole, and fill in around the roots with soil. Press down firmly around the base of the plant to secure it.
In either case, let your child do as much of this as possible. The act of planting with their own hands is what makes this project meaningful. Even toddlers can drop seeds into a hole and pat the soil down. That simple act connects them to the plant in a real and lasting way.
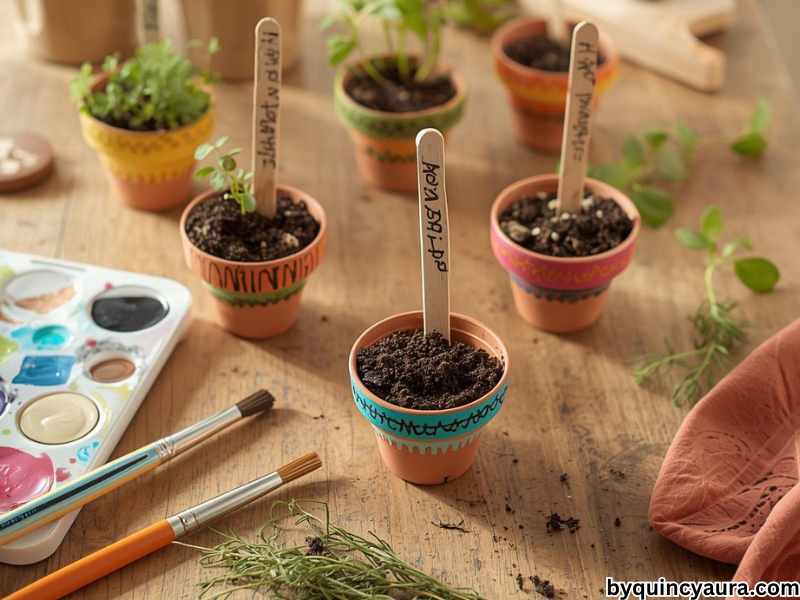
Step Eight: Push In the Herb Marker
Once the seed or seedling is planted, push the finished herb marker into the soil next to the plant.
This serves two purposes. First, it labels the herb so everyone knows what is growing in each pot. Second, it makes the finished planter look complete and polished.
For kids who planted seeds, the marker is especially important because the soil looks empty at first. Having a marker in place helps the child remember what is planted and keeps the excitement alive during the waiting period before anything sprouts.
Step Nine: Water and Place in a Sunny Spot
Give the newly planted herb a gentle but thorough watering. Use a small watering can or a spray bottle set to a gentle mist so the seeds are not displaced by heavy water pressure.
The soil should be moist but not waterlogged. A good rule of thumb is that the soil should feel like a wrung-out sponge damp all the way through but not dripping wet.
Next, find the best spot for your herb garden. Most herbs need at least six hours of sunlight each day. A south-facing windowsill is ideal for indoor herb gardens. Alternatively, an outdoor porch, patio, or garden bed works wonderfully in warmer weather.
Show your child where the planter will live and explain why that spot was chosen. Teaching them about a plant’s need for sunlight is a natural science lesson that feels completely effortless in this context.
How to Care for Your Herb Garden
Now that the planting is done, the ongoing care is what keeps kids engaged with this project long after craft day is over.
Watering: Most herbs need watering every two to three days. The easiest way to check is to push a finger about an inch into the soil. If it feels dry at that depth, it is time to water. If it still feels moist, wait another day.
Make your child the designated waterer: Give them a small watering can they can fill and use themselves. This daily responsibility builds a wonderful habit and keeps them invested in watching their plant grow.
Sunlight: Rotate the pot every few days so all sides of the plant receive equal light. This prevents the plant from leaning toward the window and keeps it growing straight and full.
Harvesting: Once your herbs are big enough usually after four to six weeks for seedlings and six to eight weeks for seeds, you can start harvesting. Show your child how to pinch off leaves from the top of the plant. Explain that pinching the top actually encourages the plant to grow fuller and bushier. Then use the harvested herbs in a meal together.
There is nothing quite like the moment a child tastes something flavored with a herb they grew themselves. It is one of those small but powerful experiences that plants a seed of curiosity, if you will excuse the pun that grows for a lifetime.
Fun Ways to Extend This Project
Once your kids have made one herb planter, they will almost certainly want to make more. Here are some fun ways to extend the project and keep the momentum going.
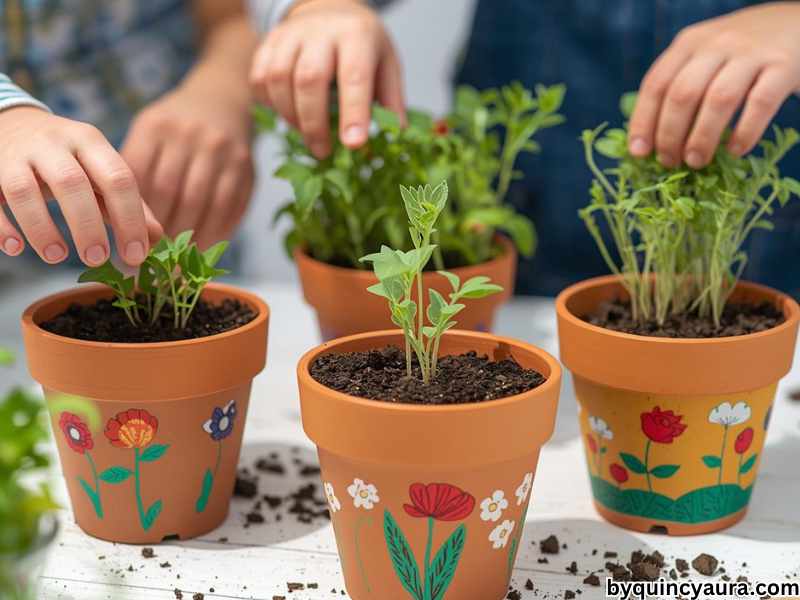
Make a whole herb garden collection: Create multiple pots with different herbs and arrange them together on a windowsill or tray. A coordinated collection of decorated pots looks absolutely stunning and gives kids a real sense of accomplishment.
Give them as gifts: A decorated herb planter with a handwritten care card makes one of the most thoughtful and personal gifts a child can give. Grandparents especially love receiving something their grandchild grew with their own hands.
Start a garden journal: Give your child a small notebook to record their observations. Encourage them to draw the plant each week and note any changes they see. This simple habit builds observation skills and creates a beautiful record of the growing process.
Expand to vegetables: Once your child has successfully grown herbs, the natural next step is vegetables. Cherry tomatoes, lettuce, and radishes are all easy to grow in small containers and are incredibly rewarding for young gardeners.
Your Action Step for This Weekend
Here is what I want you to do right now.
Head to Dollar Tree and pick up a few small terra cotta pots, some acrylic paint, and a packet of herb seeds. That is genuinely all you need to get started. Everything else like brushes, soil, craft sticks, you likely already have at home.
Set aside a Saturday morning for the painting and planting. Then put the finished planter on your sunniest windowsill and water it together every few days.
Watch what happens.
Within a week or two, small green shoots will push up through the soil. Your child will check on them every single morning. They will call you over to look. They will feel proud in a way that is hard to put into words.
And one day, when you use those herbs in dinner and your child says “I grew that” you will be so glad you did this project.
That moment is worth every bit of the soil on the kitchen table.
Leave a Reply