This site contains affiliate links, which means I may earn a small commission If you click on a link and make a purchase, at no extra cost to you.
Halloween crafts can get expensive quickly when every cute idea seems to require a special supply. The good news is that you can make plenty of fun decorations with things you can find at a dollar store.
The trick is knowing what to look for. A plain picture frame can become spooky wall art, a plastic bowl can turn into a Halloween candy holder, and a pack of craft sticks can become a tiny haunted house.
If you enjoyed creating a cozy setup at home for Halloween, you can also create a cozy Halloween night at home. These crafts can easily become part of that setup, especially when you want the room to feel festive without buying a whole new collection of decorations.
Start With a Simple Dollar Store Craft Haul
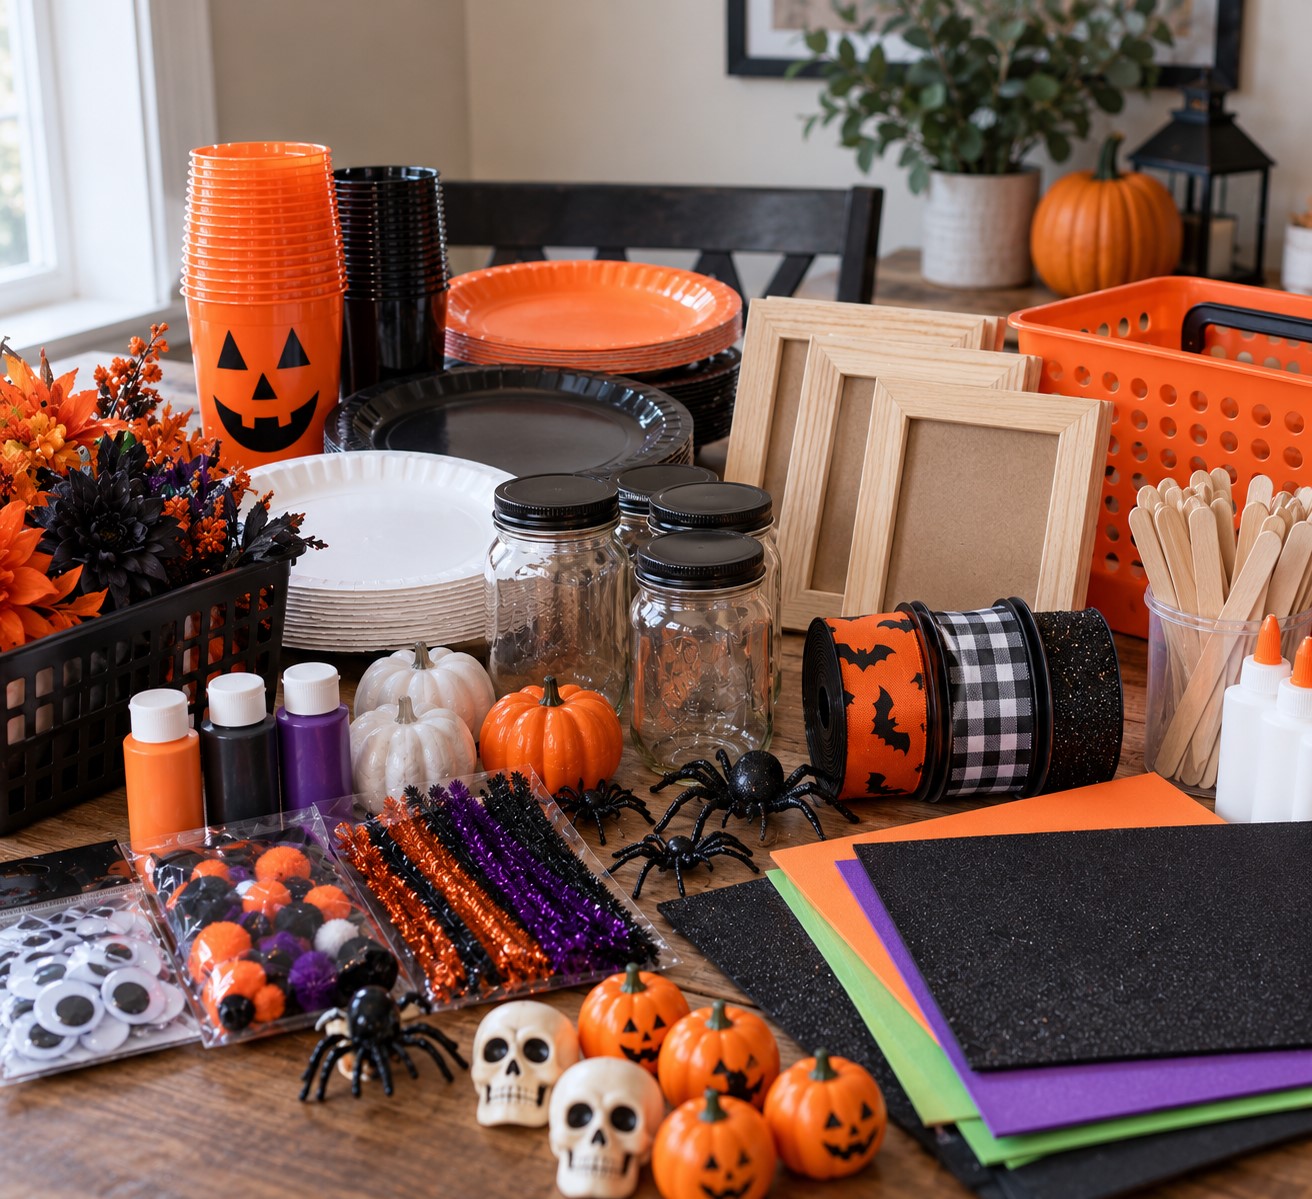
You do not need to fill your cart with everything that looks remotely Halloween-themed. Start with basic craft supplies that can work for several different projects.
Look for things like paper plates, plastic cups, small bowls, picture frames, glass jars, wooden craft sticks, ribbon, foam sheets, faux flowers, baskets, and inexpensive plastic decorations.
Paint is another useful item to pick up. A small [Amazon: Acrylic Paint Set] can give you several Halloween colors to work with, including black, white, orange, purple, and green.
You will also want something to help with the smaller details. A [Amazon: Paint Brushes Set] with different brush sizes is useful for painting faces, tiny lines, pumpkins, signs, and other decorations.
For projects that involve gluing, keep a [Amazon: Mini Hot Glue Gun] nearby. It is especially handy for craft sticks, ribbon, foam, and lightweight decorations.
The goal is to buy supplies that can be used more than once instead of purchasing one item for every single craft.
Save this post: How to Create a Halloween Party Menu That Feeds a Crowd
1. Turn a Plastic Bowl Into a Halloween Candy Dish
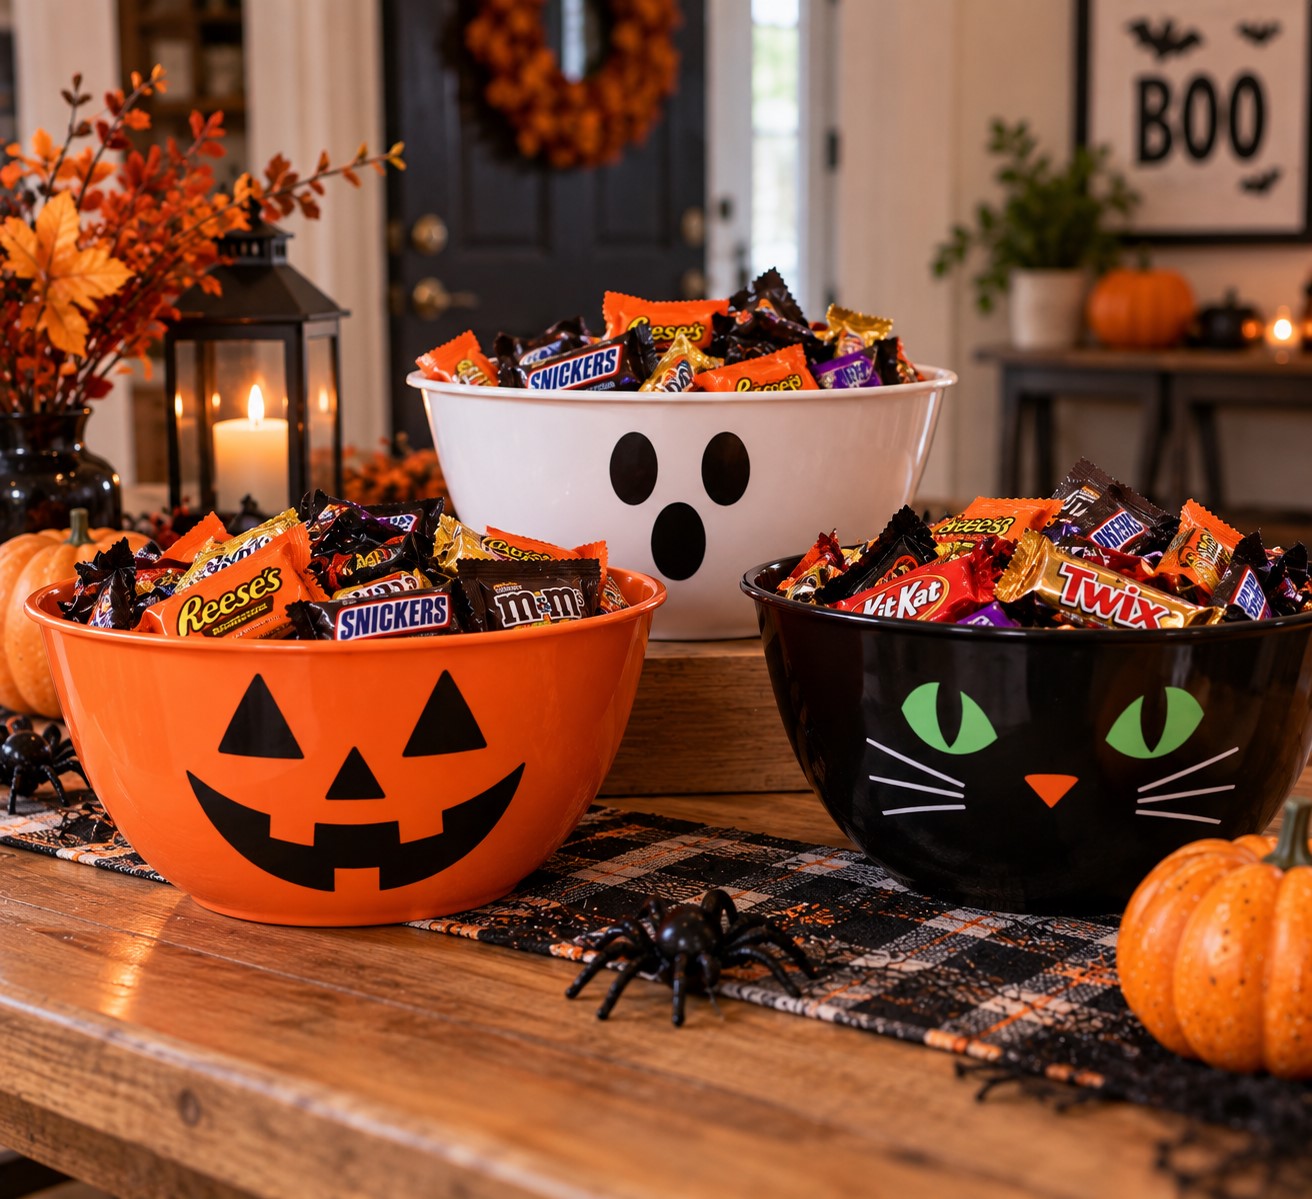
A plain plastic bowl might not look exciting when you first see it sitting on a dollar store shelf. Give it some paint, though, and it can become a fun Halloween candy dish.
Choose an orange bowl for a pumpkin-inspired look. Paint a simple jack-o’-lantern face on the front using black paint.
You can also go in the opposite direction and make a little ghost bowl. Use a white bowl and add two black eyes and a small mouth.
Keep the design simple because the Halloween shape does most of the work.
Once the paint is completely dry, fill the bowl with wrapped candy and place it on a kitchen counter, entryway table, or party table.
You could even make two or three different characters and use them together. A pumpkin, ghost, and black cat would make a cute little candy station without costing much.
If you are planning Halloween treats for children, you can also make Halloween treat bags kids will actually love and place the finished bags beside your candy dish.
2. Make a Mini Haunted House With Craft Sticks
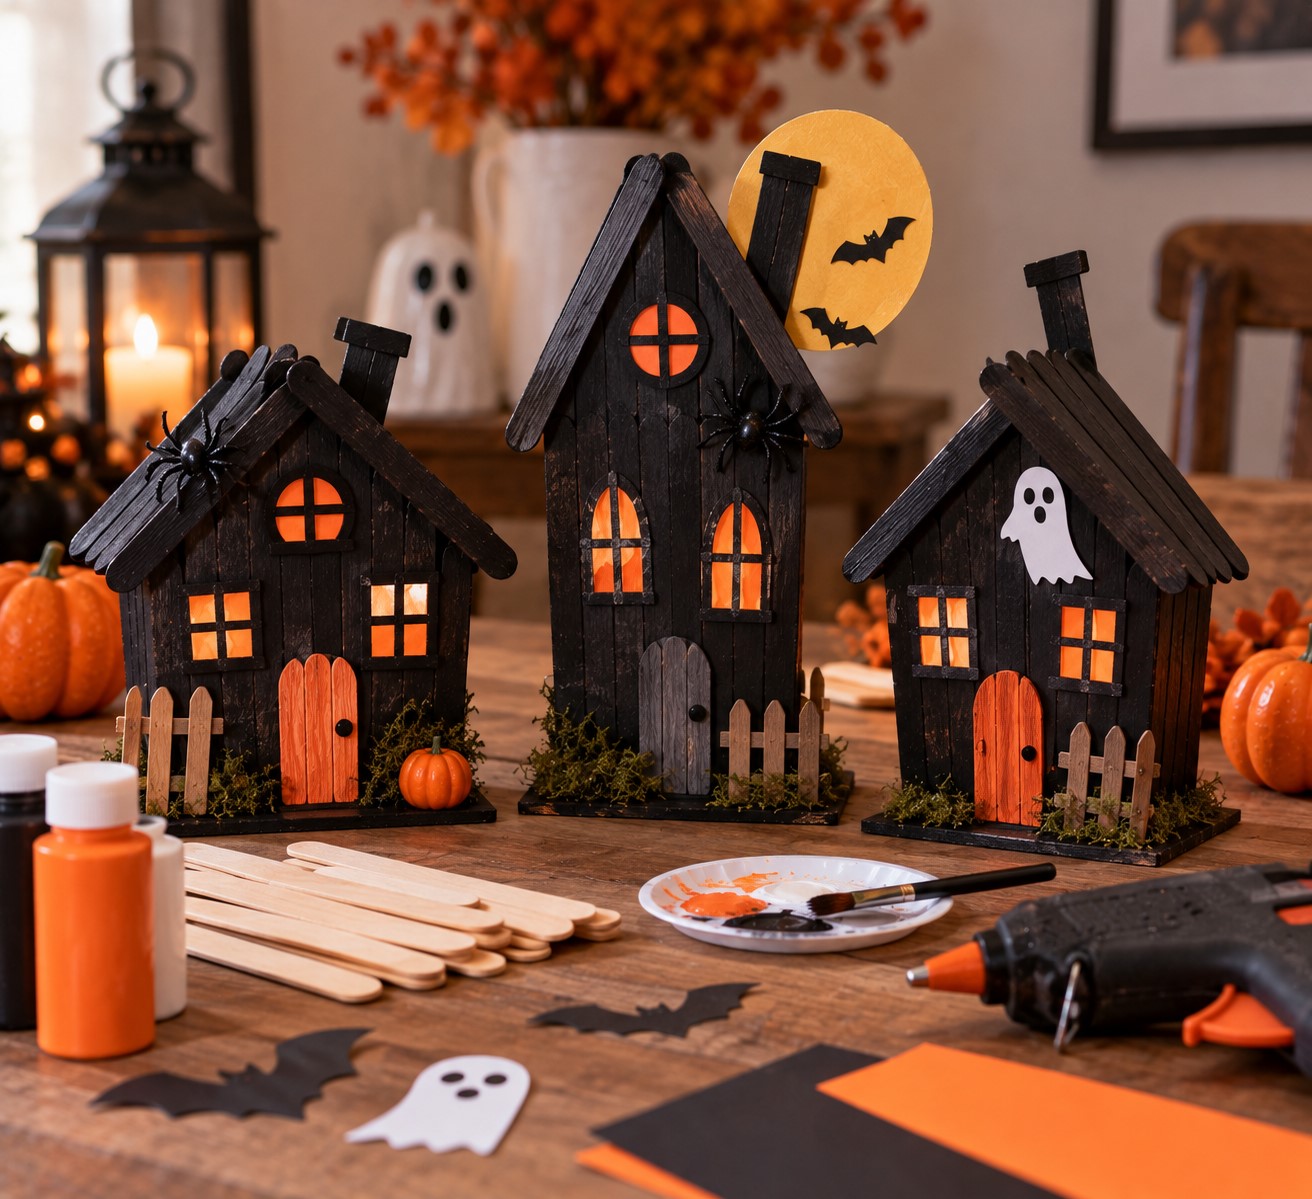
Craft sticks are one of those supplies that are worth buying because you can use them for so many seasonal projects.
For a simple haunted house, arrange the sticks into the shape of a small house. Use your hot glue gun to hold the pieces together.
Do not worry about making every stick perfectly straight. A slightly crooked shape can actually make the house look more like a little haunted building.
Paint the entire house black or dark gray.
Once the paint dries, add tiny windows and a door. You can use white paint for the windows or cut small pieces from white paper.
A little orange around the windows can make the house look like it has lights glowing inside.
Add a crooked chimney, a tiny paper moon, or even a little plastic spider if you have some leftover decorations.
For this project, a [Amazon: Wooden Craft Sticks] pack can give you enough material to make several versions.
Place the finished haunted house on a shelf, mantel, bookshelf, or side table.
You could make three different houses and create a tiny haunted neighborhood.
You will love this: How to Make Halloween Cupcakes Look Like They Came From a Bakery
3. Create Spooky Mason Jar Lanterns
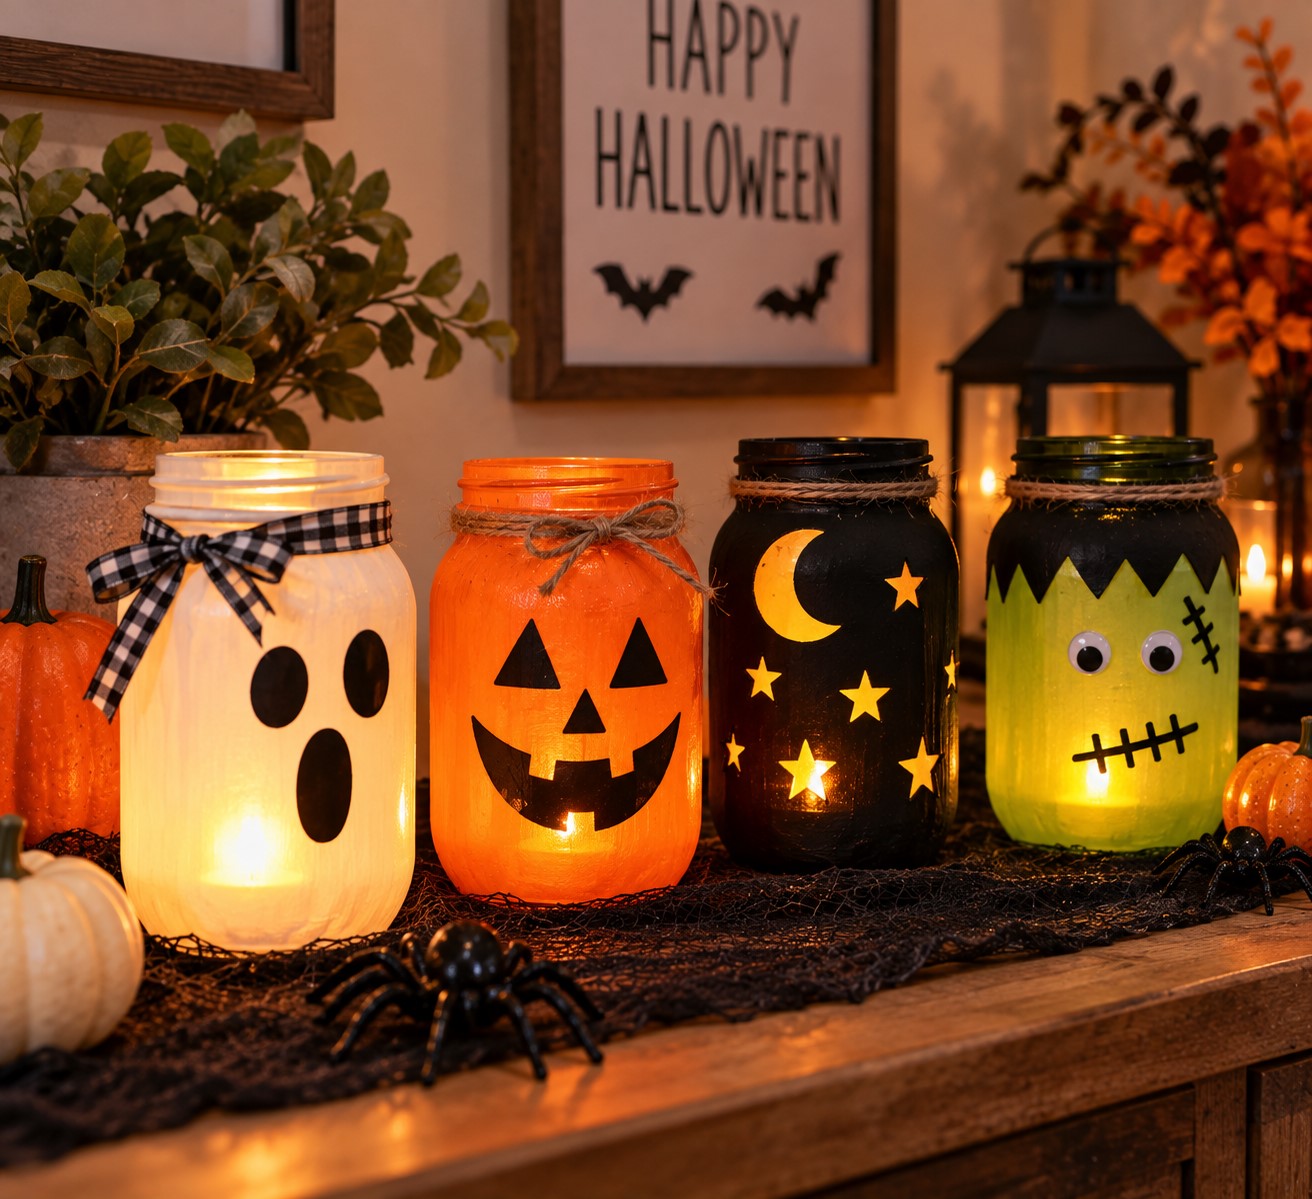
Glass jars are another great dollar store find because they can be decorated in so many ways.
Clean the jar and let it dry completely. Then paint the outside using a Halloween color.
For a ghost lantern, use white paint. Add black eyes and a little mouth.
For a pumpkin version, use orange paint and add a simple jack-o’-lantern face.
You can also paint a jar completely black and add small white stars or a moon.
Once everything has dried, place a battery-operated tea light inside.
A [Amazon: Battery Operated Tea Lights] set is useful for this type of decoration because you can use the lights inside jars, lanterns, pumpkins, and other Halloween displays.
Avoid using real flames inside decorated jars. Battery-operated lights give you the glow without the heat.
Line three or four jars along a shelf or table for a simple Halloween display.
They look especially cute when you make each jar slightly different.
Pin this post: How to Decorate Pumpkins Without Carving Them
4. Turn a Cheap Picture Frame Into Halloween Wall Art
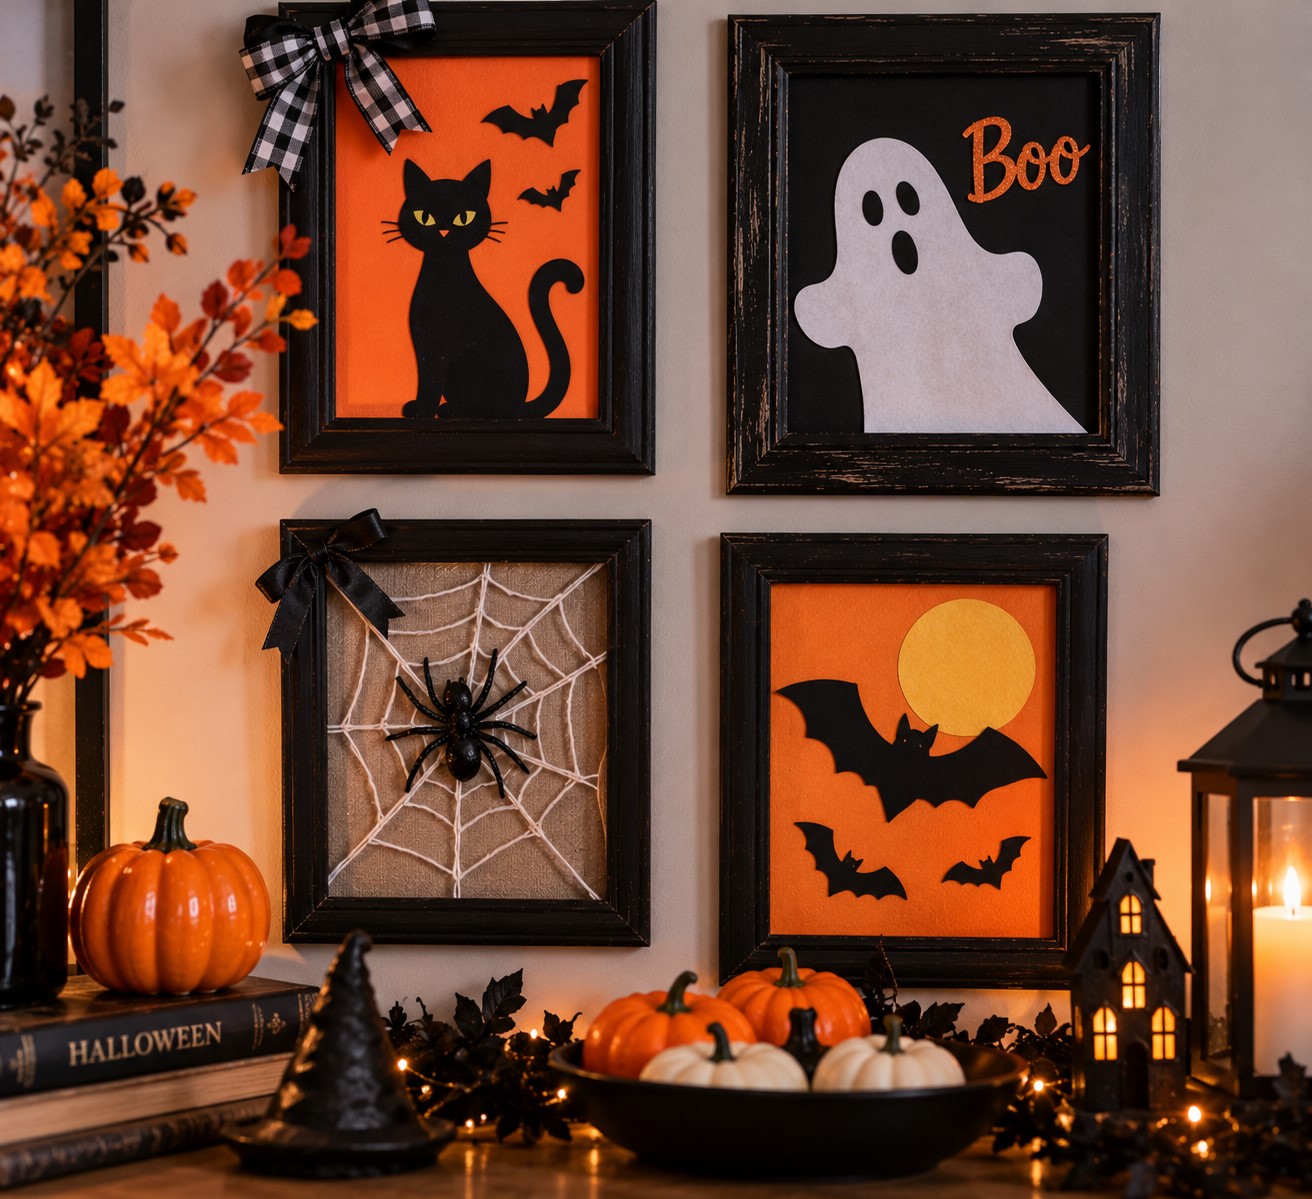
Picture frames are easy to overlook at the dollar store, but they can become some of the best Halloween crafts.
Pick a frame with a simple shape. Remove the glass if you do not need it.
Paint the frame black and allow it to dry.
Inside the frame, add a Halloween image made from paper or cardstock. You could make a black cat silhouette, a white ghost, a large bat, or a simple pumpkin.
Another easy idea is to create a spiderweb using white yarn.
Stretch a few pieces across the inside of the frame and secure them at the back. Then place a small plastic spider in the middle.
You now have Halloween wall art that looks much more intentional than a plain dollar store frame.
For extra detail, add a small piece of black ribbon to the corner or place the finished frame beside another Halloween decoration.
This type of project also works well when you want to turn your fall decor into Halloween decor without starting over. You can use frames, baskets, trays, and other pieces you already have instead of buying everything again.
5. Make Halloween Bats From Foam Sheets
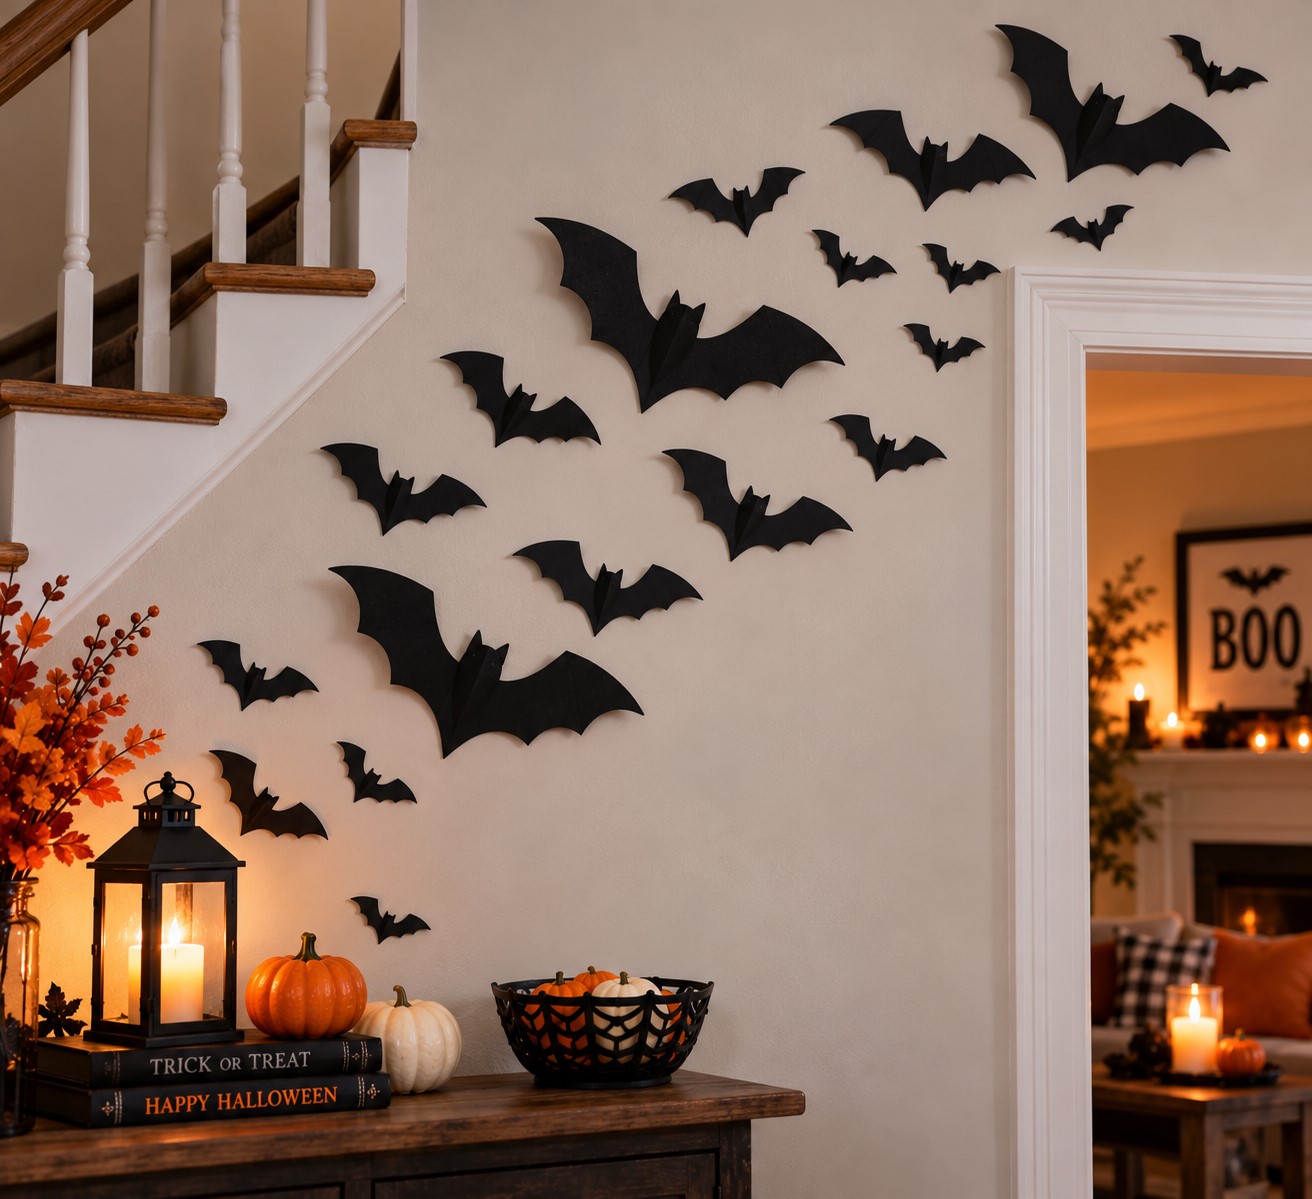
Black foam sheets are perfect for making simple Halloween decorations.
Start by drawing a few bat shapes on the back of the foam. They do not have to be perfect.
Make some bats large and some small.
Cut them out carefully and arrange them on a wall in a flying pattern.
You can make the bats appear to be flying upward toward a doorway or across a blank wall.
If you want a little more dimension, gently bend the wings upward before attaching them.
A pack of [Amazon: Black Foam Craft Sheets] can also be useful for making pumpkins, cats, spiders, letters, and other Halloween shapes.
For a cute look, mix the black bats with orange paper pumpkins.
For something more dramatic, keep the entire display black and white.
See what is trending: How to Make Your Own Halloween Costume From Clothes You Already Own
6. Create a Simple Halloween Garland
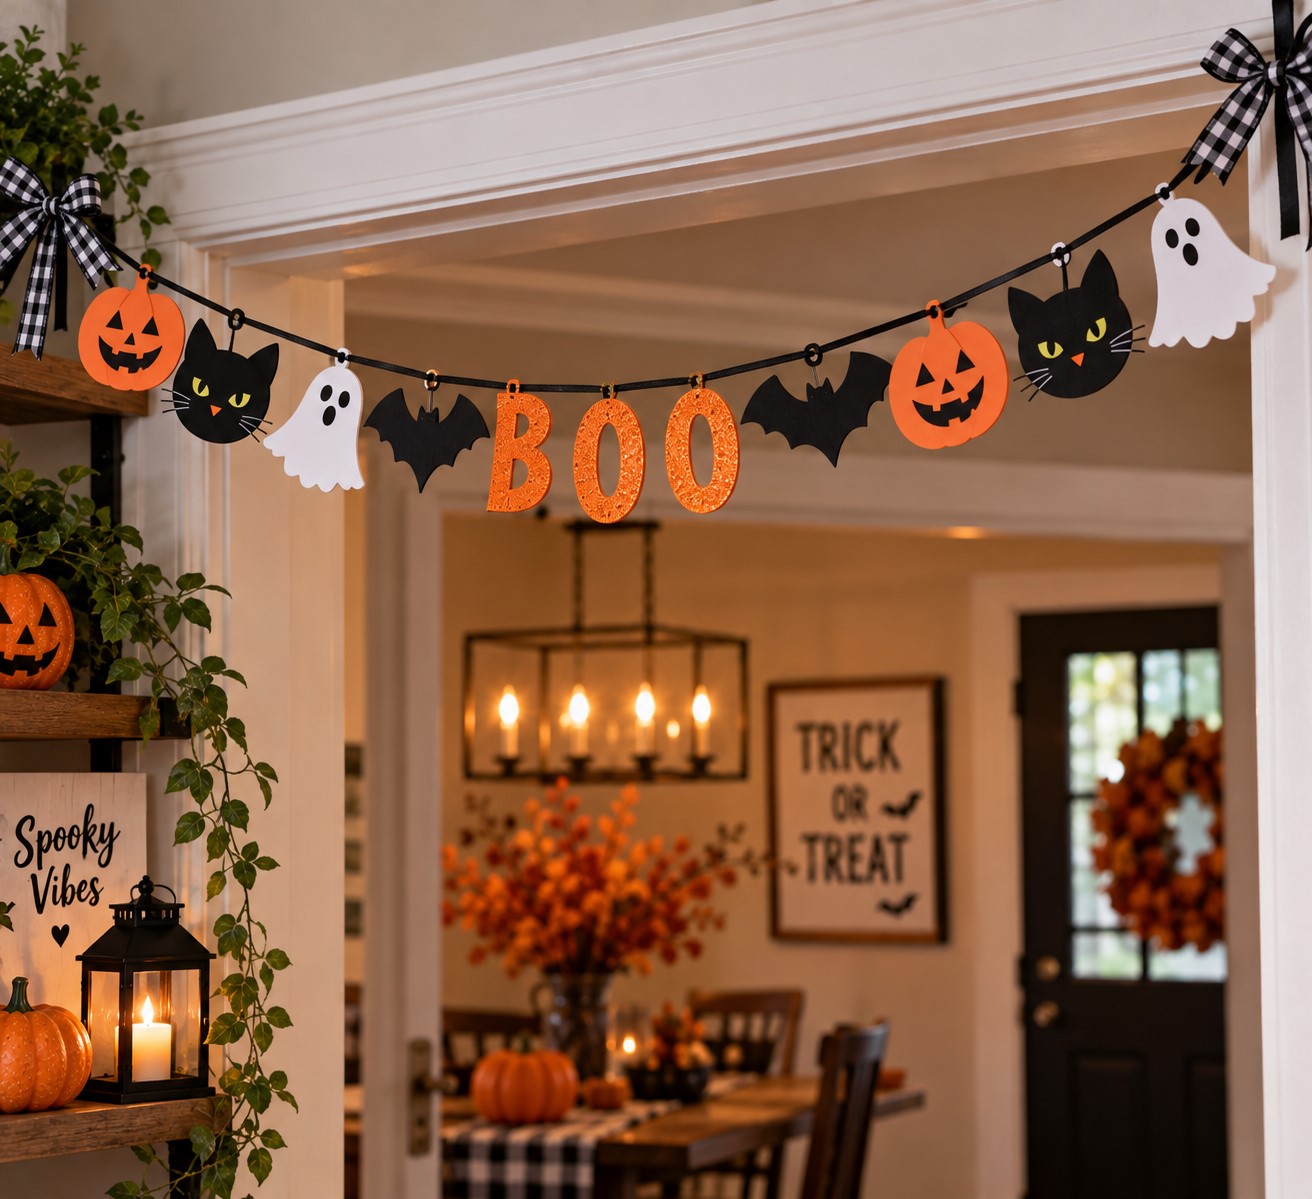
A handmade garland can completely change a boring wall, doorway, or shelf.
Use foam sheets, construction paper, or cardstock to make small pumpkins, bats, ghosts, and cats.
You can use one shape throughout the garland or mix several together.
Punch a small hole near the top of each piece and thread them onto ribbon or string.
Try alternating the colors as you go.
For example, you could make an orange pumpkin, a black bat, a white ghost, and then repeat the pattern.
You can also add small bows between the shapes if you have extra ribbon.
If your dollar store has letter stickers, make a simple BOO garland.
Keep the letters large enough to read easily and place them between your Halloween shapes.
Hang the finished garland over a doorway, across a bookshelf, above a party table, or along a mantel.
Keep this handy: How to Turn Dollar Store Finds Into Halloween Decorations
7. Make Little Halloween Monsters From Plastic Cups
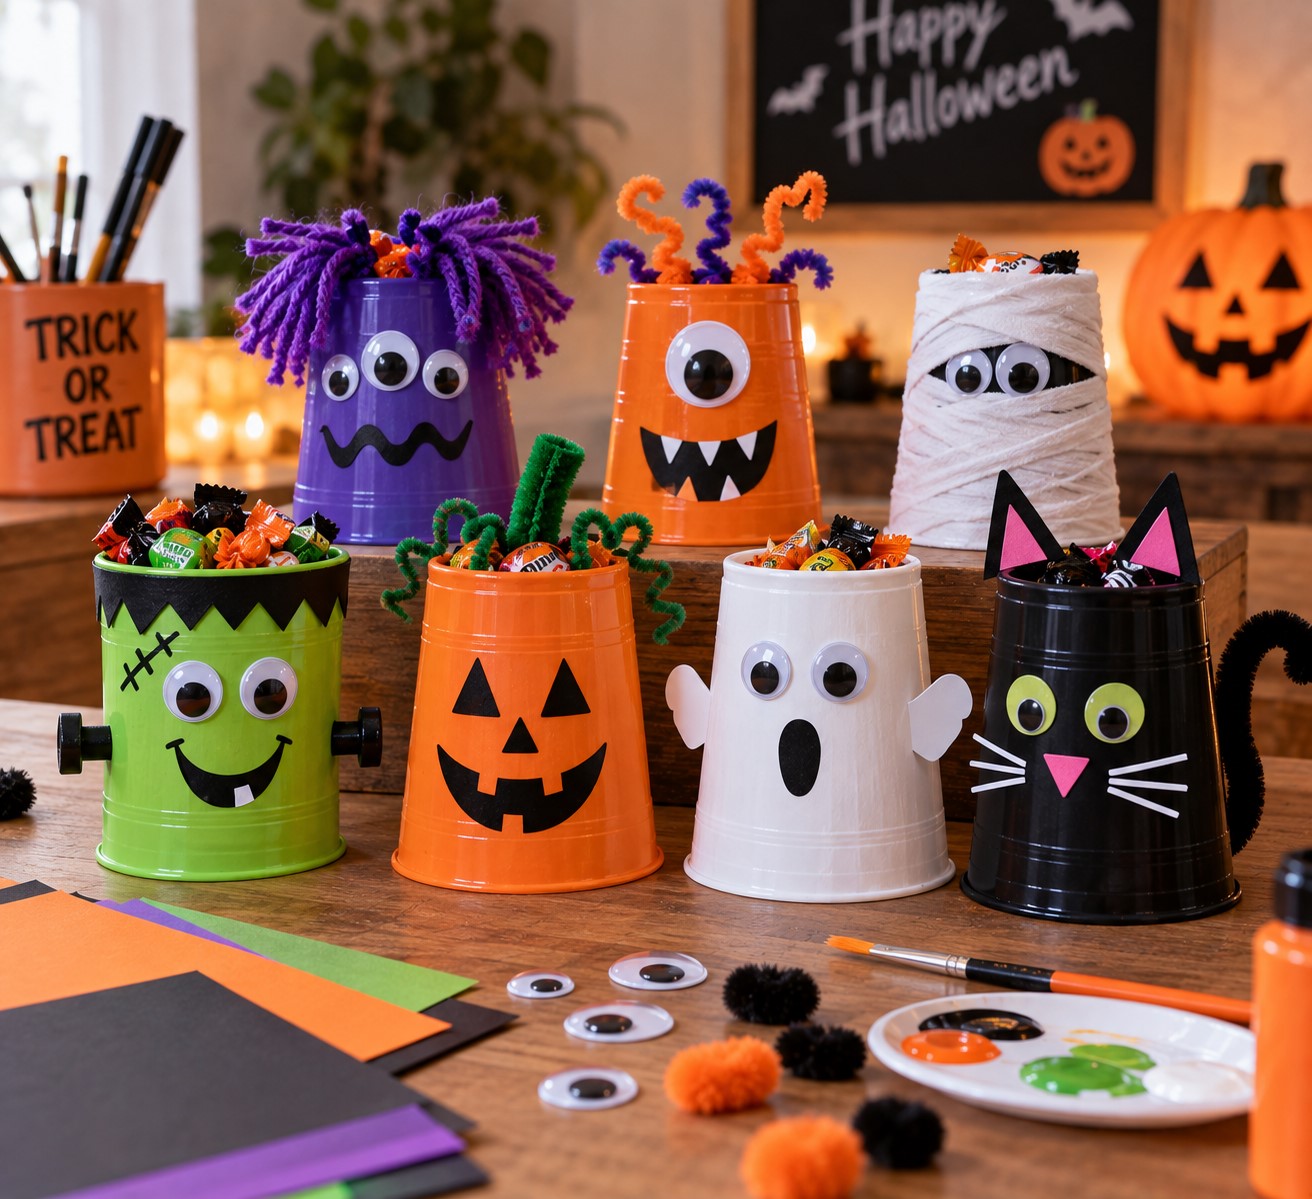
Plastic cups can become adorable little Halloween monsters with almost no effort.
Paint each cup a different color.
Green can become a monster, orange can become a pumpkin, white can become a ghost, and black can become a little cat.
Once the paint dries, add eyes and a mouth.
You can use small craft pieces or paint the details directly onto the cup.
For silly monsters, add googly eyes in different sizes.
A [Amazon: Googly Eyes Craft Pack] is one of those small craft supplies you can keep using throughout the year.
You can also glue yarn around the top of the cup to create monster hair.
Use the finished cups as little candy holders, pencil cups, or decorations.
If you are making these with children, let them create their own monsters instead of trying to make every one look the same.
That usually makes the finished display much more fun.
8. Make a Paper Plate Black Cat
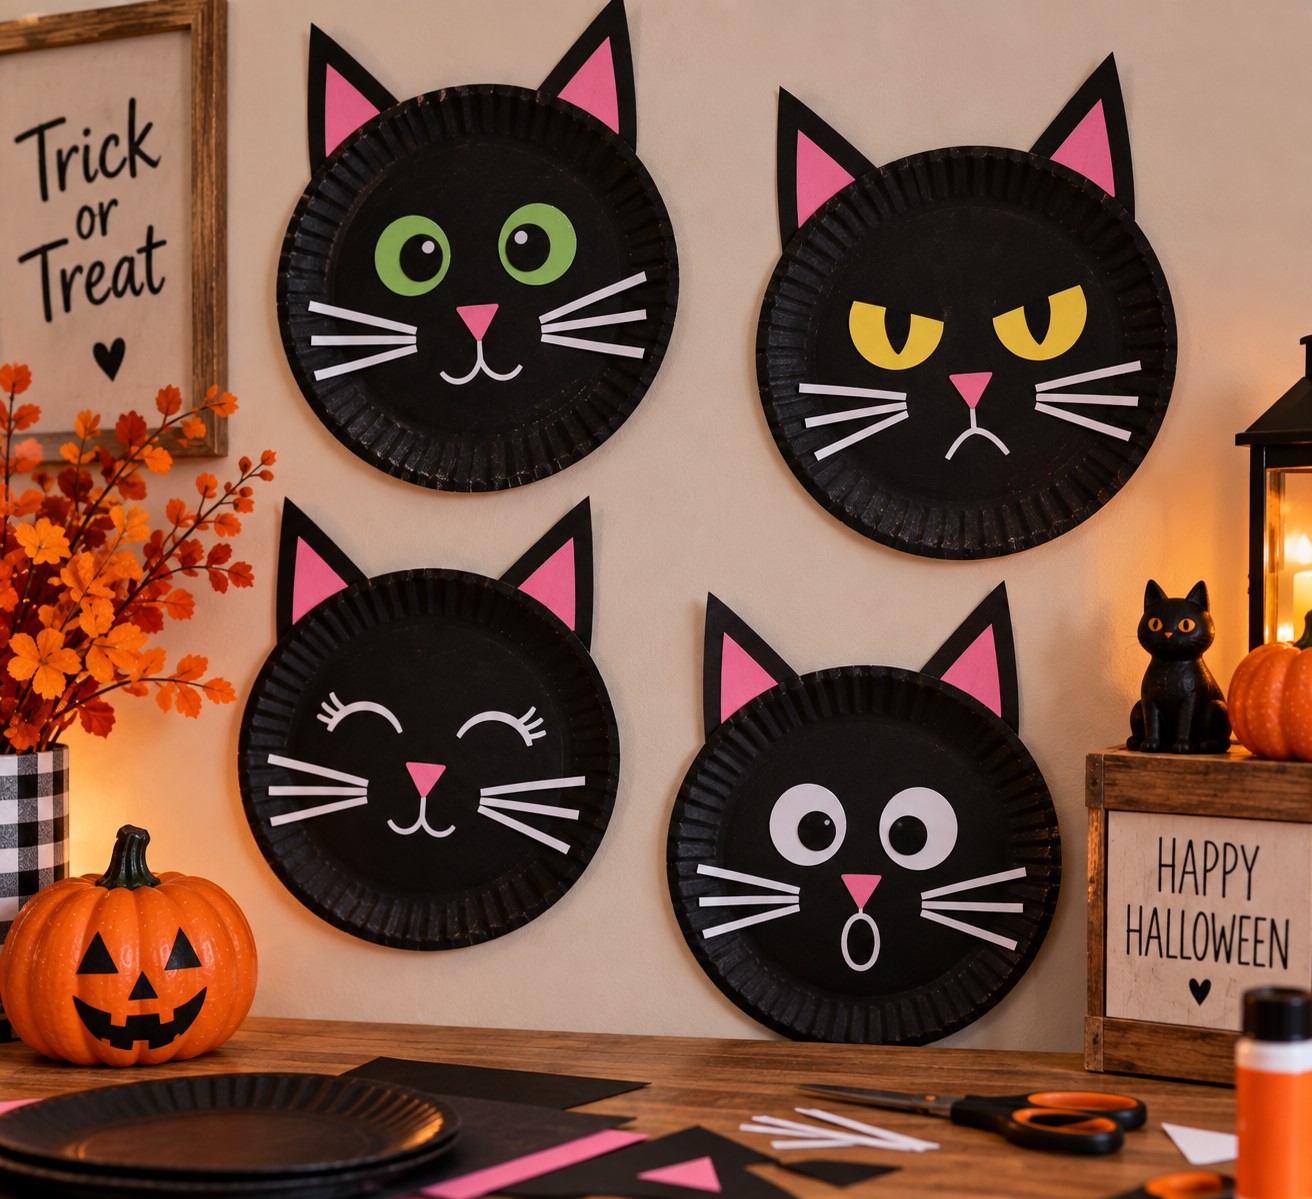
Paper plates are another inexpensive supply that can become several Halloween decorations.
For a black cat, paint the plate black and let it dry.
Cut two triangles from black cardstock or another paper and glue them to the top for ears.
Then add two eyes, a small nose, and whiskers.
You can use white paint for the details or cut them from paper.
Make several cats with different expressions.
One can look happy, another can look surprised, and another can look completely grumpy.
Hang them together on a wall or place them around a Halloween party table.
You can also make a few smaller cats and attach them to a garland.
Make Your Dollar Store Crafts Look More Put Together
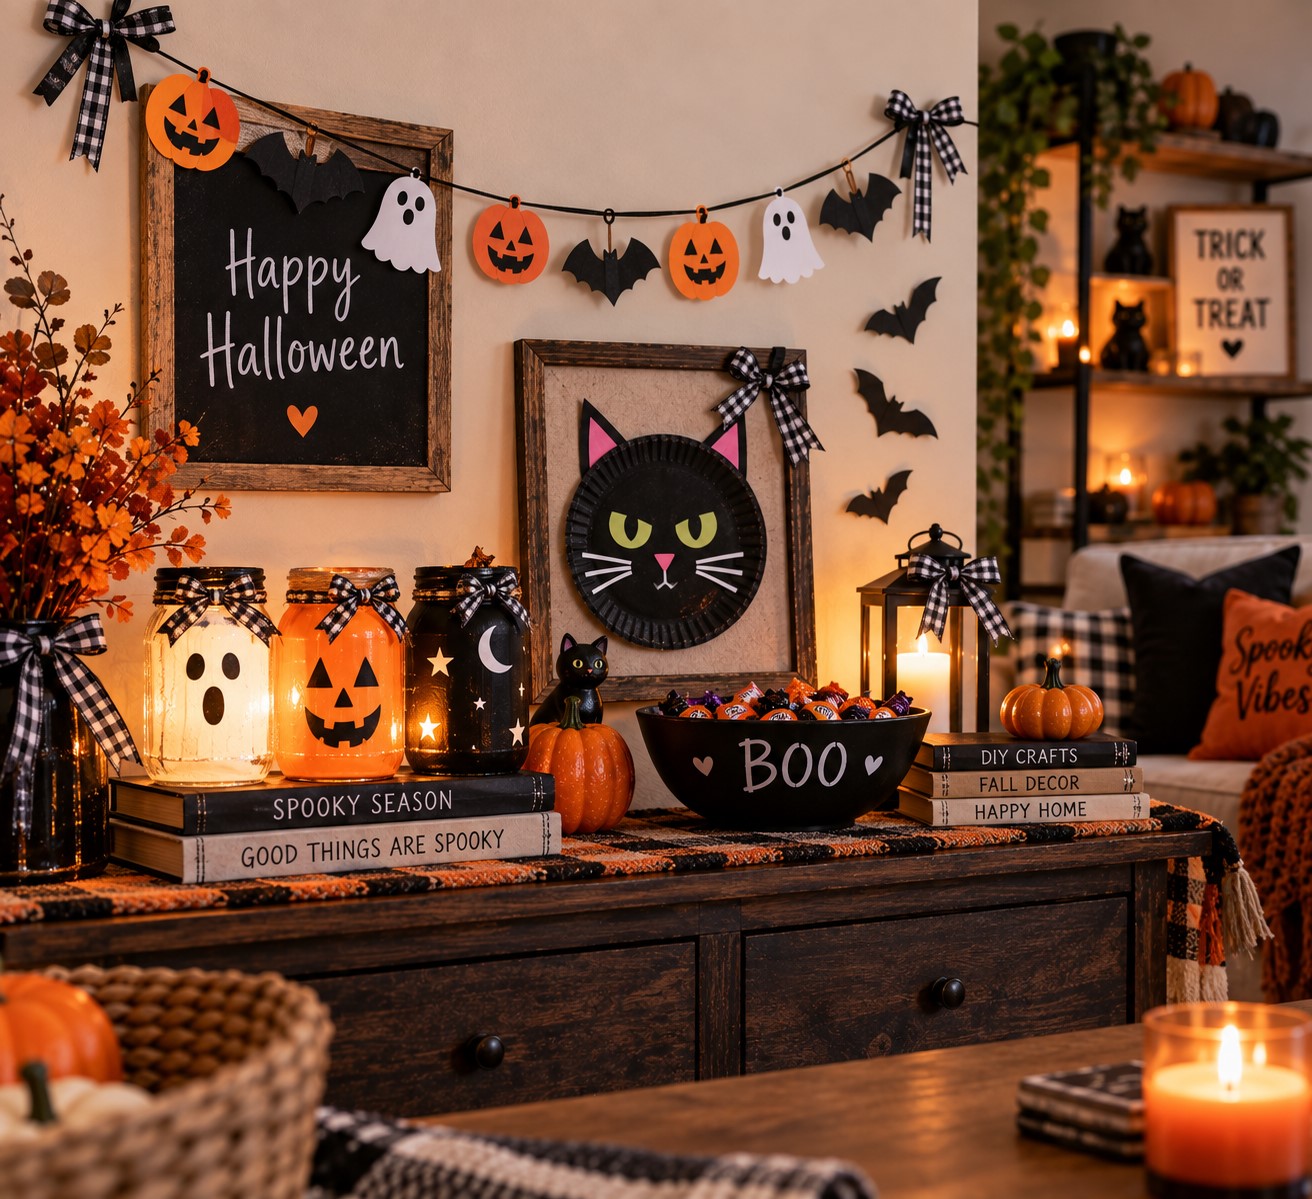
The easiest way to make inexpensive crafts look intentional is to repeat the same colors.
You do not need every Halloween color in every project.
Pick two or three shades and stick with them.
Black, white, and orange are an easy combination. Purple and black can give you a darker look, while orange, cream, and brown can work if you want your Halloween decorations to blend with fall decor.
You can also repeat the same material throughout your crafts.
For example, use the same black ribbon on your candy basket, mason jars, and Halloween sign.
Little details like that can make inexpensive crafts feel like they belong together.
Most importantly, do not try to decorate every empty space.
A few handmade pieces grouped together usually look better than dozens of tiny decorations scattered around the room.
And if you have supplies left after making these crafts, save them.
You can use them later when you make Halloween decorations using things you already have at home.
That is one of the best parts of dollar store crafting. One small haul can keep giving you ideas long after the first project is finished.
9. Turn a Small Basket Into a Halloween Treat Basket
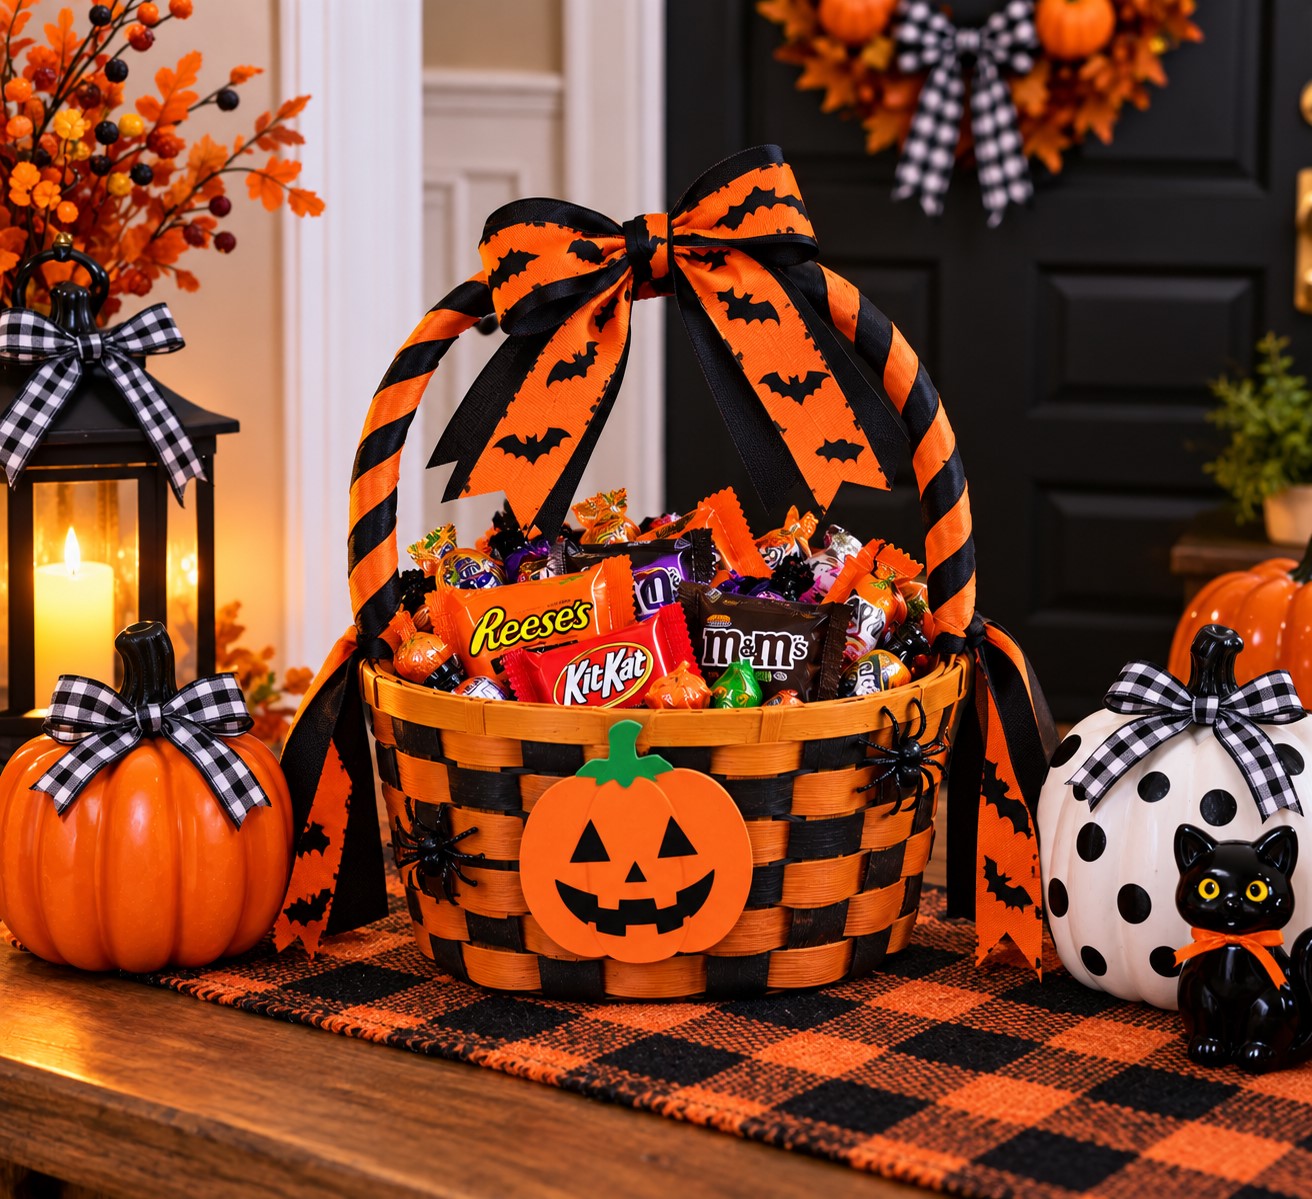
Small baskets are another dollar store item that can become much more useful with a little creativity.
Choose a plain basket and decorate the handle with orange or black ribbon. You can also tie a small bow to the front or attach a paper pumpkin.
For something a little spookier, add a black cat face or a few small plastic spiders.
Fill the basket with individually wrapped candy and place it near the entrance for guests to grab.
You could also make several smaller baskets and use them as individual treat holders at a Halloween party.
If you are already preparing treats for children, you can make Halloween treat bags kids will actually love and use the basket to hold the finished bags.
The basket itself does not need much decoration. A few small details are enough.
10. Make a Halloween Sign From Cardboard
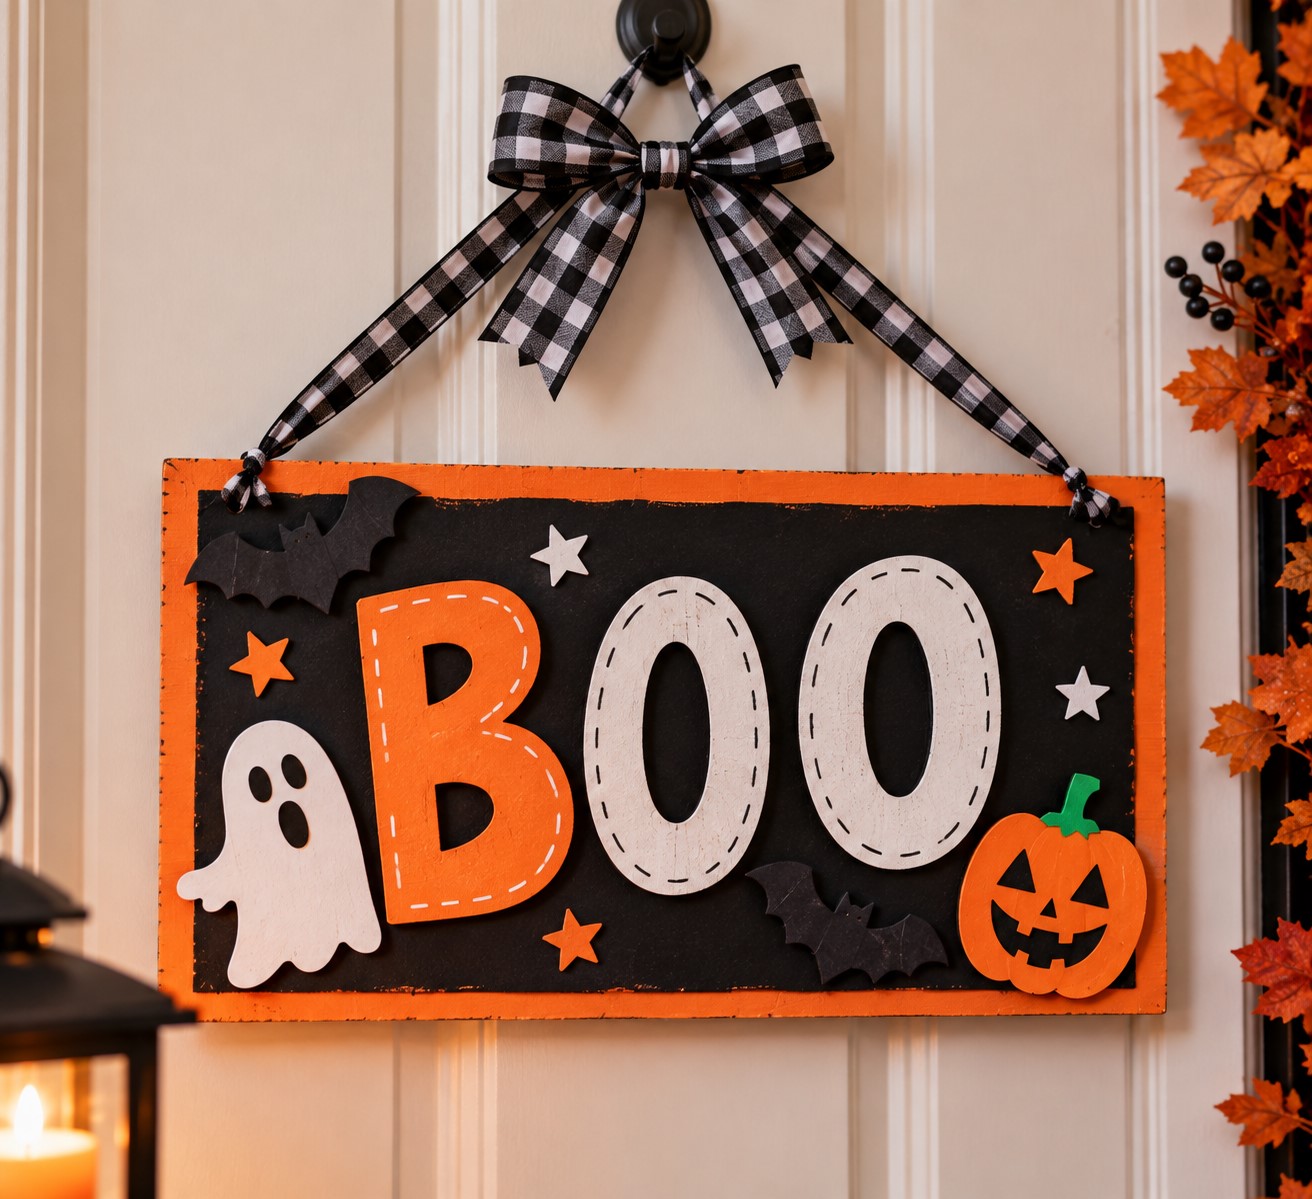
Before throwing away a sturdy cardboard box, look at it as another craft supply.
Cut a flat piece into a rectangle and cover it with black, orange, white, or purple paper.
Then turn it into a simple Halloween sign.
You could write BOO, EEK, SPOOKY, or HAPPY HALLOWEEN across the front.
If you do not like your handwriting, use letter stickers from the dollar store.
Add a little ribbon at the top so you can hang it from a door or wall.
You can also make the sign look more finished by layering a smaller piece of cardstock over the cardboard.
A [Amazon: Black Cardstock Paper] pack can be useful for signs, bats, cat silhouettes, pumpkin faces, and lots of other Halloween crafts.
Do not worry about making the sign look perfect.
A slightly handmade appearance is part of the charm.
11. Make Tiny Halloween Ghosts
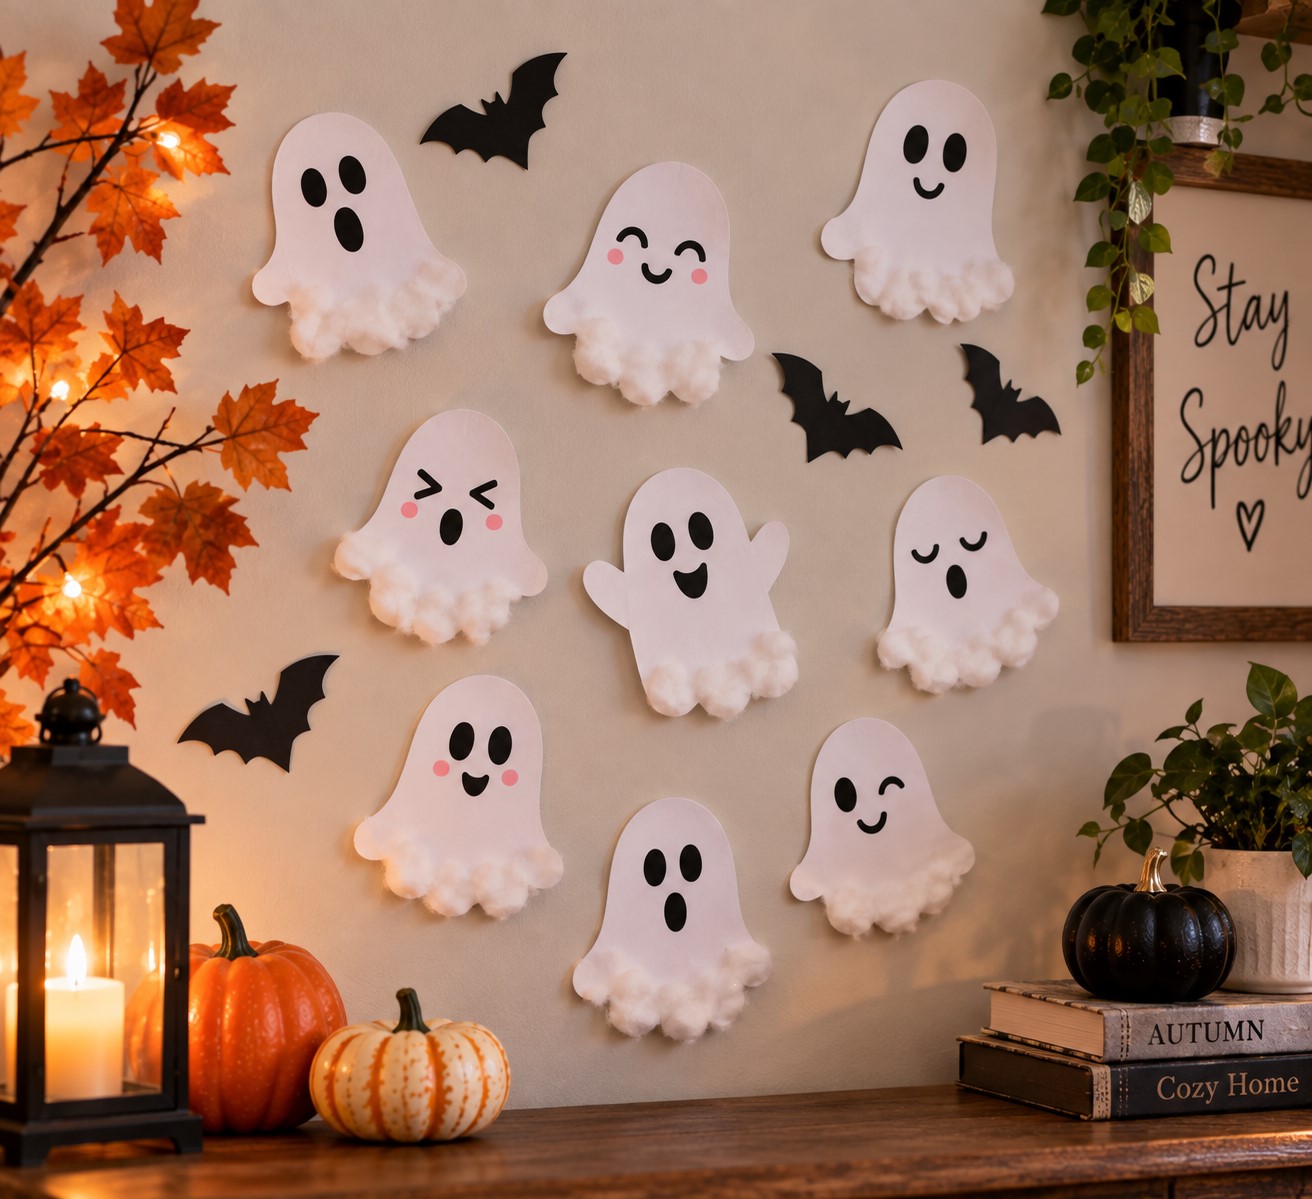
This is one of those crafts that takes very little time but can fill an empty wall quickly.
Start with white paper or cardstock.
Draw simple ghost shapes and cut them out.
Add black eyes and little mouths using a marker or small pieces of black paper.
You can make each ghost look different.
Some can have surprised faces. Others can look happy or sleepy.
For more texture, glue a few cotton balls around the edges of the ghosts.
Once they are finished, attach them to a wall using removable adhesive.
You can make a group of tiny ghosts for a bookshelf or create larger ones for a hallway.
This is also a fun project for children because there is no pressure to make every shape exactly the same.
12. Create a Halloween Spiderweb From Yarn
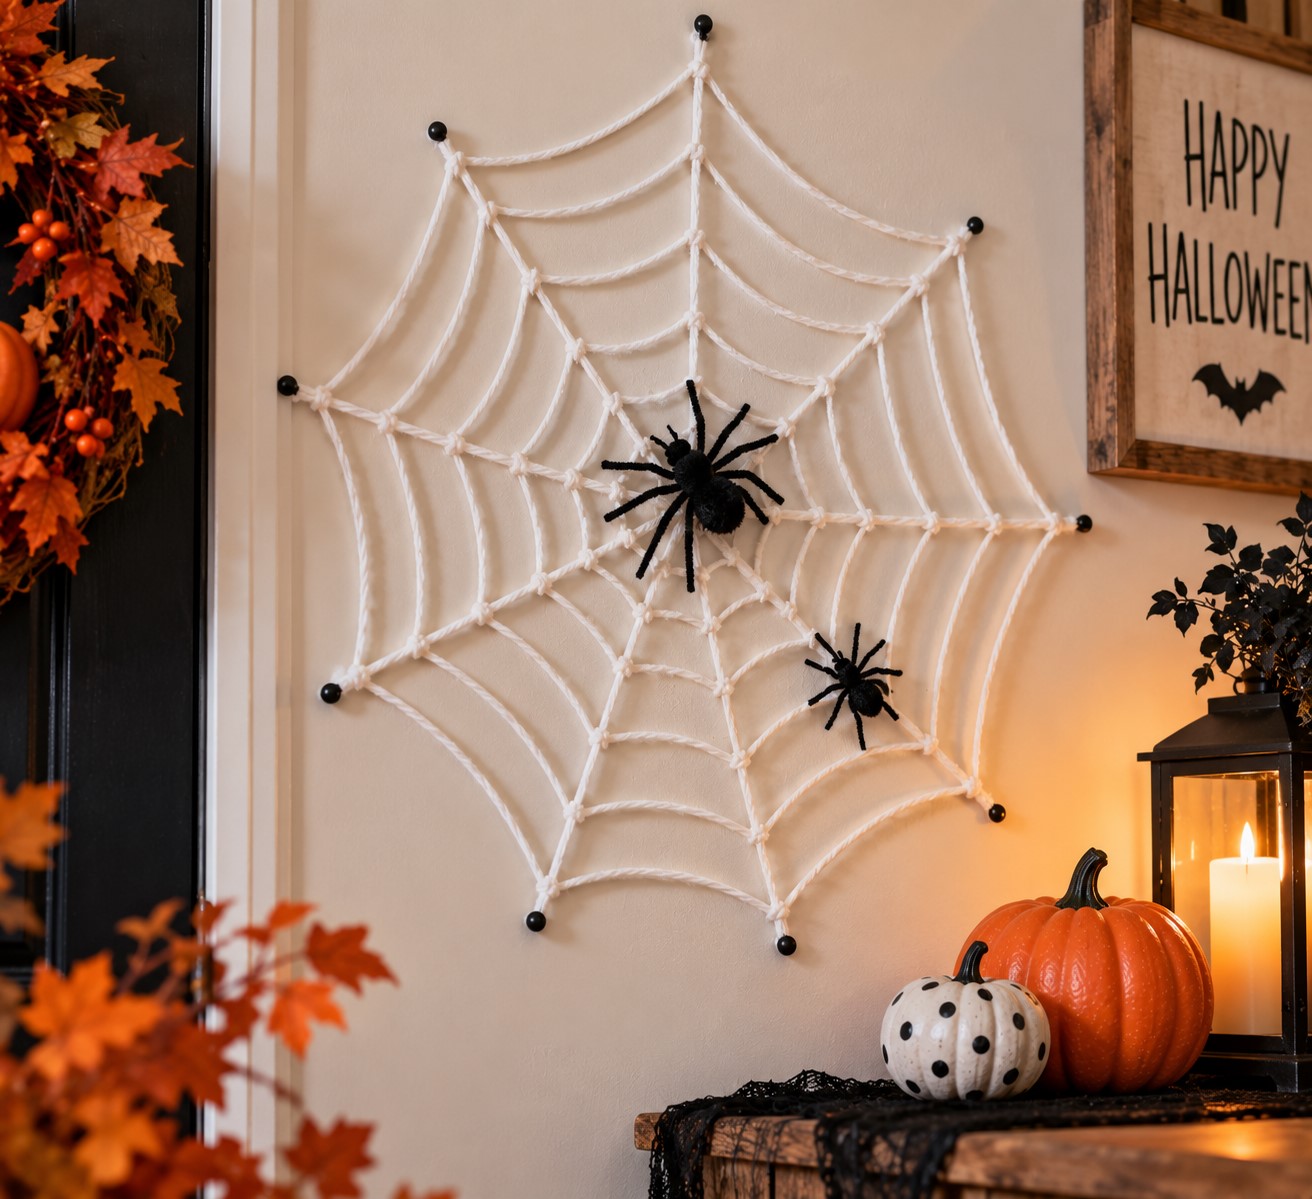
You do not need to buy a large bag of fake spiderweb material to create a spooky display.
White yarn can do the job.
Start by cutting several pieces of yarn and stretching them outward from a central point.
Secure the pieces as you go.
Then add smaller pieces between the main strands to create the web pattern.
The finished web can be as small or large as you want.
Add one or two plastic spiders in the middle.
A [Amazon: White Yarn for Crafts] bundle can also be useful for other projects, so you can keep the leftover yarn for future seasonal crafts.
Try placing a small web inside a picture frame.
You can also stretch a larger one across the corner of a bookshelf or over a small section of a wall.
The key is not to make every part perfectly symmetrical.
Real spiderwebs are messy, so an uneven handmade web can actually look more convincing.
13. Turn Faux Flowers Into Halloween Decor
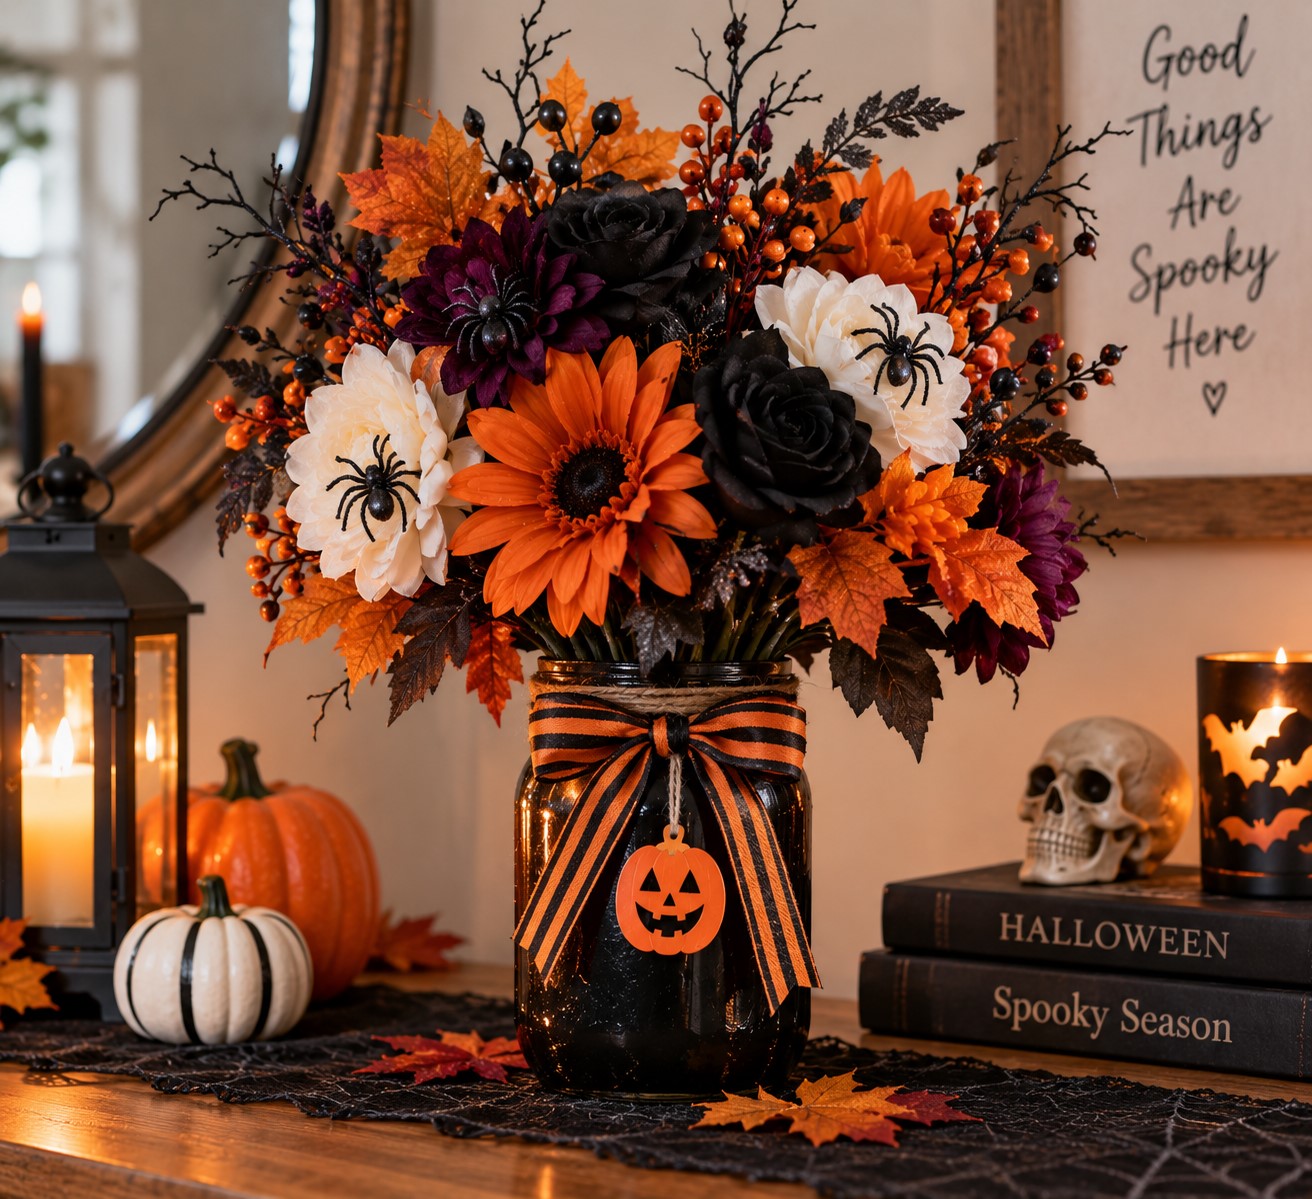
Faux flowers might not be the first thing you think of when shopping for Halloween craft supplies.
Look for black, white, orange, burgundy, or dark purple flowers.
You can place them inside a plain jar or small vase and add a few Halloween details.
A small plastic spider tucked between the flowers is an easy option.
You could also wrap the stems with black ribbon.
For a slightly creepier display, add a few faux leaves and arrange the flowers so they look full and dramatic.
This works especially well on a dining table, mantel, entryway table, or bedroom dresser.
You can also use the arrangement as part of a Halloween party table.
If you are planning a Halloween gathering, you can create a Halloween party that both kids and adults will enjoy and use your handmade decorations throughout the space.
14. Make Wooden Spoon Halloween Characters
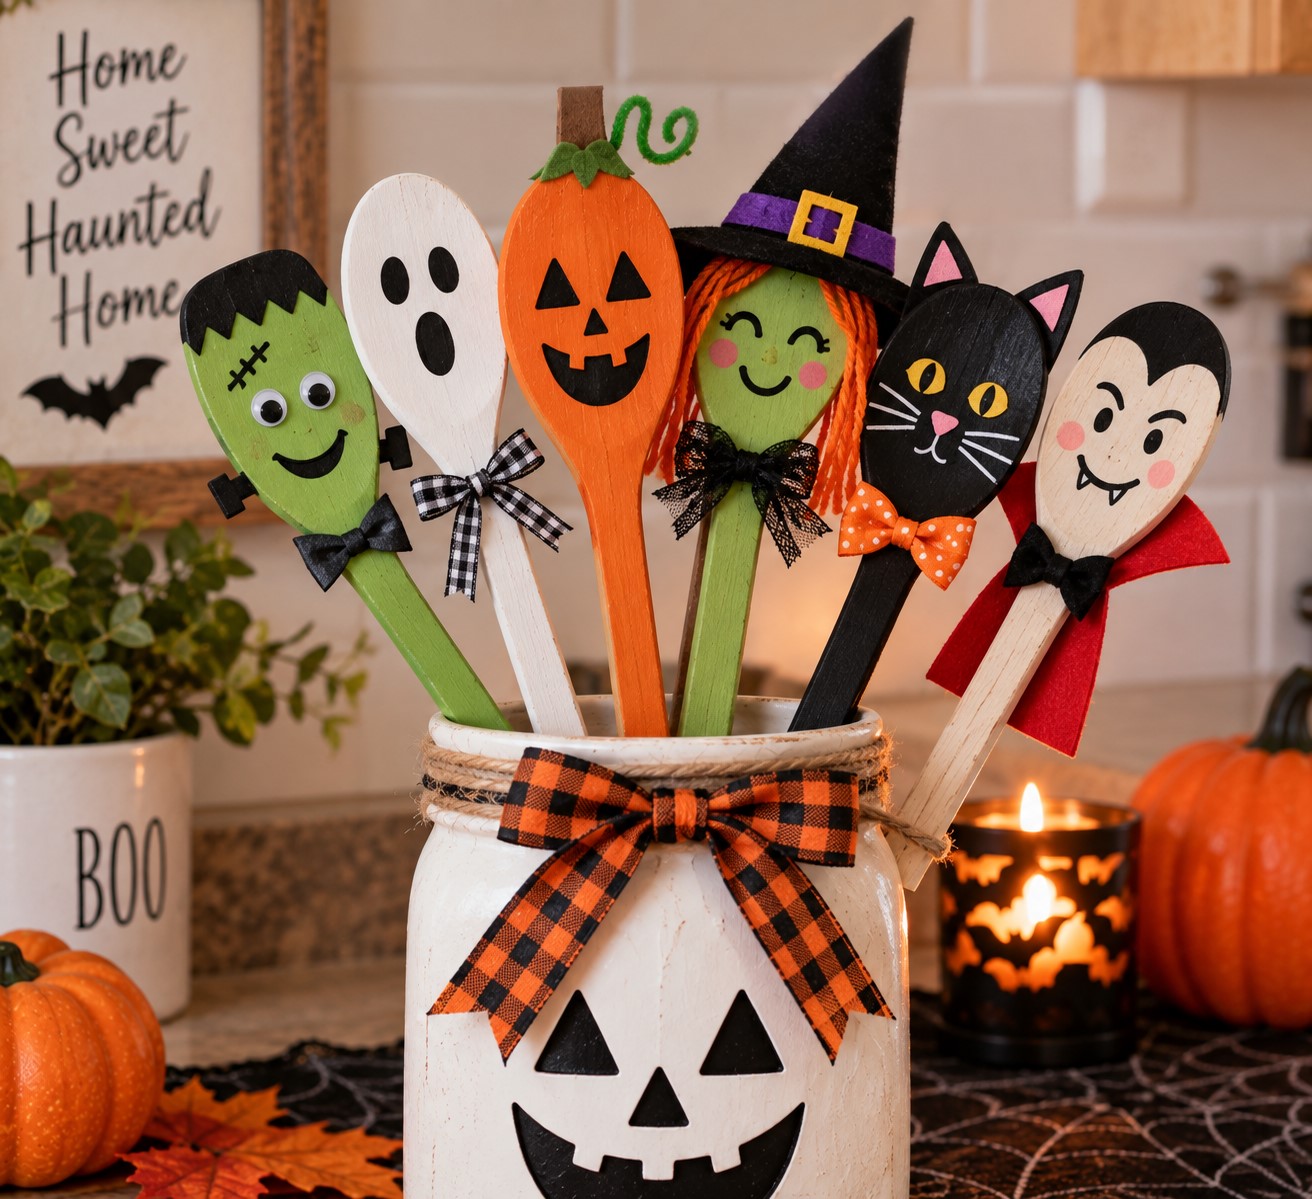
Wooden spoons can become tiny Halloween characters with a little paint.
Paint one orange and turn it into a pumpkin.
Paint another white and make it a ghost.
You can also create a black cat, witch, vampire, or monster.
Use a small paintbrush to add the faces.
A [Amazon: Fine Detail Paint Brush Set] is helpful here because the tiny brush makes it easier to paint eyes and other small features.
If you have scraps of paper or foam left over from your other projects, use them to make hats, ears, collars, or little accessories.
Place the finished spoons in a jar or small container.
They can become part of a kitchen display or sit on a shelf with other Halloween decorations.
You could even make several characters and let each family member choose one.
15. Make a Simple Pumpkin Garland
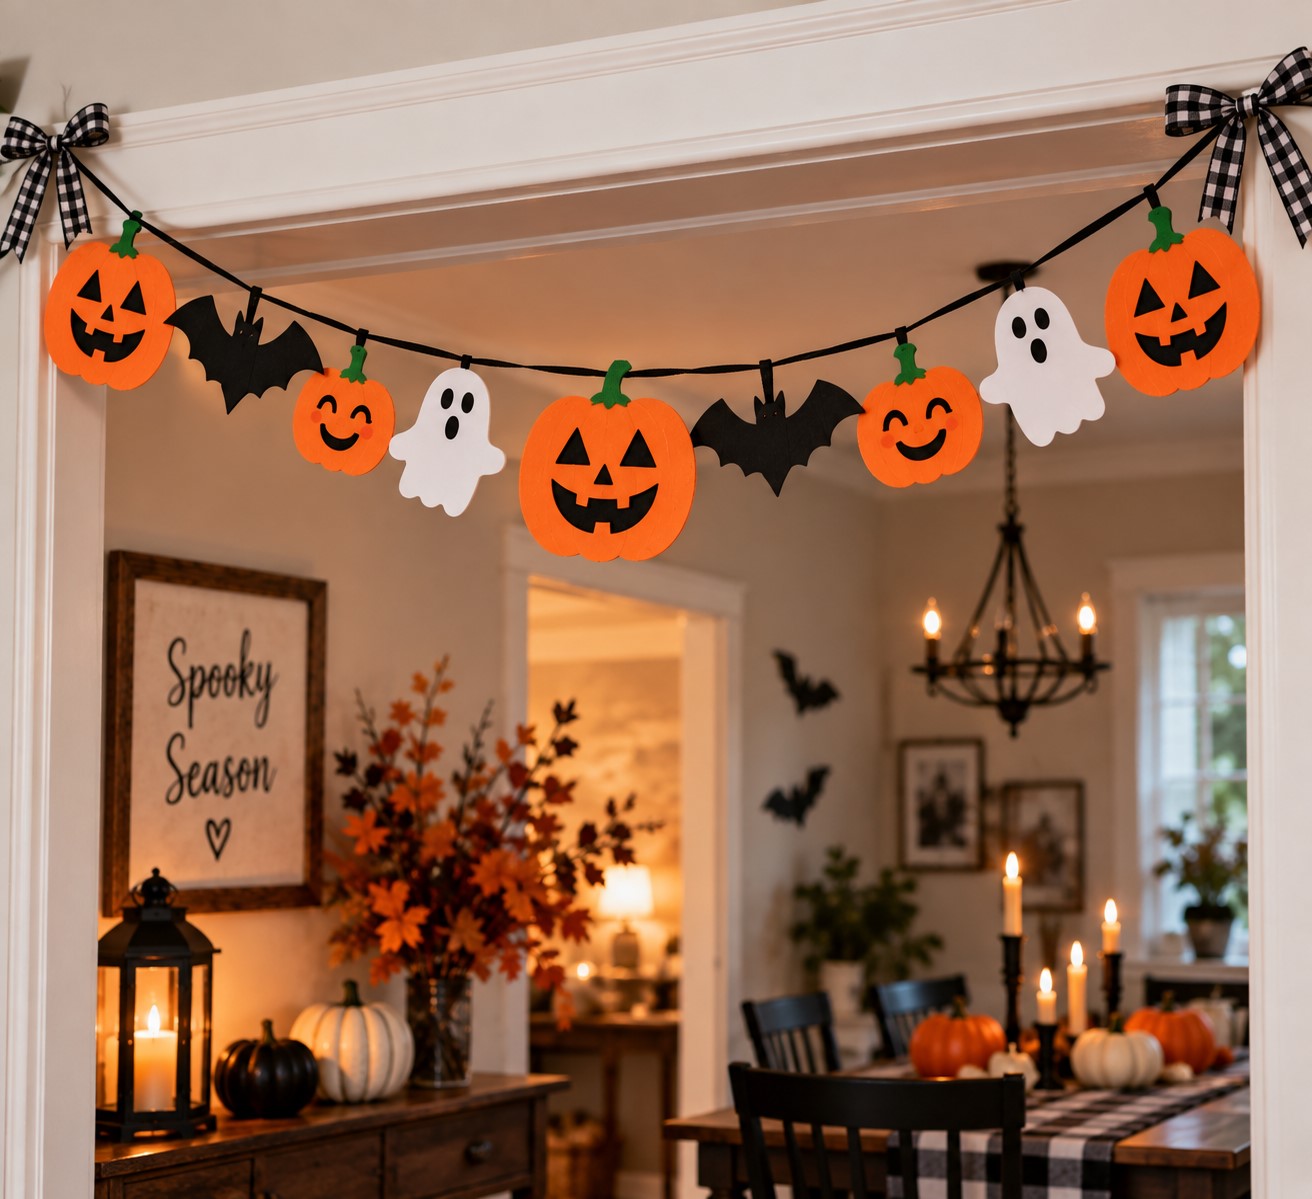
If you still have orange paper, foam, or cardstock left from another craft, turn it into a pumpkin garland.
Cut several pumpkin shapes in different sizes.
Add simple black faces to some of them while leaving others plain.
Then attach them to a length of ribbon or string.
You can alternate the pumpkins with black bats or white ghosts if you have leftover materials.
For a more polished look, keep the shapes evenly spaced.
For a playful look, make the sizes different and let them hang at slightly different heights.
Hang the finished garland over a doorway, above a shelf, across a wall, or behind a Halloween dessert table.
16. Use Leftover Supplies Instead of Buying More
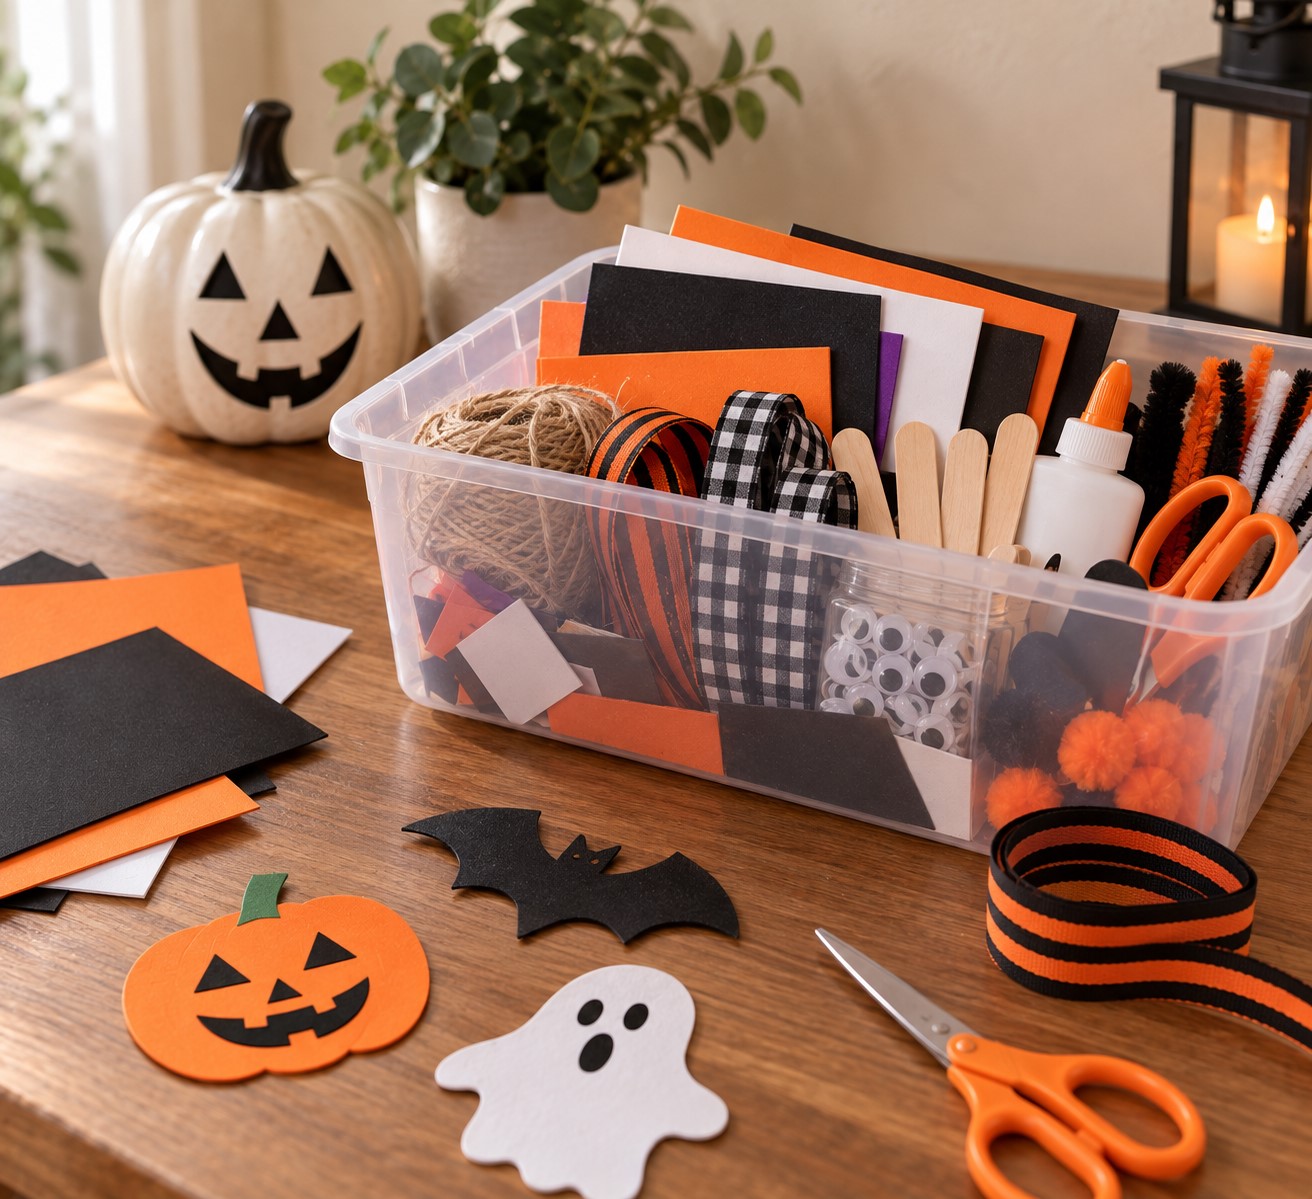
One of the easiest ways to overspend on crafts is buying something new every time you get another idea.
Before going back to the store, look at what you already have.
You might have half a sheet of black foam, leftover ribbon, three wooden sticks, a little white paint, or some unused paper.
Those scraps can become something completely different.
Black foam can become bat wings.
White paper can become ghosts.
Orange scraps can become pumpkin faces.
Ribbon can decorate a basket.
Small cardboard pieces can become signs.
You can even combine several leftovers to create one new decoration.
That is why it helps to keep your craft supplies together in one box.
You can see what you have before spending money on another pack.
If you are decorating for Halloween on a budget, this approach can make a bigger difference than constantly searching for cheaper decorations.
Think Beyond Halloween Night
Another good reason to make your own decorations is that you can decide exactly how you want them to look.
You do not have to make everything scary.
If you prefer softer decorations, use cute ghosts, smiling pumpkins, black cats, and simple bats.
If you want a darker look, stick with black, white, deep purple, and a few dramatic details.
You can also make pieces that work with your existing fall decor.
A black cat sign can sit beside a fall basket.
Orange pumpkins can work with autumn leaves.
A black ribbon can be added to a vase you already own.
That way, Halloween does not have to mean completely changing your home.
You can simply add a few handmade details to what is already there.
And when you finish decorating, save the pieces that can be used again next year. Some crafts may only cost a few dollars to make, but they can become part of your Halloween collection for years.
If you want to keep your handmade decorations instead of throwing them away after one season, make Halloween decorations you can reuse every year.
A Few More Ways to Use Your Crafts
Once your crafts are finished, think about where they can actually live in your home.
A small handmade decoration can make a kitchen counter feel festive. A few paper bats can fill an empty wall. A painted jar can become part of your Halloween table.
You can even use some of your crafts while planning a Halloween gathering. If you want to keep everyone entertained, plan a Halloween craft night the whole family will enjoy and let everyone make their own decoration.
For a family-friendly celebration, you can also create a Halloween-themed breakfast kids will love and use some of your handmade pieces around the table.
If you have a lot of decorations but worry about everything feeling messy, create a Halloween party without making your home look cluttered. A few well-placed handmade pieces can have more impact than covering every surface.
And if you are decorating the front of your home, make a Halloween porch look spooky without making it scary using some of the same inexpensive materials.
Finally, if you have children who would rather stay home, create a Halloween night for kids who don’t want to trick-or-treat and turn your crafts into part of the evening’s activities.
Final Thoughts
You really do not need an expensive Halloween haul to make your home feel festive.
A few dollar store supplies, some paint, and a little imagination can give you decorations that feel personal and fun. Save the leftover materials, keep the pieces you love, and bring them back out next Halloween.
Sometimes the simplest crafts end up being the decorations you enjoy the most.
Leave a Reply