Mother’s Day is coming, and if you’re anything like me, you want a gift that makes your mom pause, smile, maybe even tear up a little. Not just a “nice” gift, but something that feels personal, thoughtful, and truly memorable.
That’s exactly why I fell in love with the idea of making a DIY Mother’s Day explosion box. Imagine a small, seemingly simple box… and then, with a pull of a ribbon or lift of a lid, it magically unfolds to reveal layers of love, memories, and little surprises inside. Every layer tells a story, every fold feels intentional, and the whole thing screams, “I made this just for you.”
And honestly, after creating my own, I realized this isn’t just about the box itself. It’s about the small, thoughtful touches you can add. For example, I paired it with some handmade touches like beads and charms inspired by my guide on How to Make Mother’s Day Jewelry Gifts That Look Expensive. Even a simple piece of jewelry tucked inside instantly transforms the explosion box from cute to unforgettable.
In this step-by-step guide, I’ll show you exactly how to make a DIY Mother’s Day explosion box that looks beautiful, feels personal, and will leave your mom genuinely speechless. Even if you’re crafting for the first time or just want to make this year extra special, you’ll love how easy it is to create a gift that’s equal parts stunning and heartfelt.
Step 1: Gathering Materials & Choosing Your Explosion Box Style
Before you start folding, cutting, and decorating, you need a clear vision of what your explosion box will look like. Think of it as setting the stage, the foundation that will make everything inside shine.
Start by deciding the size and style. Do you want a simple three-layer box or something more intricate with multiple folds and compartments? Remember, the more layers, the more space for surprises, but even a single-layer box can look stunning if decorated thoughtfully.
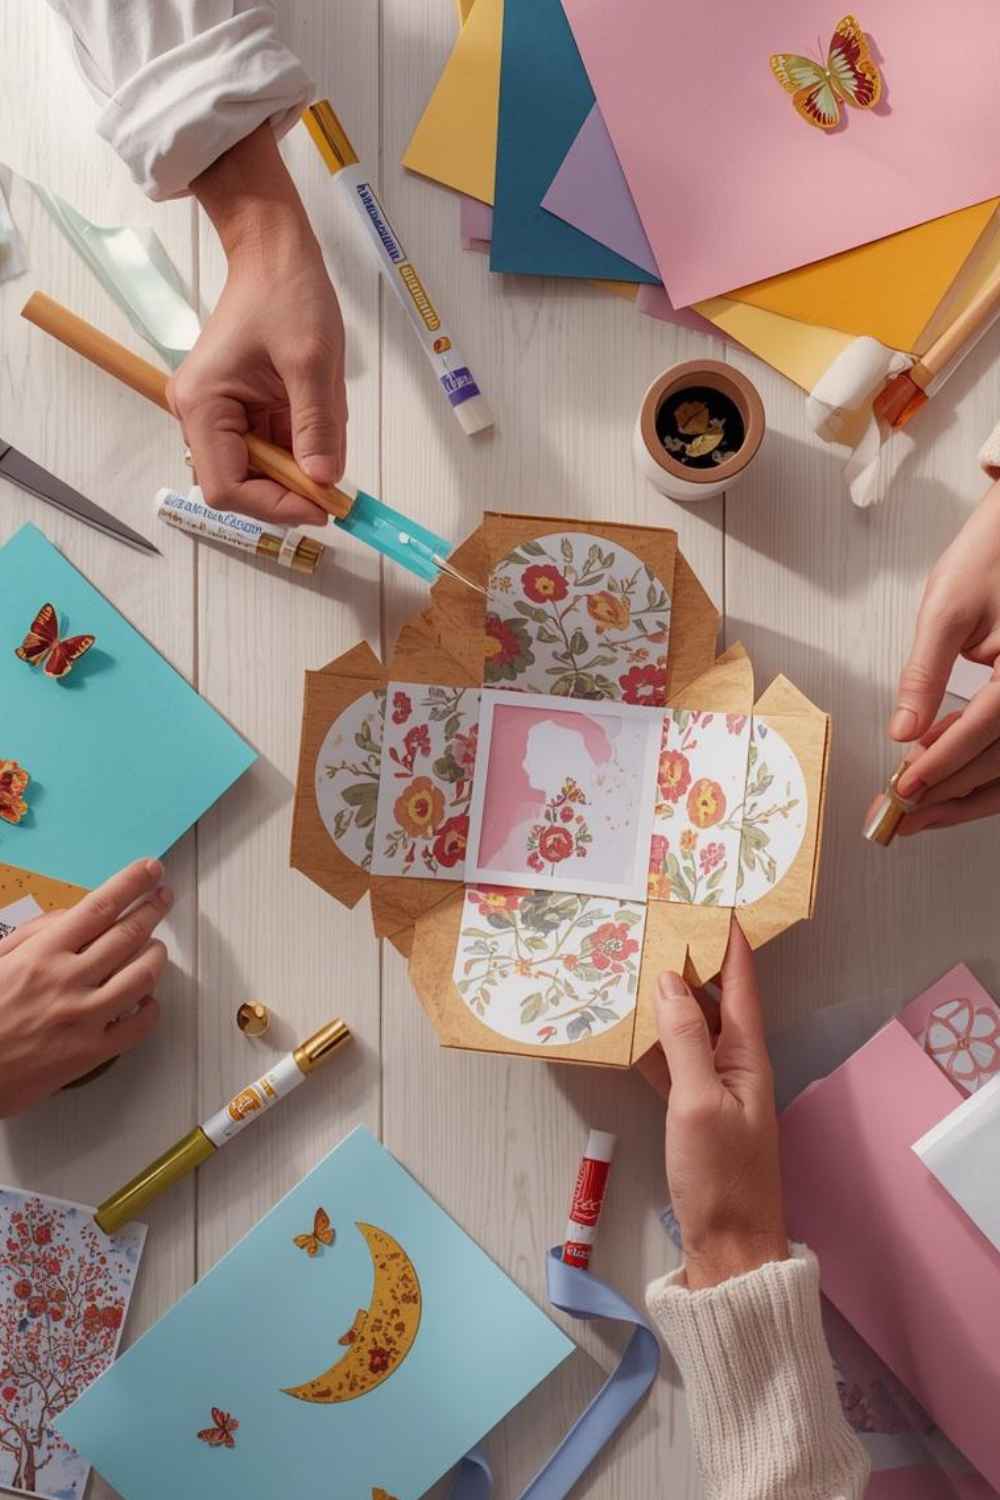
Next, gather your materials. You’ll want sturdy cardstock for the base, colorful decorative paper for the layers, scissors or a craft knife, glue or double-sided tape, and embellishments like stickers, ribbons, or even tiny keepsakes. This is also the perfect place to think about including small gifts that complement the box. For instance, if you’ve been following my other gift guides, a tiny handmade item from DIY Mother’s Day Gift Basket Ideas She’ll Love can fit beautifully into one of the compartments. It adds a touch of thoughtfulness and makes your explosion box feel even more curated and special.
The key here is organization. Lay everything out before you start, so you can visualize how the layers will come together. Trust me, a well-prepared workspace makes the assembly process feel effortless and, honestly, way more fun.
Once you have your materials ready and your vision in mind, you’re ready to move on to the creative part which is designing the layers and arranging your surprises inside, which we’ll tackle in Step 2.
Step 2: Designing Your Explosion Box Layers
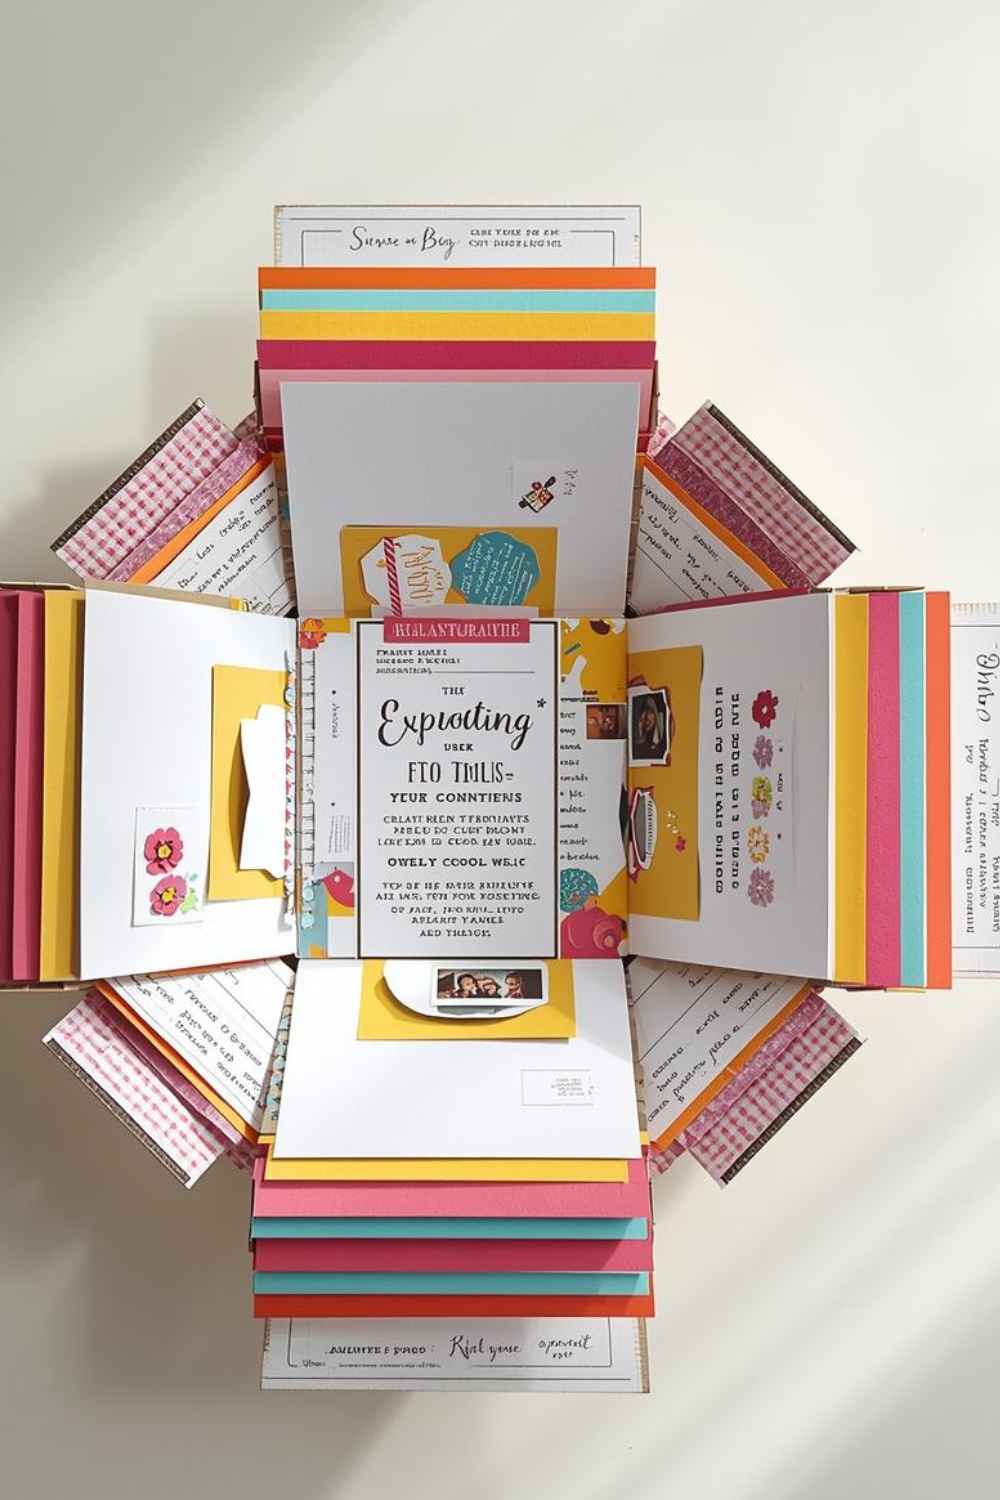
Now that your materials are ready, it’s time to make the box truly pop. This is where your explosion box starts coming to life, layer by layer. Each fold, each color, each embellishment tells a little story and this is what makes your mom’s reaction unforgettable.
Start with the base layer. This is the foundation, so pick a color or pattern that will anchor the rest of the design. Don’t overthink it sometimes a simple solid color with subtle textures is all you need. Then, move on to the middle layer. Here’s where you can start layering patterns, playful prints, or even small pockets to hold surprises. The beauty of an explosion box is that it gives you little “compartments” for meaningful touches.
For example, add tiny notes, mini photos, or keepsakes into each section. You can even tie in small handmade coupon and card if you’ve read our guide on Printable Mother’s Day Cards & Coupons, they fit perfectly into a corner and feel like a little secret gift.
Finally, the top layer is your showstopper. Think of it as the “wow” moment when the box fully opens. You can use delicate embellishments like paper flowers, stickers, or a sweet mini note. Keep it cohesive with the colors and theme from your base and middle layers, consistency makes it look polished and professional.
The key here is balance. Don’t cram too much into one layer, but don’t leave it empty either. Each fold should feel intentional, playful, and heartfelt.
Once you’ve designed all the layers, your explosion box will be ready for the final assembly and finishing touches, which we’ll cover in Step 3. This is where your vision truly becomes a gift that’s impossible to forget.
Step 3: Assembling the Layers & Adding Surprises
Alright, now comes the fun part bringing your explosion box to life. This is where all your preparation pays off, and you get to see your creative vision start to unfold… literally.
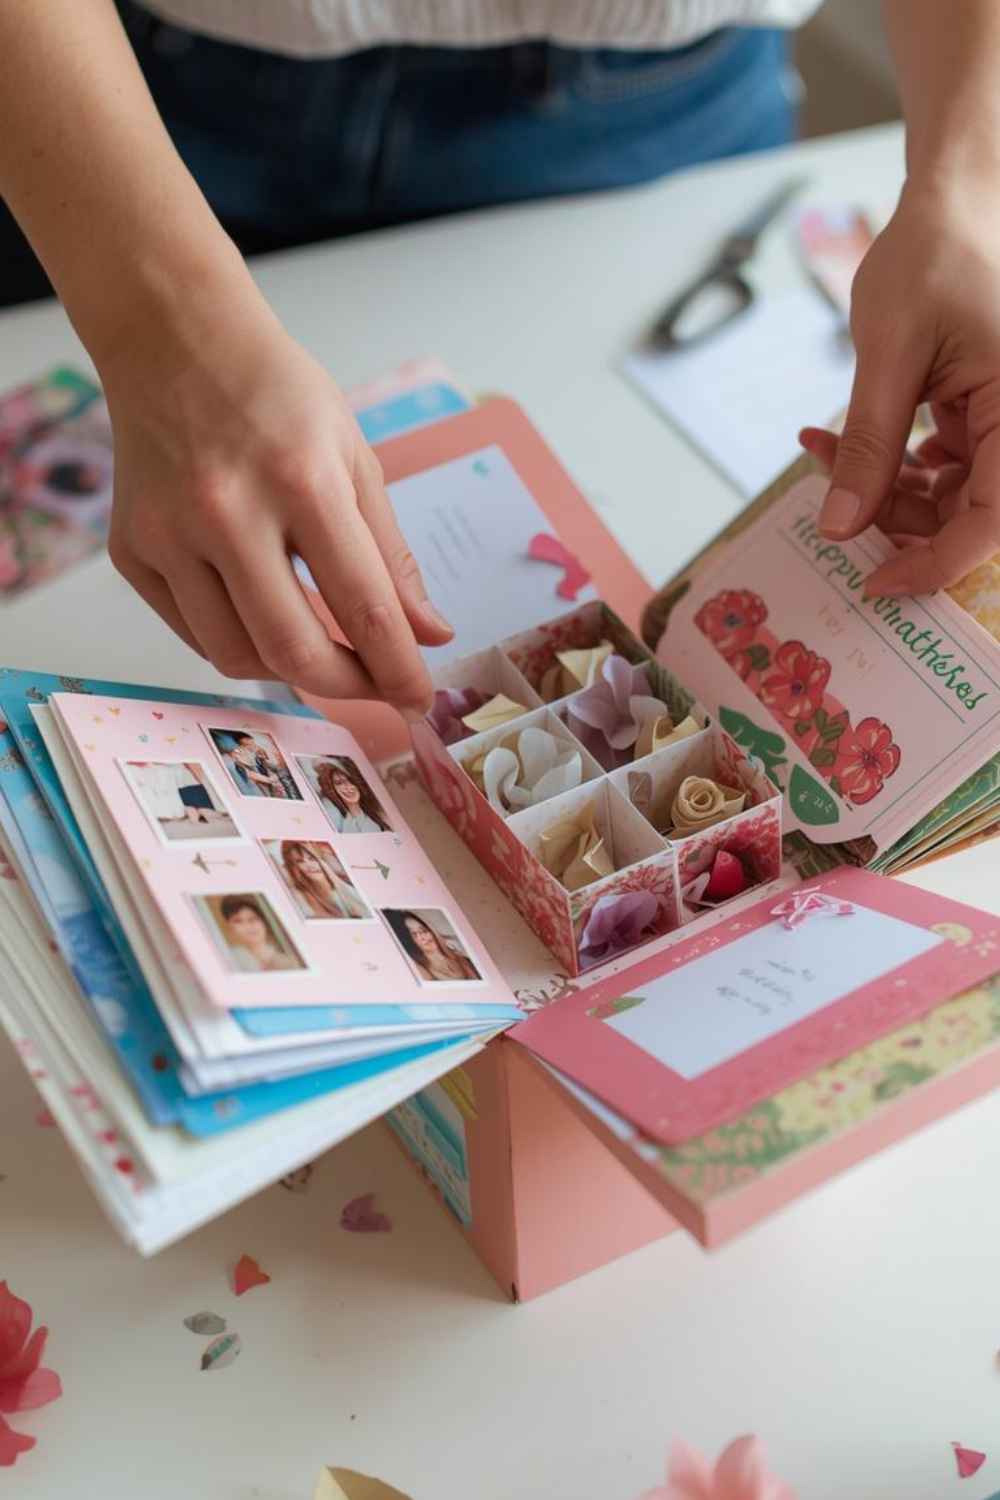
Start by carefully stacking your layers. The base goes first, then the middle layer, and finally the top. Use double-sided tape or glue to secure them, making sure each layer can still fold and unfold smoothly. A little patience here goes a long way, the cleaner your assembly, the more professional your explosion box will look.
Once the layers are stacked, it’s time to add the surprises. Think tiny notes, small keepsakes, or even mini chocolates. For a playful twist, you can include some DIY items inspired by Easy Mother’s Day Crafts for Kids (That Moms Will Actually Keep) these little touches make your box feel interactive and personal. Kids’ crafts like paper flowers or hand-drawn hearts fit beautifully in the smaller compartments and add that extra “awww” factor when your mom opens it.
Another tip: layer the surprises strategically. Put the smallest items at the bottom layers so that as the box opens, she discovers more treasures gradually. It builds anticipation and makes the whole experience feel magical.
Finally, take a moment to step back and look at your work. Does each fold feel intentional? Are the colors balanced? Are the surprises well-distributed? A few small adjustments now will make the final reveal feel flawless.
Once everything is in place, your explosion box isn’t just a gift, it’s an experience. And it’s almost ready for the finishing touches and presentation, which we’ll cover in Step 4. This is the part that will make your mom stop, smile, and maybe even shed a happy tear.
Step 4: Finishing Touches & Presentation

You’ve stacked the layers and added all the surprises, now it’s time to make your explosion box look polished and ready to gift. This step is all about the details that make a huge impact.
Start with the lid and ribbon. A neatly tied ribbon or bow instantly makes the box feel special. Choose a color that complements your layers, and if you want, you can add a small charm or bead to the ribbon for an extra luxurious feel.
Next, think about small embellishments on the top layer. Paper flowers, tiny hearts, or a little handwritten note can make the box feel personal and heartfelt. Don’t overcrowd it just a few thoughtful accents are enough to create a “wow” effect.
Another idea….Include little DIY touches that kids can make. A hand-drawn heart or a tiny paper flower tucked in one corner adds charm and sentimentality. These are simple, yet they make the gift feel more interactive and meaningful.
Finally, presentation is key. Consider placing your explosion box in a small gift bag or pairing it with a card or small treat. A soft touch like this elevates the entire gift. Even a little styling, a clean table, a simple background, or a ribboned box can make your gift feel intentional, curated, and memorable.
Once everything is in place, your explosion box is ready to shine. The layers, surprises, and little touches all work together to create a gift that’s not just beautiful, but emotional and memorable.
Final Thoughts: A Gift That Comes From the Heart
At the end of the day, your DIY Mother’s Day explosion box isn’t just a craft project, it’s an experience wrapped in a box. Every layer, every surprise, every tiny detail tells your mom one simple thing: “I thought about you, and I made this just for you.”
The magic of an explosion box is that it combines creativity, thoughtfulness, and emotion all in one and if you want to take it a step further you can pair your explosion box with other thoughtful gifts that feel luxurious but won’t break the bank. For example, our guide on 21 Luxurious Mother’s Day Gift Ideas on a Budget is packed with ideas that beautifully complement handmade crafts. Little touches like these turn a simple explosion box into a full, memorable Mother’s Day experience.
And here’s the best part: You don’t have to be a professional crafter to make something that feels meaningful. With a little planning, a few creative touches, and a lot of heart, you can create a gift that your mom will cherish forever.
So go ahead fold, layer, and surprise. Watch her reaction. Capture that smile. And know that the time and thought you put into this small box is what makes it truly priceless.
If you enjoyed making this DIY Mother’s Day explosion box, you’ll definitely want to check out some of my other Mother’s Day craft and gift guides below:
Leave a Reply