Some crafts are fun in the moment and forgotten by the next day.
This is not one of those crafts.
Air dry clay bowls are the kind of project that sticks around. Literally. Once your child makes one, it sits on the shelf, holds little treasures, and gets pointed out to every single visitor who walks through your front door.
“I made that.”
Those three words. Every time.
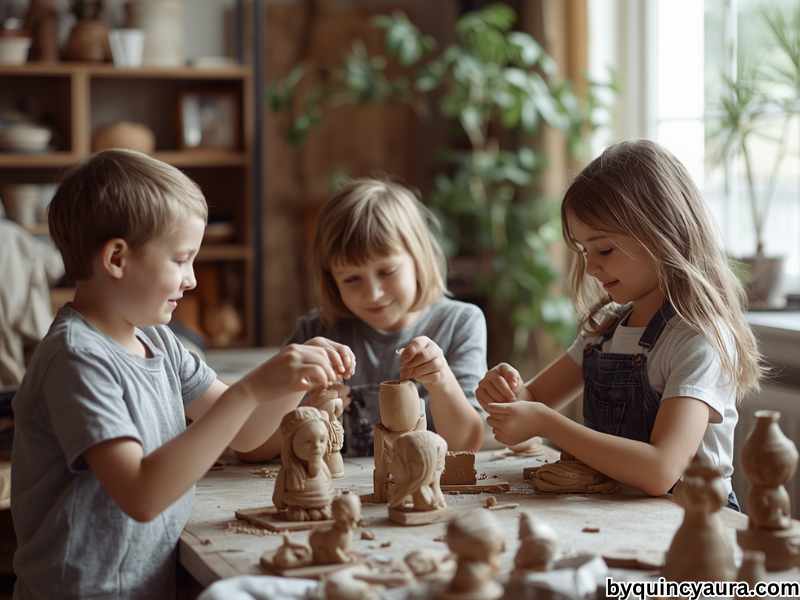
I first tried this project with a mixed-age group during an indoor activity day. I had toddlers, preschoolers, and a few older kids all sitting at the same table. Honestly, I was a little nervous about how it would go. Clay can feel intimidating especially for parents who have never worked with it before.
But here is what happened. Every single child, regardless of age, dove in without hesitation. The toddlers loved squishing the clay. The older kids got serious about their designs. And by the end, we had the most beautiful, imperfect, completely unique little bowls lined up on the windowsill to dry.
It was one of those afternoons I still think about.
If you are just getting started with crafting and you are not sure where to begin, I would love for you to first check out my beginner’s guide How to Start Crafting with Kids as a Beginner where I walk you through everything from supplies to setting up your space. Then come right back here, because this project is the perfect next step.
Ready? Let’s make some clay bowls.
Why Air Dry Clay Is One of the Best Craft Materials for Kids

Before we get into the steps, let me tell you why air dry clay deserves a permanent spot in your craft supplies.
First of all, it requires no special equipment. There is no kiln needed, no oven required, and no complicated tools involved. The clay dries completely on its own at room temperature, which makes it incredibly accessible for everyday families.
It is also surprisingly forgiving. Unlike other materials where mistakes are hard to fix, clay can be reshaped, smoothed, and reworked as many times as needed before it dries. As a result, kids feel free to experiment without the fear of ruining everything.
On top of that, the finished products are genuinely useful. A clay bowl is not just a craft, it is a functional object your child made with their own hands. It can hold jewelry, coins, hair clips, or little keepsakes. That sense of purpose makes the project feel even more meaningful to kids.
Furthermore, air dry clay is widely available and affordable. Most craft stores carry it, and it is also easy to find at Walmart or on Amazon. A single block is usually enough for multiple projects, which makes it great value too.
In short, this is one of those materials that looks impressive but is actually very beginner friendly. And that, in my experience, is the sweet spot for crafting with kids.
What You Will Need
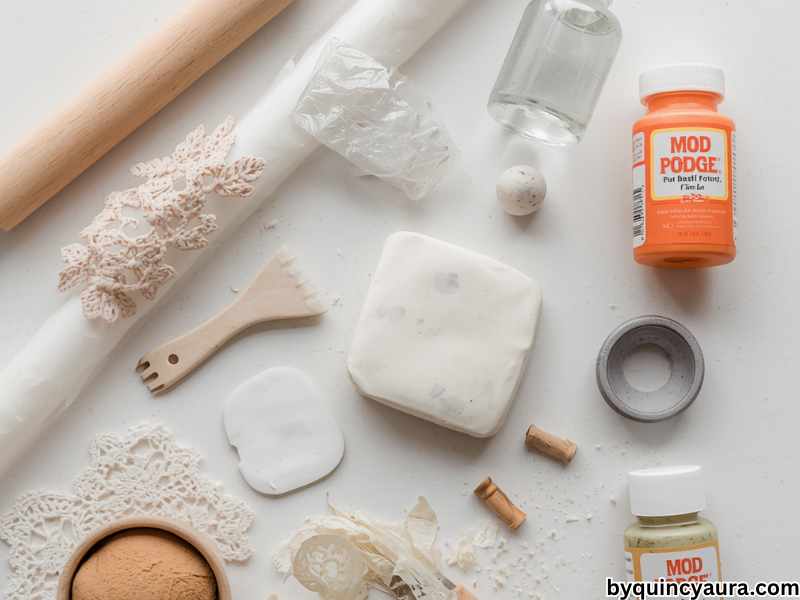
Here is your full supply list. Everything here is easy to find and budget friendly.
Air dry clay: This is the star of the show. White air dry clay is the most versatile because it can be painted any color after drying. Crayola Air Dry Clay and DAS Air Hardening Modeling Clay are both excellent options that work well for kids.
A rolling pin or smooth bottle: You will use this to roll the clay out flat. A dedicated clay rolling pin is ideal, but a smooth glass bottle or even a large cup works just fine.
A small bowl to use as a mold: This is how you shape your finished bowl. A cereal bowl, a soup bowl, or any small rounded bowl from your kitchen works perfectly. You will not be putting it in the oven, so any bowl is safe to use.
Plastic wrap: This goes over the outside of your mold bowl to prevent the clay from sticking to it. This step is important, so do not skip it.
A butter knife or plastic clay tool: For trimming edges and adding detail. A plastic knife from a picnic set works perfectly for younger kids.
Parchment paper or a silicone mat: To work on. Clay sticks to wooden tables and is hard to remove, so always work on a protected surface.
Sandpaper (fine grit): Optional but useful for smoothing rough edges after the clay dries.
Acrylic paint: For decorating after drying. Any basic acrylic craft paint works well.
Paintbrushes: A few different sizes for painting details.
Mod Podge or clear acrylic sealer: For sealing the finished bowl and making it look polished and professional.
Optional extras: Stamps, lace fabric, leaves, or textured materials for pressing patterns into the clay before it dries. This is a wonderful way to add detail and texture to your bowls.
Setting Up Your Workspace
A little setup goes a long way with this project. Before you call the kids over, take about ten minutes to get everything ready.
Cover your table with a plastic tablecloth or lay down a silicone mat. Clay that dries on a wooden table is genuinely hard to remove, so protecting your surface is really important here.
Next, flip your mold bowl upside down and cover the outside of it completely with plastic wrap. Smooth the wrap down as flat as possible and tuck any loose ends underneath. This layer of plastic wrap is what allows you to remove the clay bowl cleanly once it is shaped.
Set out the clay, rolling pin, and tools within easy reach. If you have multiple kids working at the same table, give each child their own portion of clay on their own piece of parchment paper. This prevents territorial disputes over supplies, which as any parent knows is always a good call.
Also, have a small bowl of water nearby. Dipping fingers lightly in water helps smooth the clay and fix any cracks that appear while working. However, remind the kids to use just a tiny amount. Too much water makes the clay sticky and hard to work with.
Now call the kids in.
Step by Step Instructions
Step One: Condition the Clay
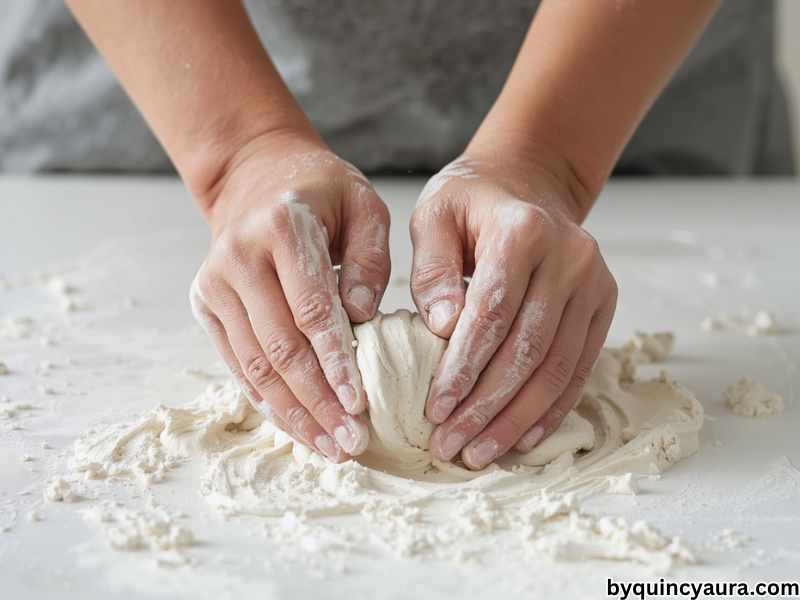
Before you start shaping anything, you need to warm up and soften the clay. This is called conditioning, and it makes a huge difference in how easy the clay is to work with.
Simply take your portion of clay and knead it in your hands for two to three minutes. Squeeze it, fold it, press it, and roll it. As you work it, the clay becomes warmer, softer, and much more pliable.
This step is perfect for toddlers and young children because it is basically just playing. Let them squish and squeeze the clay freely for a few minutes before moving to the next step. Not only does this condition the clay, but it also helps little hands warm up and get comfortable with the material.
For older kids, show them how to fold and press the clay like they are kneading bread dough. They tend to find this deeply satisfying.
Step Two: Roll the Clay Out Flat
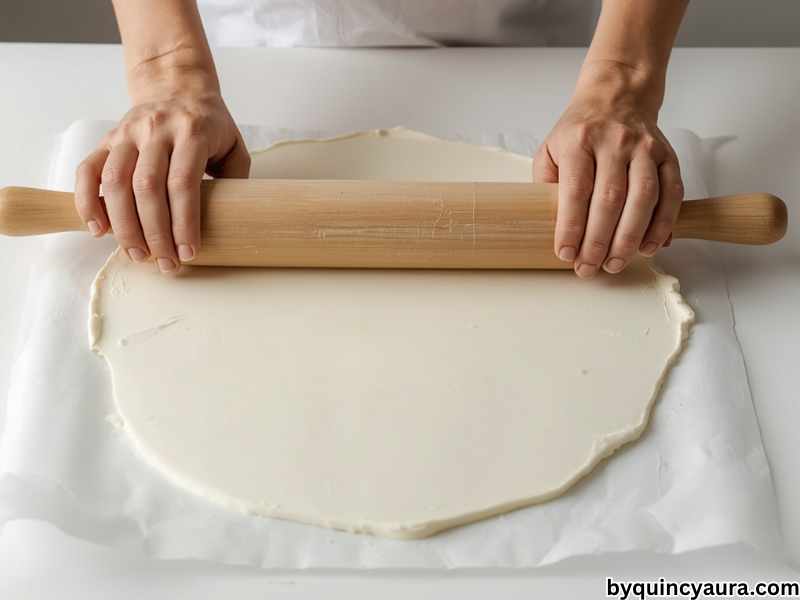
Once the clay is soft and pliable, place it on your parchment paper and begin rolling it out with your rolling pin.
Aim for an even thickness of about a quarter of an inch all the way across. Too thin and the bowl will crack easily. Too thick and it will be very heavy and take a long time to dry.
A good trick for getting even thickness is to place two pencils or wooden skewers on either side of the clay before rolling. The rolling pin then rests on the pencils and cannot press the clay thinner than the pencil height. This simple trick produces a beautifully even slab every time.
For younger children, do this step together. Let them place their hands on top of yours as you roll, so they feel part of the process. Alternatively, let them press and flatten the clay with their palms, it will not be perfectly even, but that is completely fine.
Step Three: Cut a Circle
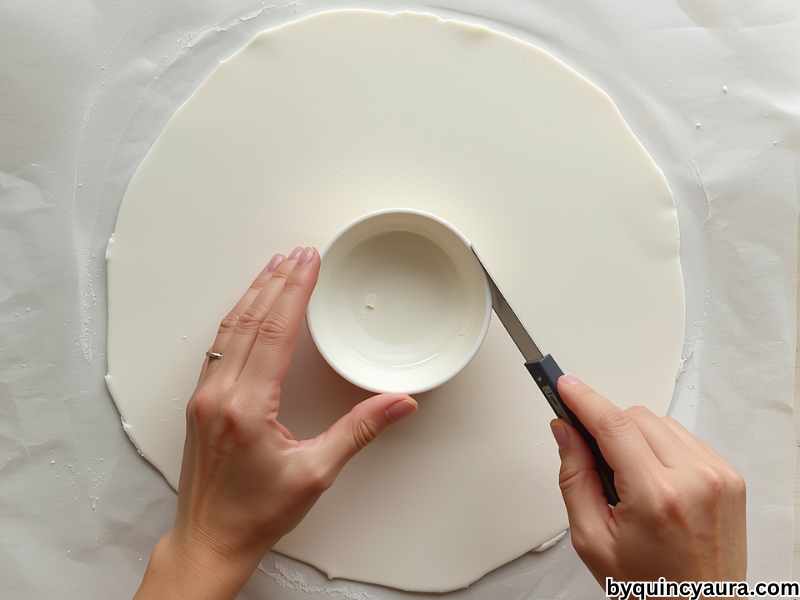
Now you need to cut the clay into a circle large enough to drape over your mold bowl.
Place your mold bowl right side up on the rolled clay and use it as a template. With your butter knife or plastic tool, trace around the outside of the bowl, cutting the clay about an inch wider than the bowl all the way around. This extra inch is what will form the sides of your finished bowl.
Remove the excess clay from around the edges and set it aside. You can use this leftover clay for decorative elements later.
Step Four: Add Texture or Patterns (Optional but Fun)

This is one of my favorite steps, and it is a great one for kids of all ages.
Before you drape the clay over the mold, now is the perfect time to press patterns and textures into the flat surface.
Press a piece of lace fabric gently into the clay and then peel it away. The result is a delicate, intricate lace pattern embedded in the clay. It looks absolutely stunning on a finished bowl.
Alternatively, press leaves, flower petals, or textured stamps into the surface. Even a fork dragged across the clay creates a beautiful lined pattern. For kids, pressing their fingerprints in a circular pattern around the center of the bowl is both meaningful and lovely.
Older kids particularly enjoy this step because it gives them a chance to make each bowl completely unique. Let them experiment freely. Whatever they press into the clay at this stage will be preserved permanently in the finished piece.
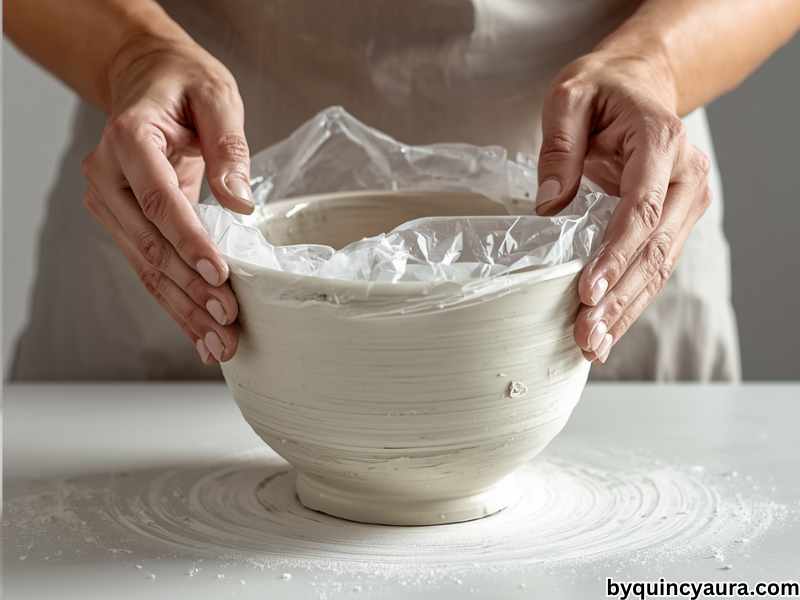
Step Five: Drape the Clay Over the Mold
Now comes the shaping step.
Carefully pick up your clay circle from the parchment paper. This requires a gentle touch, especially if the clay is thin. Slide a flat spatula or your fingers underneath to loosen it from the paper first.
Gently drape the clay circle over the outside of your upside-down mold bowl, which is already covered in plastic wrap. Center it carefully so the clay hangs evenly on all sides.
Now use your fingers to gently press and smooth the clay down over the curved surface of the bowl. Work slowly and evenly. If the edges are uneven or frilly, that is completely fine in fact, a slightly uneven, organic edge is part of the charm of a handmade bowl.
If any cracks appear, dip a finger lightly in water and smooth over the crack gently. The water acts as a natural adhesive and blends the clay back together seamlessly.
Step Six: Trim and Finish the Edges

Once the clay is draped and pressed over the mold, take a look at the edges.
If you want a clean, straight rim, use your butter knife to trim along the edge in a smooth curved line. If you prefer a more organic, wavy edge, simply leave it as it is or press gently with your fingers to create a natural scalloped look.
For a really polished edge, run a slightly damp finger slowly around the entire rim. This smooths out any rough patches and gives the edge a clean, finished appearance.
Step Seven: Let It Dry on the Mold
Now comes the hardest part of the whole project….waiting.
Leave the clay draped over the mold and set it somewhere safe and undisturbed. The clay needs to dry for at least 24 hours before you attempt to remove it from the mold.
In a warm, dry environment, the clay may be ready in as little as 18 hours. In a humid environment, it can take up to 48 hours. The clay is ready to remove when it feels firm and dry to the touch and has lightened in color from grey to white.
Do not rush this step. Removing the clay too early is the most common cause of cracked or misshapen bowls. So be patient and let it dry completely.
While you are waiting, this is a great time to plan your painting design with your kids. Sketch ideas on paper. Choose colors. Get excited about the decorating step to come.
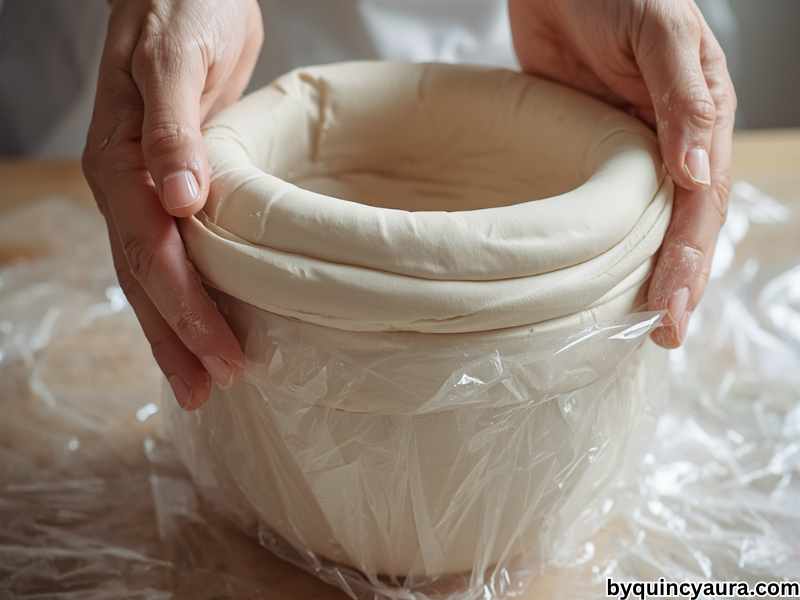
Step Eight: Remove the Bowl From the Mold
Once the clay is fully dry and firm, it is time to remove it from the mold.
Gently flip the whole thing over so the mold bowl is right side up with the clay bowl sitting on top. Slowly lift the mold bowl away from the clay. Because you used plastic wrap, it should release cleanly and easily.
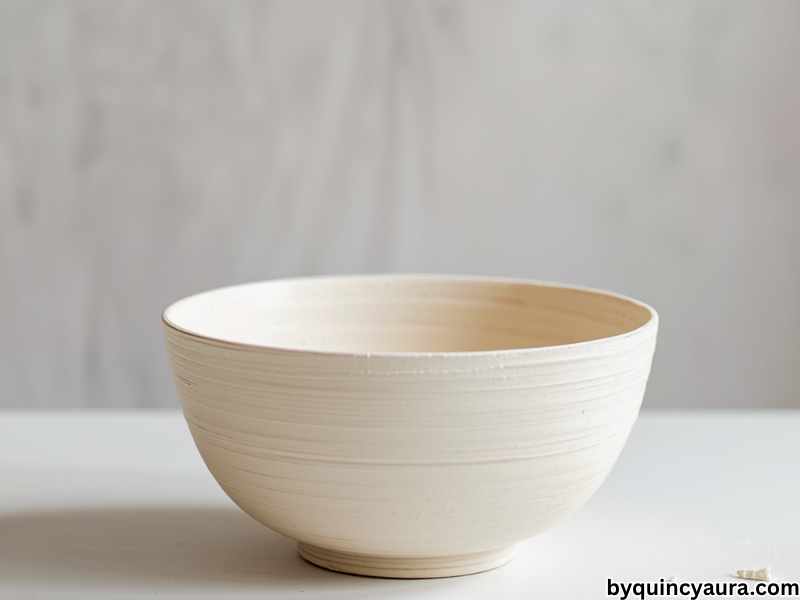
Peel away the plastic wrap from the inside of your clay bowl. Set the bowl on the table and take a look at it.
You made a bowl.
At this point, if there are any rough patches on the inside or outside, use a piece of fine grit sandpaper to gently smooth them out. This step is optional but it makes a noticeable difference in the final finish.
Step Nine: Paint and Decorate
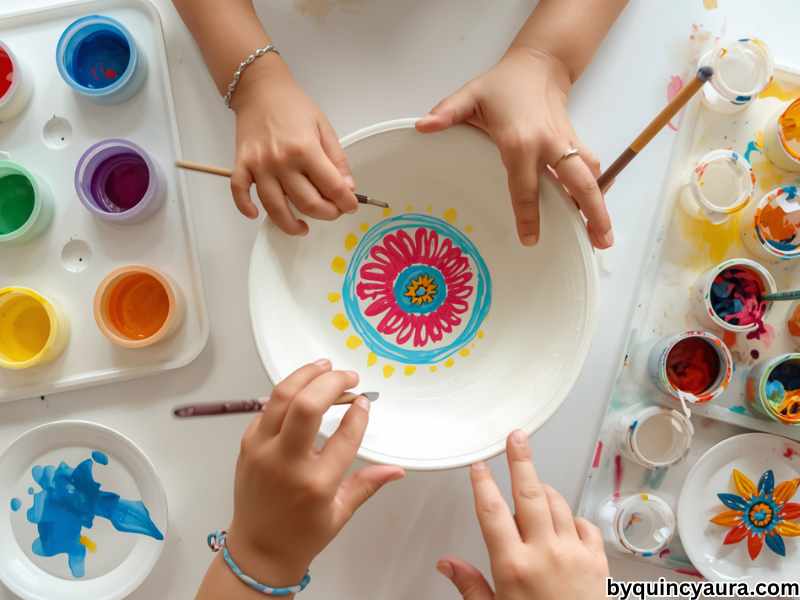
This is the step that transforms a plain white bowl into something truly special.
Set out your acrylic paints and brushes. Then step back and let your kids go wild.
For toddlers, simple all-over color is perfect. Let them paint the whole bowl one color or a mix of colors. The result will be vibrant and full of personality.
For preschoolers, try simple patterns like stripes, dots, or handprints on the inside of the bowl. A thumb dipped in paint and pressed repeatedly around the rim creates a lovely polka dot border.
For older kids, the possibilities are truly endless. Geometric patterns, ombre effects, floral designs, abstract art, older children can handle detailed and intentional decoration that looks genuinely impressive.
For a really special touch, have each family member paint one section of the bowl. A family bowl made with everyone’s colors and marks is a beautiful keepsake that tells a story.
Let the paint dry completely before moving on to the final step. This usually takes about thirty minutes to one hour depending on how thickly the paint was applied.
Step Ten: Seal the Bowl
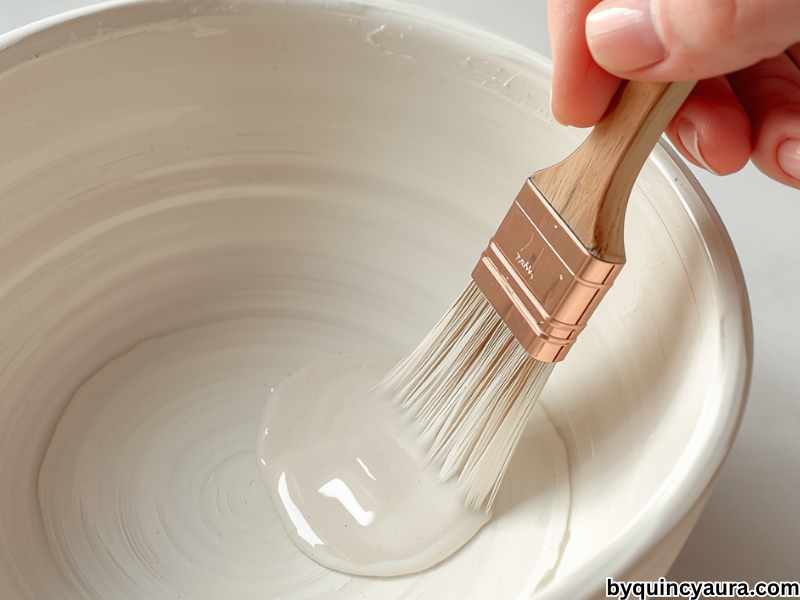
The final step is sealing your finished bowl with Mod Podge or a clear acrylic sealer.
Apply a thin, even coat over the entire outside and inside of the bowl using a wide brush. The sealer protects the paint from chipping and gives the bowl a beautiful polished finish. It also makes the bowl slightly more water resistant, though it is not fully waterproof, so it should not be used to hold liquids.
Let the first coat dry for about twenty minutes, then apply a second coat for extra protection. Once the final coat is dry, your bowl is completely finished and ready to use.
Ideas for What to Put in Your Finished Bowl
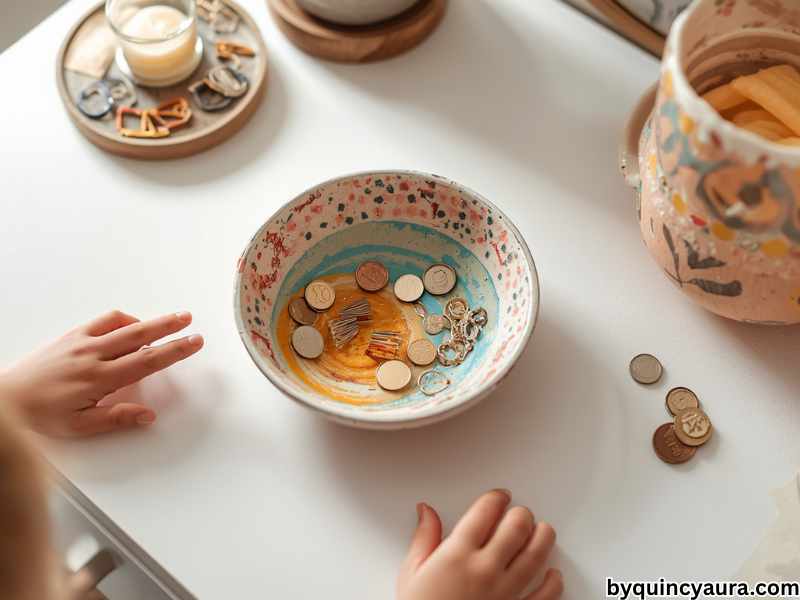
Here are some fun ideas for how your kids can actually use their finished bowls:
A jewelry dish on a dresser is a classic use. Hair clips, rings, and small accessories look lovely displayed in a handmade bowl. A coin bowl by the front door is also practical and meaningful. Some families use theirs as a keepsake bowl, filling it with little notes, treasures, and memories over time.
Older kids often use theirs to organize their desk holding paper clips, erasers, or small stationery items. Meanwhile, younger kids simply love knowing that something they made with their own hands is sitting on the shelf being used every day.
Troubleshooting Common Problems
My clay cracked while drying. This is usually caused by the clay drying too quickly or unevenly. To fix small cracks, mix a tiny amount of clay with water to make a paste and press it into the crack. Smooth it out and let it dry again.
My bowl warped out of shape. This happens when the clay is removed from the mold before it is fully dry. Unfortunately, once clay dries in the wrong shape it is very hard to fix. The good news is that slightly warped bowls still look beautiful and perfectly handmade.
The paint is not sticking. Make sure the clay is completely dry before painting. Any remaining moisture in the clay will cause paint to bead up and not adhere properly.
The bowl feels rough after drying. Use fine grit sandpaper to smooth the surface before painting. It makes a big difference and takes only a few minutes.
Your Action Step for This Weekend
Here is what I want you to do.
Pick up a block of air dry clay on your next grocery run. It costs just a few dollars and lasts for multiple projects. Choose your mold bowl, gather your supplies, and set aside a Saturday or Sunday afternoon for this.
Do not overthink the design. Do not wait until everything is perfect. Just roll out the clay, let your kids help shape it, and enjoy the process together.
The finished bowl will sit in your home for years. Every time someone notices it, your child will beam with pride.
That is the real value of this project. Not the bowl itself but the confidence, the creativity, and the memory of an afternoon spent making something beautiful together.
Now go get some clay.
Leave a Reply