Can I tell you about one of my favorite Friday afternoons in the classroom?
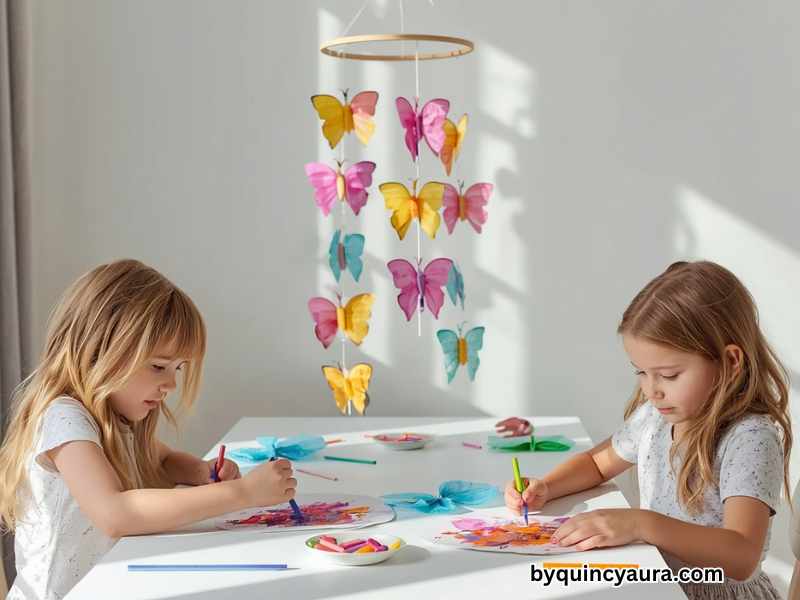
It was the kind of day where everything just clicked. The sun was coming through the windows. The kids were settled. And we were making butterfly mobiles out of coffee filters, washable markers, and string.
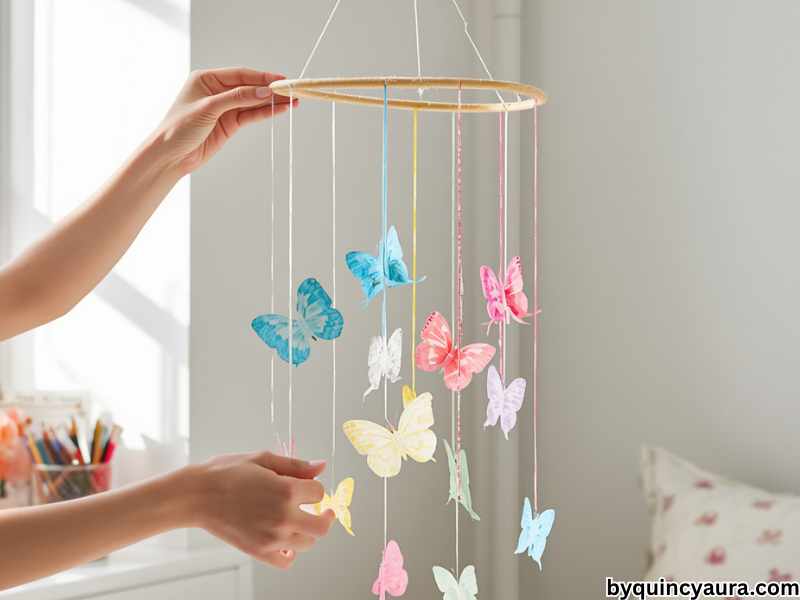
By the end of that afternoon, the ceiling of my classroom looked like a butterfly garden. Every single child from the quietest kid in the back row to the most energetic one in the front was proud of what they made.
One little girl held hers up and whispered, “It looks real.”
That moment is exactly why I love this craft so much. It is simple enough for a toddler. It is beautiful enough to hang in your living room. And it is the kind of project that turns an ordinary weekend into a memory.
Now, if you’re new to crafting, don’t worry. You don’t need to be artistic or super creative to pull this off.
In fact, if you haven’t already, I highly recommend checking out my guide on How to Start Crafting with Kids as a Beginner. It breaks everything down in a simple, stress-free way.
So this weekend, let’s make butterfly mobiles together. I am going to walk you through everything, what you need, how to do it, and how to make it work for every age in your house.
Let’s go.
Why This Craft Is Perfect for All Ages
Before we get into the how, let me explain why this particular project works so well for families with kids of different ages.
A lot of crafts are designed for one specific age group. Either the steps are too hard for the little ones or too boring for the older kids. As a result, someone always ends up frustrated or disengaged.
This butterfly mobile, however, is different.
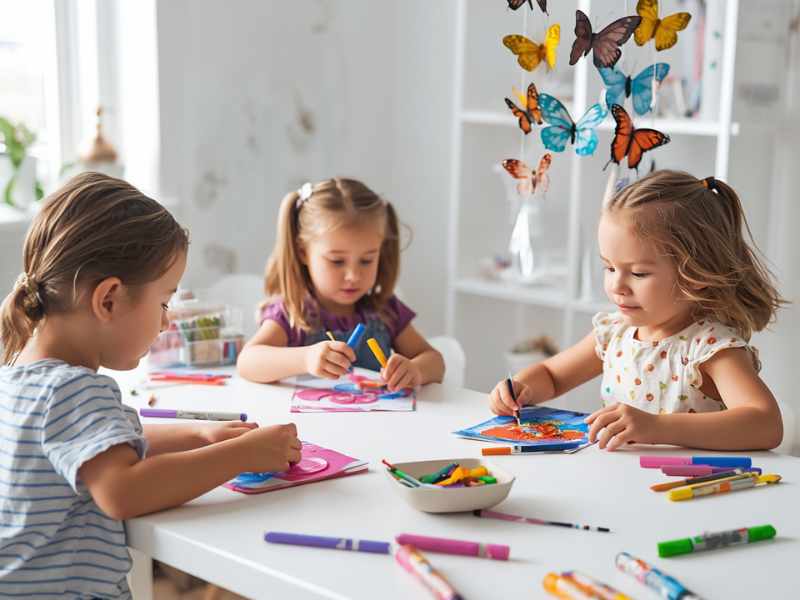
Toddlers can do the coloring. Preschoolers can do the shaping. Big kids can handle the cutting, assembling, and decorating. And honestly? Adults get just as into it as the children do. I have never met a parent who did not enjoy the coffee filter coloring step.
On top of that, the finished product looks genuinely impressive. Guests will walk into your home, see butterflies hanging from the ceiling, and ask where you bought them. When you say your kids made them, be prepared for the reaction.
It is that good.
What You Will Need

Here is the great news. Everything on this supply list is easy to find and very affordable. Most of it you may already have at home. The rest can be picked up at Dollar Tree or Walmart for just a few dollars.
Here is your full supply list:
Coffee filters: the round, flat ones work best. Get a pack of at least 20 so you have plenty to experiment with. These are the wings of your butterfly and they absorb color beautifully.
Washable markers: the brighter the better. You want bold colors that will really pop when wet. Crayola washable markers are perfect for this project.
A spray bottle filled with water: this is the magic step. More on that in a moment.
Pipe cleaners: one per butterfly. These become the body and antennae of your butterfly. Black pipe cleaners look the most realistic, but any color works.
String or twine: for hanging your butterflies. You will need enough to hang several butterflies at different heights.
A wooden dowel or stick: this is what your butterflies hang from. A wooden dowel from the craft store works perfectly. So does a sturdy stick from your backyard.
Scissors: for cutting string and trimming pipe cleaners if needed.
Optional extras: Glitter glue, sequins, or small gems for decorating. These add a beautiful sparkle when the light hits the mobile.
That is everything. Simple, right?
Setting Up Your Workspace
Before you call the kids over, take five minutes to set things up. A little preparation makes the whole experience smoother and more enjoyable for everyone.
First, cover your table with a plastic tablecloth or old newspapers. The markers can bleed through the coffee filters, so protecting your surface is important.
Next, lay out the coffee filters flat on the table. Put a small cup of markers in the center where everyone can reach them. Fill your spray bottle with clean water and set it within easy reach.
Also, set up a drying area nearby. A dish rack works perfectly for this. Alternatively, you can lay a few sheets of newspaper on the counter and stand the wet coffee filters up against something to dry.
If you have a toddler joining in, put them in an art smock first. The markers are washable, but why create extra laundry if you do not have to?
Finally, put on some fun music. Seriously, this step is underrated. Good music makes crafting feel like a party. In my classroom, we always had music playing during craft time. The kids worked better, stayed calmer, and had more fun as a result.
Step by Step Instructions
Alright, here we go. Let me walk you through the whole process from start to finish.
Step One: Color the Coffee Filters
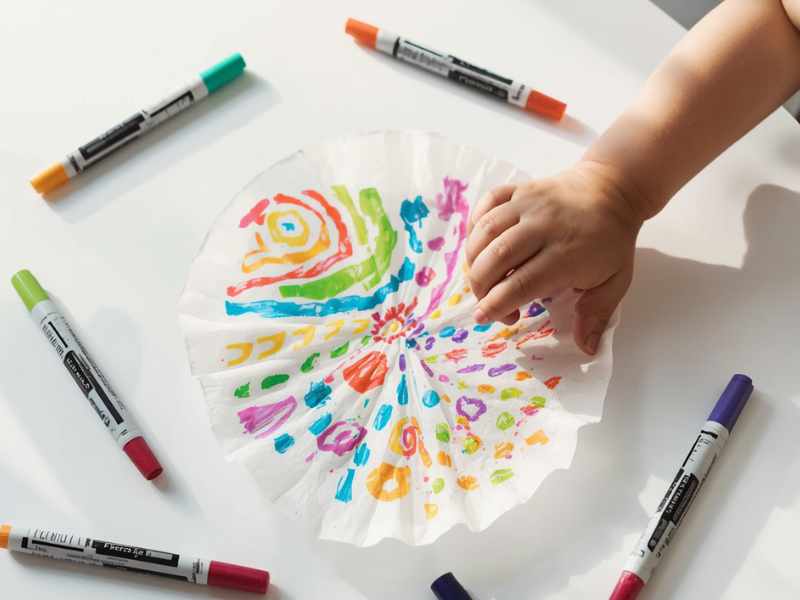
This is the most fun step and also the one that produces the most “wow” reactions.
Open a coffee filter and lay it flat on the table. Now let your child color it with the washable markers. There are no rules here. They can make stripes, dots, swirls, or just fill the whole thing in with one color. Every single approach produces a beautiful result.
Encourage your kids to press firmly with the markers so the color is bold and saturated. Lighter marks tend to fade a little in the next step.
For toddlers, just let them go. Give them three or four marker colors and let them do whatever they want. The results are always gorgeous.
For older kids, suggest patterns like symmetrical designs where both halves of the filter match. This adds a lovely touch that looks intentional and detailed.
Once the filter is colored, it is time for the magic.
Step Two: The Water Spray Moment
Hold the spray bottle about six inches above the colored coffee filter. Then give it two or three gentle sprays of water.
Watch what happens next.
The water causes the marker ink to bleed and blend across the filter. Colors merge into each other. New shades appear. Patterns that looked simple suddenly become stunning and complex.
Every single child I have ever done this with has gasped at this step. Even parents gasp. It is genuinely one of the most satisfying moments in all of kids’ crafting.
Let the filter sit for about thirty seconds to soak in the water. Then carefully pick it up and place it in your drying area. Stand it upright if possible so the water drips down and creates even more blending.
Repeat this process for as many butterflies as you want to make. For a full mobile, aim for at least eight to ten butterflies. However, even five or six can look beautiful depending on the size of your dowel.
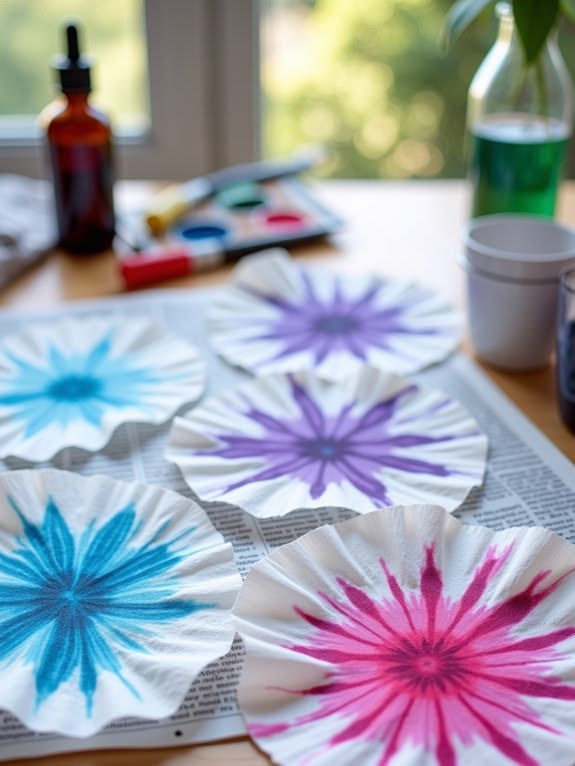
Step Three: Let Them Dry Completely
This step requires patience especially from the kids.
The coffee filters need to dry fully before you can shape them. Depending on how wet they got, this usually takes between thirty minutes and one hour.
Use this waiting time wisely. Clean up the coloring station together. Have a snack. Put on a show. Or if you have older kids, use this time to prepare the dowel and cut your string lengths.
One thing I always told my students: the waiting is part of the craft. Good things take a little time. And when the filters are finally dry and you see those colors set in, the wait is always worth it.
Step Four: Shape the Butterflies
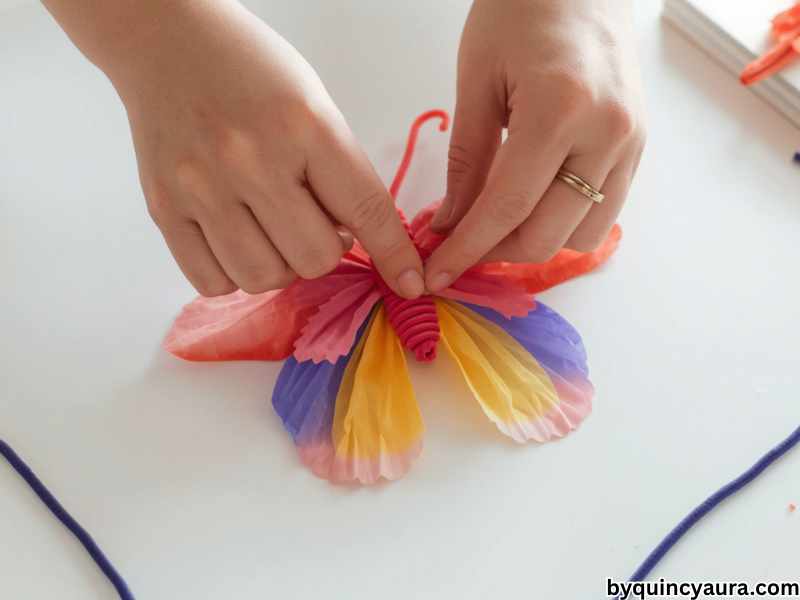
Once your coffee filters are completely dry, it is time to turn them into butterflies.
Pick up one dried filter and pinch it in the very center. Gather it together like you are making a bow or a flower. This pinched center becomes the middle of your butterfly, and the two sides fan out to become the wings.
Hold the pinched center firmly and pick up one pipe cleaner. Wrap the pipe cleaner tightly around the pinched center two or three times. This holds the butterfly shape in place securely.
Once the body is secured, gently fan out the wings on both sides so they are open and full. The rounder and more spread out the wings are, the more beautiful the butterfly looks.
Finally, take the two ends of the pipe cleaner that are sticking up and curl them slightly outward. These are your butterfly’s antennae. A gentle curl at the tip of each one adds a lovely finishing touch.
Hold it up and take a look.
There is your butterfly.
Step Five: Add Optional Decorations
This step is completely optional, but it takes the butterflies from pretty to absolutely stunning.
If you have glitter glue, let your kids add small dots or swirls on the wings. The glitter catches the light beautifully once it dries. Sequins and small gem stickers also work wonderfully here.
Older kids especially love this step. It gives them a chance to personalize each butterfly and make it their own. Some kids go all out with decorations. Others prefer to keep theirs simple and elegant. Both approaches look wonderful on the final mobile.
Give the glitter glue about twenty minutes to dry before moving on to the next step.
Step Six: Assemble the Mobile
Now comes the part where everything comes together.
Cut several pieces of string in different lengths. For a beautiful cascading effect, vary the lengths, some short at around six inches, some medium at around ten inches, and some long at around fourteen inches. This variation creates visual depth and movement in the finished mobile.
Tie one end of each string around the pipe cleaner body of each butterfly. Make sure the knot is tight so the butterfly hangs securely.
Next, tie the other end of each string to your wooden dowel. Space the butterflies out evenly along the dowel so the weight is balanced. If one side feels heavier than the other, simply slide the strings along the dowel until it hangs level.
Once all your butterflies are attached, tie a longer piece of string to the center of the dowel for hanging. This is your hanging string and it needs to be strong, so double knot it.
Hold the mobile up and let it hang freely. Watch the butterflies spin and flutter.
It is honestly breathtaking.
How to Hang Your Butterfly Mobile
Now that your mobile is assembled, let’s talk about where and how to hang it.
A child’s bedroom is the most popular spot for this. Hang it near a window where light can hit the translucent wings and make the colors glow. The effect in morning sunlight is absolutely magical.
A nursery is another beautiful option. The gentle movement of the butterflies is calming and visually stimulating for babies and toddlers. It doubles as a sensory decoration.
The living room is also a wonderful choice, especially if you use a longer dowel with more butterflies. It becomes a real conversation piece.
For hanging, a small adhesive hook works well and does not damage the ceiling. Alternatively, use a push pin if you have a soft ceiling tile. In a child’s room, you can also tie the mobile to a curtain rod for an easy no-damage option.
Tips for Making This Craft Work at Every Age
Since we are making this for all ages, here are some specific tips to help each child have the best experience possible.
For toddlers ages 1 to 3
Focus entirely on the coloring step. Let them scribble freely on the coffee filters with two or three markers.
Do the shaping and assembly yourself while they watch. Let them help hold the pipe cleaner or pull the string.
Their contribution is real even if it is small.
For preschoolers ages 3 to 5
They can do the coloring and the water spray step with guidance.
Help them with the pinching and pipe cleaner wrapping, but let them try first.
At this age, the feeling of “I did it myself” is incredibly important for confidence.
For big kids ages 6 to 12
They can handle every step with minimal help.
Give them creative freedom to design their own color patterns, choose their own decorations, and even help hang the finished mobile.
Older kids also enjoy making mobiles as gifts for younger siblings or family members.
For mixed age groups
Set up an assembly line. Let the toddlers color. Let the preschoolers spray the water.
Let the big kids do the shaping and assembly.
Working together like this builds teamwork and makes every child feel valued.
Ways to Make Your Mobile Extra Special
Once you have mastered the basic version, here are some fun ways to take it even further.
Seasonal themes work beautifully with this mobile. For spring, stick with bright pinks, yellows, and greens. For fall, use oranges, reds, and deep purples. For Christmas, try red and green with silver glitter. The same technique works for every season with just a change of color palette.
Name mobiles are a gorgeous personalized version. Write each letter of your child’s name on a separate butterfly using a fine black marker after the colors dry. Hang them in order along the dowel. It makes a stunning and meaningful bedroom decoration.
Gift mobiles are also a wonderful idea. A set of handmade butterfly mobiles makes a heartfelt gift for grandparents, teachers, or family friends. Pack them in a clear bag with ribbon and they look like something from a boutique shop.
What to Do If Things Don’t Go as Planned
Let me be honest with you for a second.
Some coffee filters will get too wet and tear a little. Some butterflies will not hang perfectly straight. Some colors will bleed more than expected and turn brownish in the middle.
All of that is completely okay.
In fact, the ones that get a little extra water often end up the most beautiful. The unexpected color blending that happens when filters get very wet produces some of the most stunning results. So instead of worrying when things look different from the plan, lean into it.
Remind your kids and yourself, that there are no mistakes in art. There are only happy surprises.
Your Action Step for This Weekend
So, here is what I want you to do.
This weekend, grab some coffee filters and markers. Then, call your kids into the kitchen, put on some music, and make butterflies together.
Most importantly, do not wait for a special occasion. Also, do not wait until you have all the optional supplies. In fact, the basic version with just coffee filters, markers, and pipe cleaners is already beautiful enough to hang in your home.
Years from now, your child will not remember the exact colors they used. However, they will remember standing next to you at the kitchen table. They will remember watching the colors blend together on the wet filter and feeling amazed by what their own hands created.
In the end, that is the real magic of this craft.
And honestly, it is waiting for you this weekend.
Leave a Reply