You know those moments when a child walks up to you with that specific look on their face? The one that says they are bored, restless, and approximately thirty seconds away from causing some kind of chaos? Every parent, teacher, and caregiver knows that look intimately. And in those moments, you need something fast.
Not something that requires a trip to the craft store. Not something that needs forty-five minutes of setup time. Something you can start right now with materials already sitting in your house.
Paper is honestly the most underrated craft material in existence. It is everywhere. It is cheap. It cuts, folds, tears, rolls, and transforms into almost anything a child can imagine. And the best part is that some of the most satisfying paper crafts take less than ten minutes from start to finished product.
If you have been following along here on the blog, you will remember our last post on How to Create a Scrapbook With Your Child to Document Summer Memories. That project was about preserving memories in a beautiful and lasting way. This one, however, is about immediate fun. Quick wins. Fast creativity that keeps little hands busy and little minds engaged without any complicated preparation on your part.
Today we are covering fifteen paper crafts that kids can genuinely make in under ten minutes each. Some are classic. Some are surprising. All of them work. So let us get straight into it.
Save this guide: 20 Easy Father’s Day Cards Kids Can Make in 10 Minutes
What You Need Before You Start
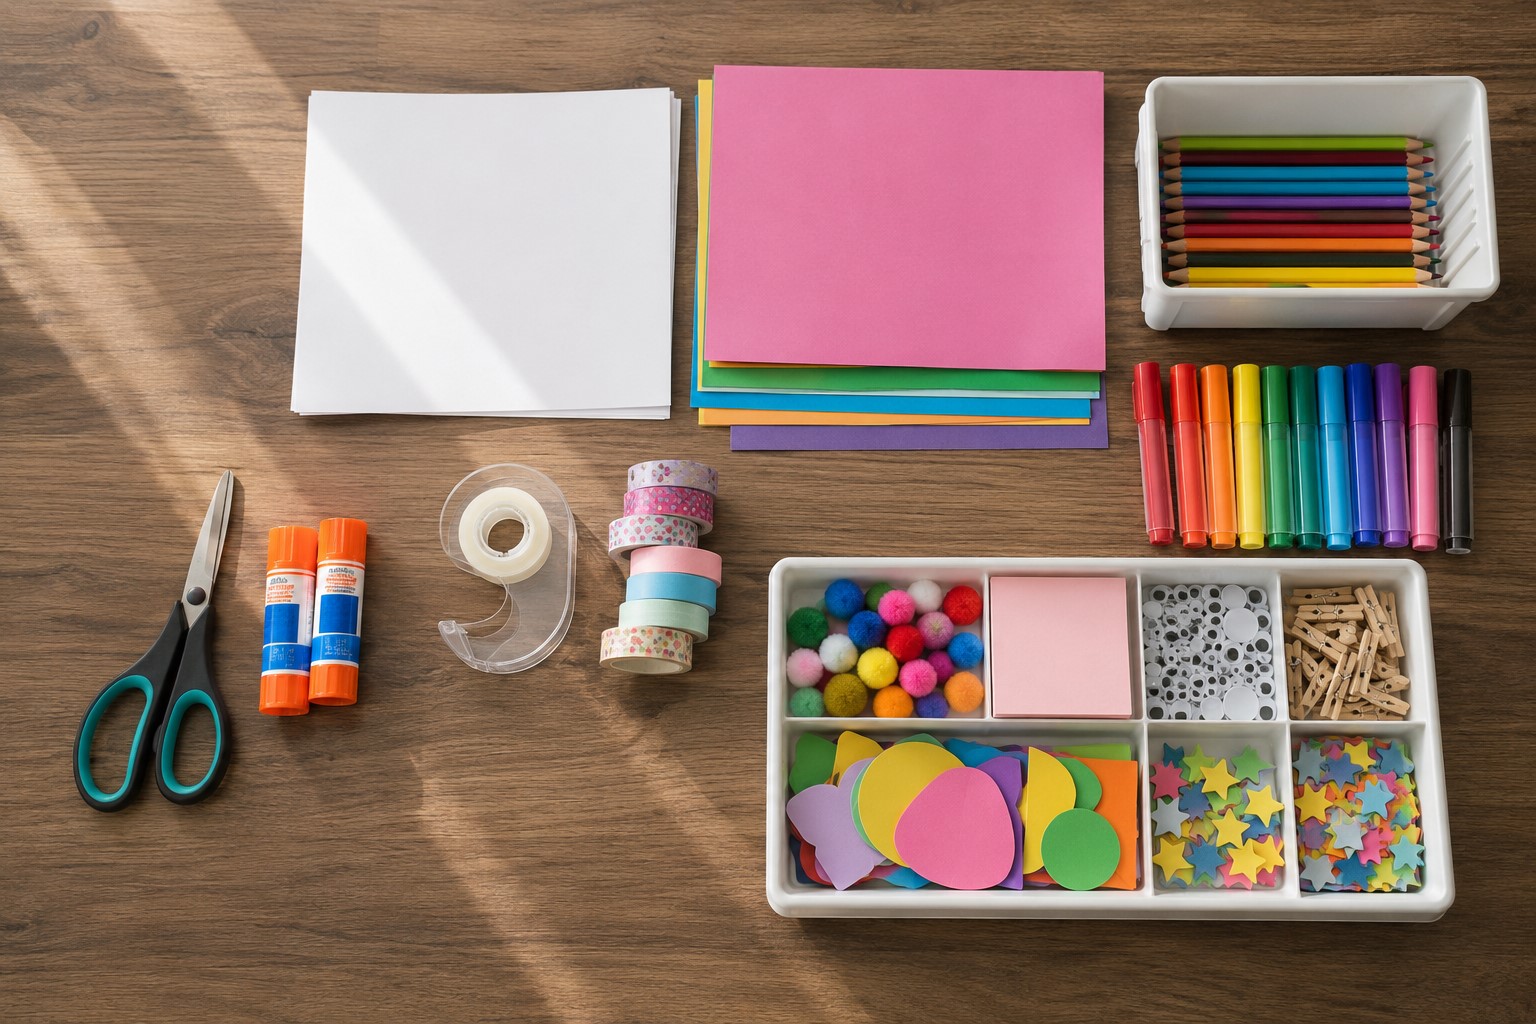
Before we get into the actual crafts, let me quickly cover the basic supplies. The beauty of everything on this list is that the materials are minimal and mostly things you already own.
Plain paper. White printer paper, colored construction paper, newspaper, and old magazines all work beautifully depending on the specific craft. Having a mix of colors available makes the session more fun and gives kids creative choices.
Scissors. Age-appropriate scissors for every child participating. Blunt-tipped scissors for younger kids. Sharper craft scissors for older ones who need cleaner cuts.
Glue. A basic glue stick handles most of what we are doing today. A small bottle of PVA glue is useful for a few of the projects. Neither needs to be anything fancy or expensive.
Markers and colored pencils. For decorating finished crafts and adding personal details that make each piece uniquely theirs.
Tape. Both regular clear tape and washi tape are useful. Washi tape additionally doubles as a decorative element on several of these projects.
That is genuinely everything. No special tools. No expensive materials. Just basic supplies that most households already have sitting in a drawer somewhere right now.
1. The Classic Paper Fortune Teller
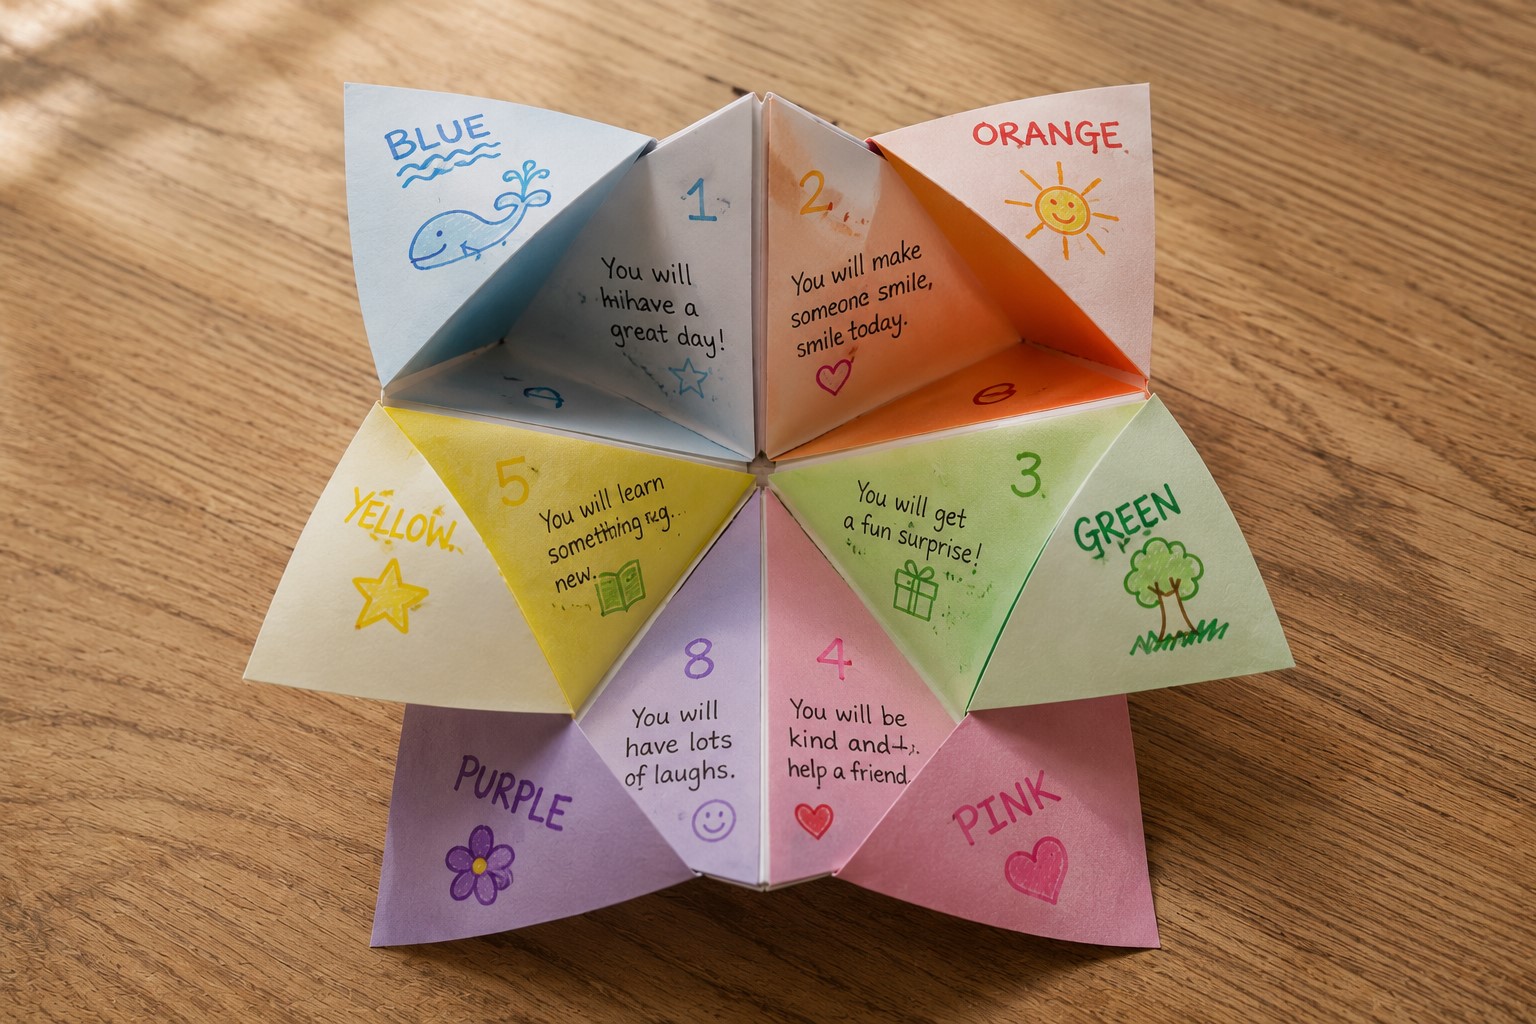
Let us start with an absolute childhood classic that never gets old no matter what generation you belong to. The paper fortune teller, also called a cootie catcher, has been entertaining kids in classrooms for decades and it still works brilliantly today.
Start with a square piece of paper. Fold it diagonally both ways and then unfold it so you have cross crease marks. Fold each corner into the center point precisely.
Flip the paper over and fold each corner into the center again. Fold in half, unfold, fold in half the other way. Then push your thumbs and forefingers into the four pockets on the underside and push toward the center until the fortune teller pops open.
Write numbers on the eight outer triangles. Write colors on the four inner squares. Write fortunes or funny messages on the eight innermost flaps. Kids love writing the fortunes themselves because it gives them complete creative control over the whole experience.
Furthermore, this craft doubles as a social activity. Once finished, kids immediately want to use it with friends and family. Consequently, one fortune teller often inspires a whole batch of them in quick succession.
2. Paper Finger Puppets
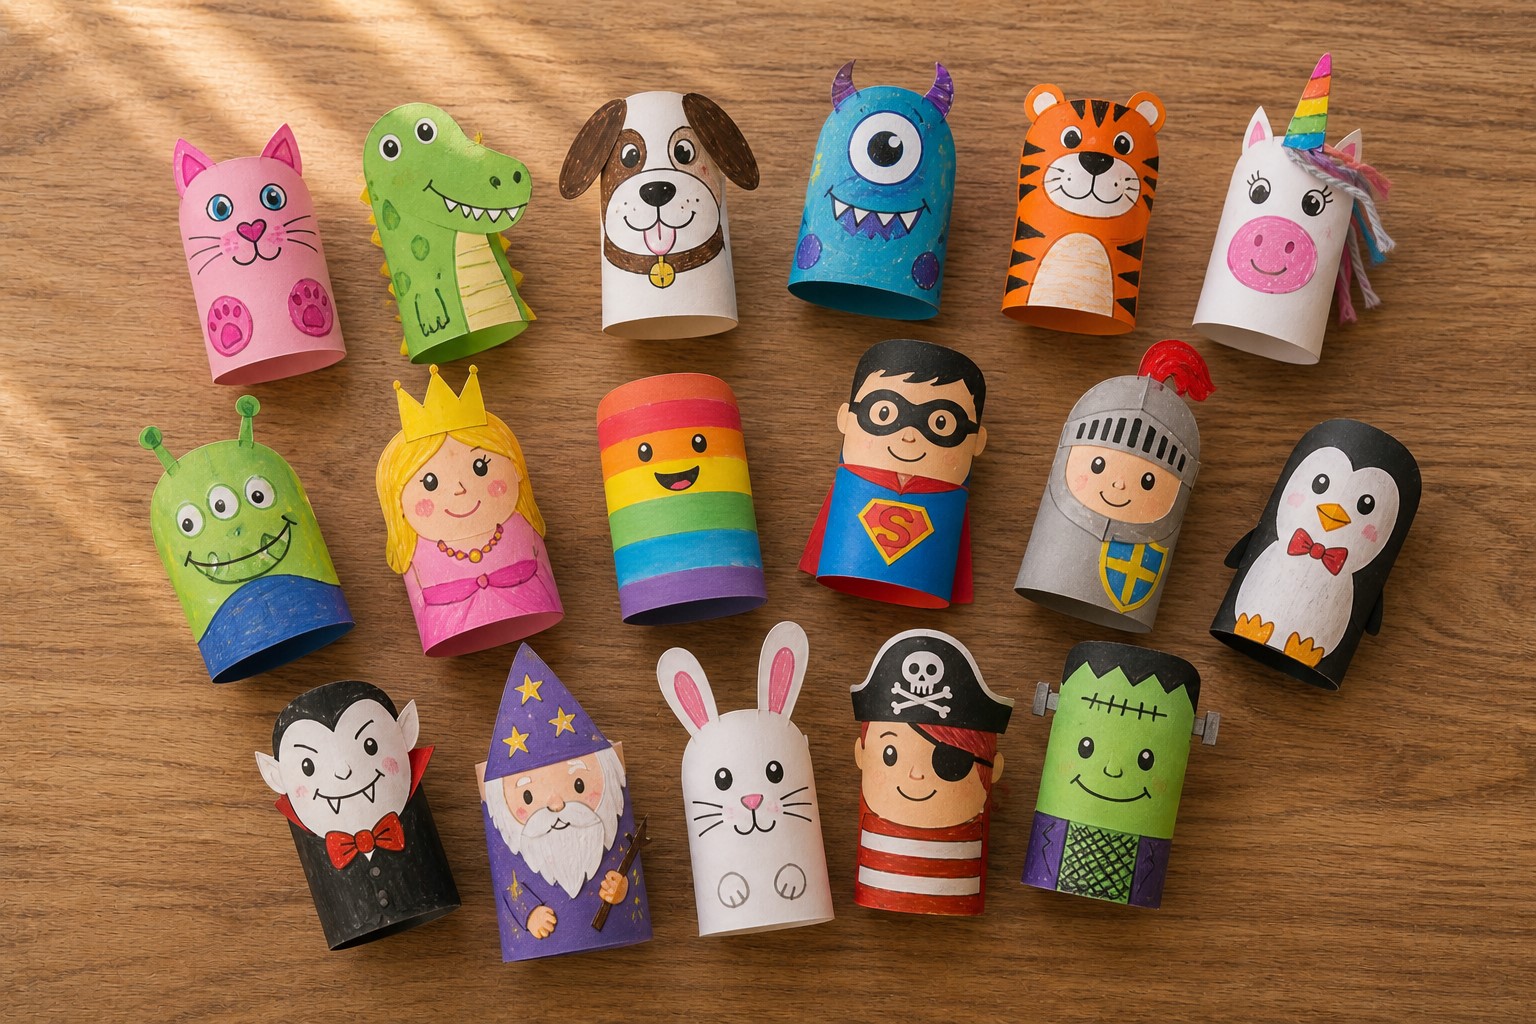
Paper finger puppets are fast, fun, and immediately become a performance. All you need is a strip of paper, some markers, and about five minutes of focused time.
Cut a strip of paper approximately three centimeters wide and long enough to wrap around a child’s finger with a small overlap. Tape the ends together to form a ring that fits comfortably. Then draw a face, character, or animal on the front of the ring with markers.
The real magic happens when kids make a whole set of characters together. A family of animals. A cast of superheroes. A group of silly monsters. Once they have three or four finger puppets, an entire spontaneous puppet show follows naturally without any prompting from you.
Additionally, older kids enjoy making more detailed characters with paper ears, crowns, and accessories glued or taped onto the basic ring. Even a simple paper spike becomes a crown. A tiny paper bow becomes an accessory. The details matter enormously to kids and they will spend happily engaged time perfecting each character.
3. Paper Chain Garland
Paper chains are one of those crafts that feel almost too simple to mention. However, they deserve a spot on this list because they are genuinely satisfying to make and beautiful to display when finished.
Cut strips of colored paper approximately two centimeters wide and fifteen centimeters long. Loop one strip into a circle and tape or glue the ends together. Thread the next strip through the first loop before closing it into a circle. Continue adding loops in alternating colors until your chain reaches the desired length.
The result is a colorful garland that works as party decoration, bedroom decor, or seasonal display. Moreover, this is one of the most accessible crafts on the entire list. Even very young children aged three and four can participate meaningfully by handing strips, choosing colors, and pressing the tape down.
Therefore, paper chain making works particularly well as a group activity where each child contributes sections that eventually get joined into one long communal garland. The sense of collective achievement is genuinely lovely to witness.

4. Origami Jumping Frog
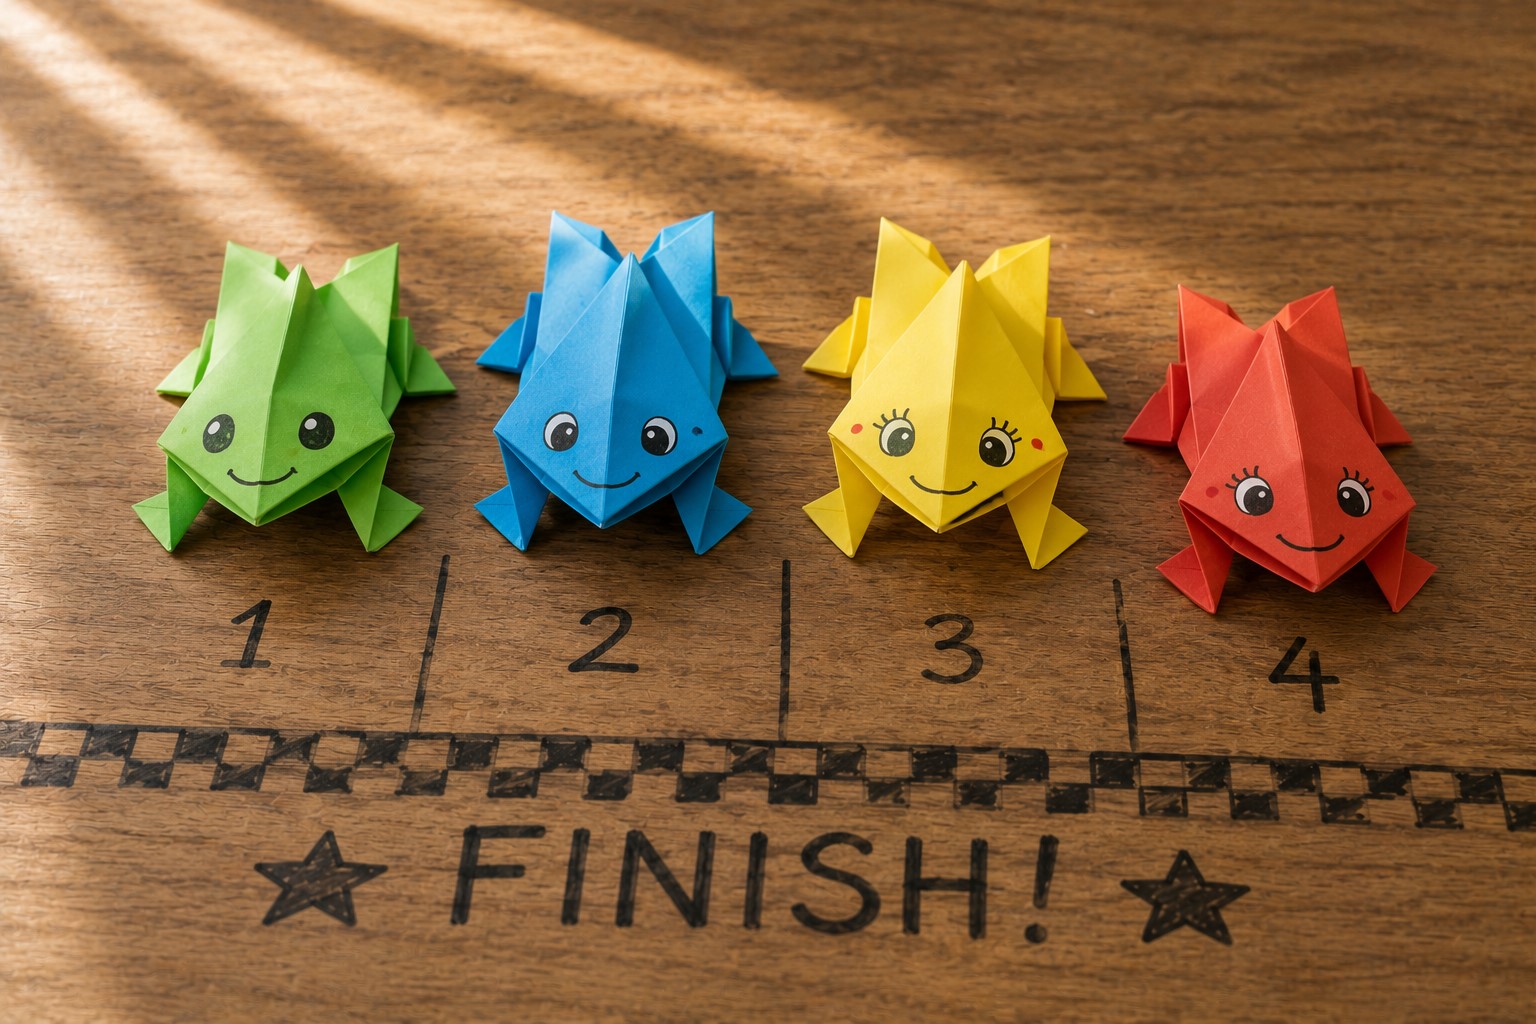
Now this one gets loud and competitive very quickly. Fair warning. The origami jumping frog is one of those crafts that children discover they can make into a game and from that moment forward there is no going back.
Start with a rectangular piece of paper. Fold the top edge down to meet the left edge and crease. Unfold and repeat on the other side so you have an X crease at the top. Push the sides in so the top forms a triangle pointing downward.
Fold the two bottom corners of the triangle up to the top point. Fold the sides of the remaining rectangle into the center. Fold the bottom half up. Then fold the bottom half back down to create the spring mechanism. Flip over and your frog is ready.
Press down on the back end and release quickly to make it jump. Kids will immediately start measuring whose frog jumps furthest. Subsequently, this single craft can occupy a group of children for a surprisingly long time as they refine their folding technique and jumping release method in pursuit of the longest jump record.
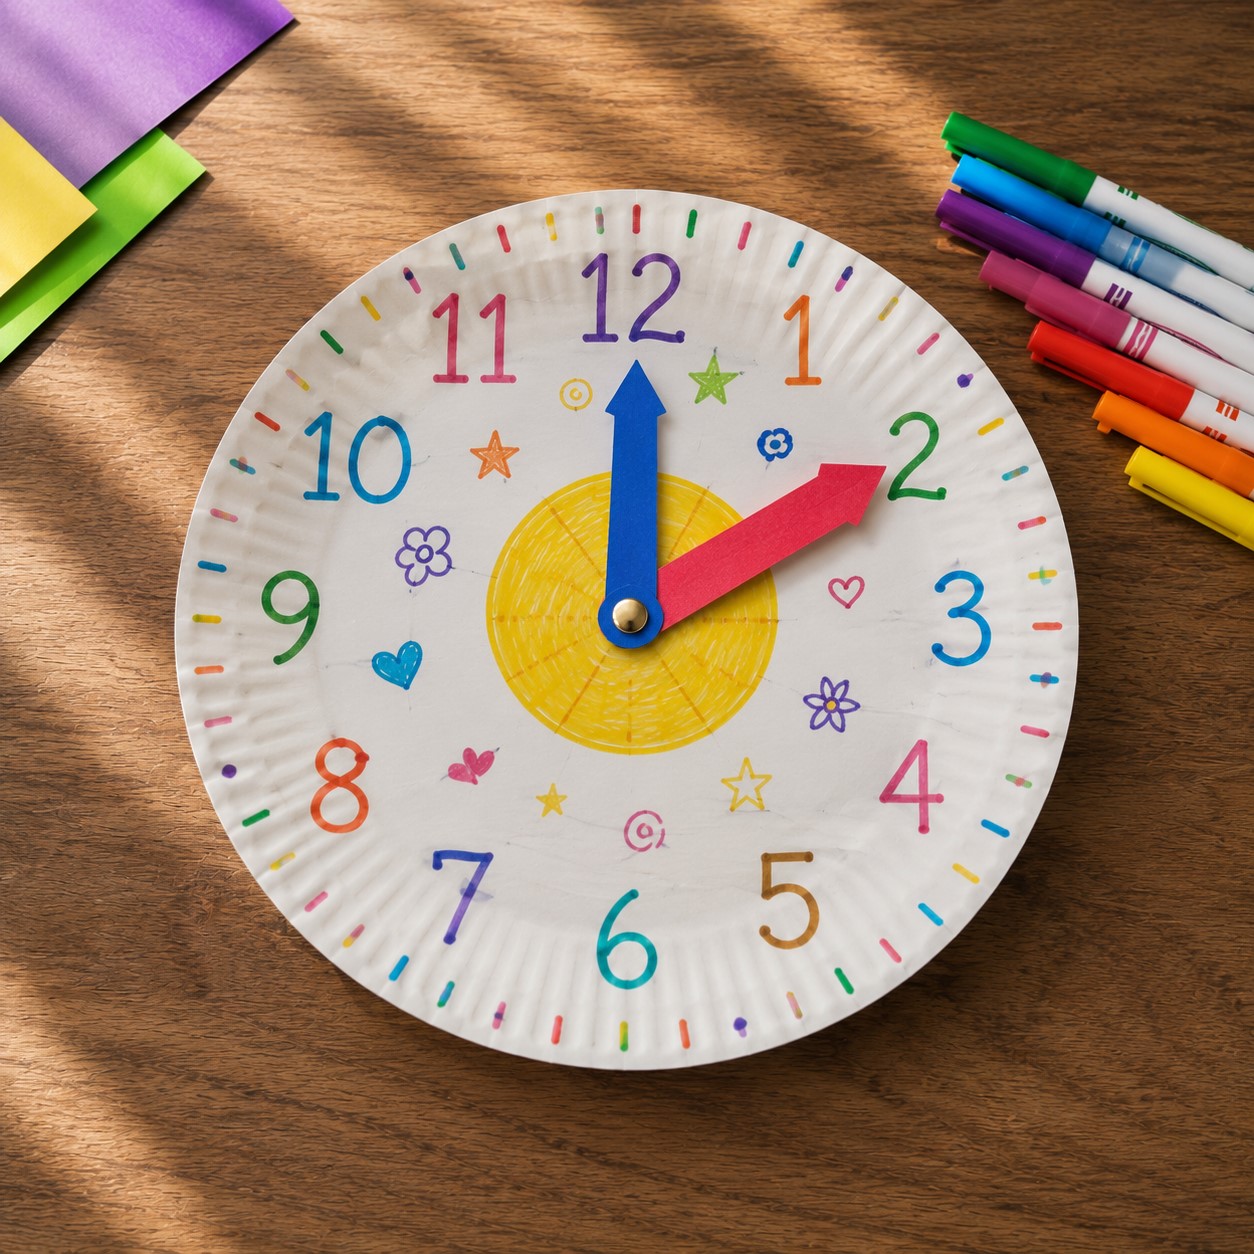
5. Paper Plate Clock
This one works beautifully as both a craft and a sneaky learning activity for younger children. All you need is a paper plate, markers, and two strips of paper for the clock hands.
Write the numbers one through twelve around the edge of the paper plate in the correct clock positions. Cut two strips of paper in different lengths for the hour and minute hands. Use a brass fastener or a small piece of rolled tape through the center to attach both hands so they can rotate freely.
Decorate the clock face with colors, patterns, and designs that reflect the child’s personality. Let them choose a favorite color scheme. Let them add decorative elements around the numbers.
Furthermore, once the clock is finished, younger kids can use it to practice telling time in a hands-on and personal way. Telling time on a clock they made themselves feels completely different from a worksheet. The personal investment makes the learning stick in a way that formal practice often does not.
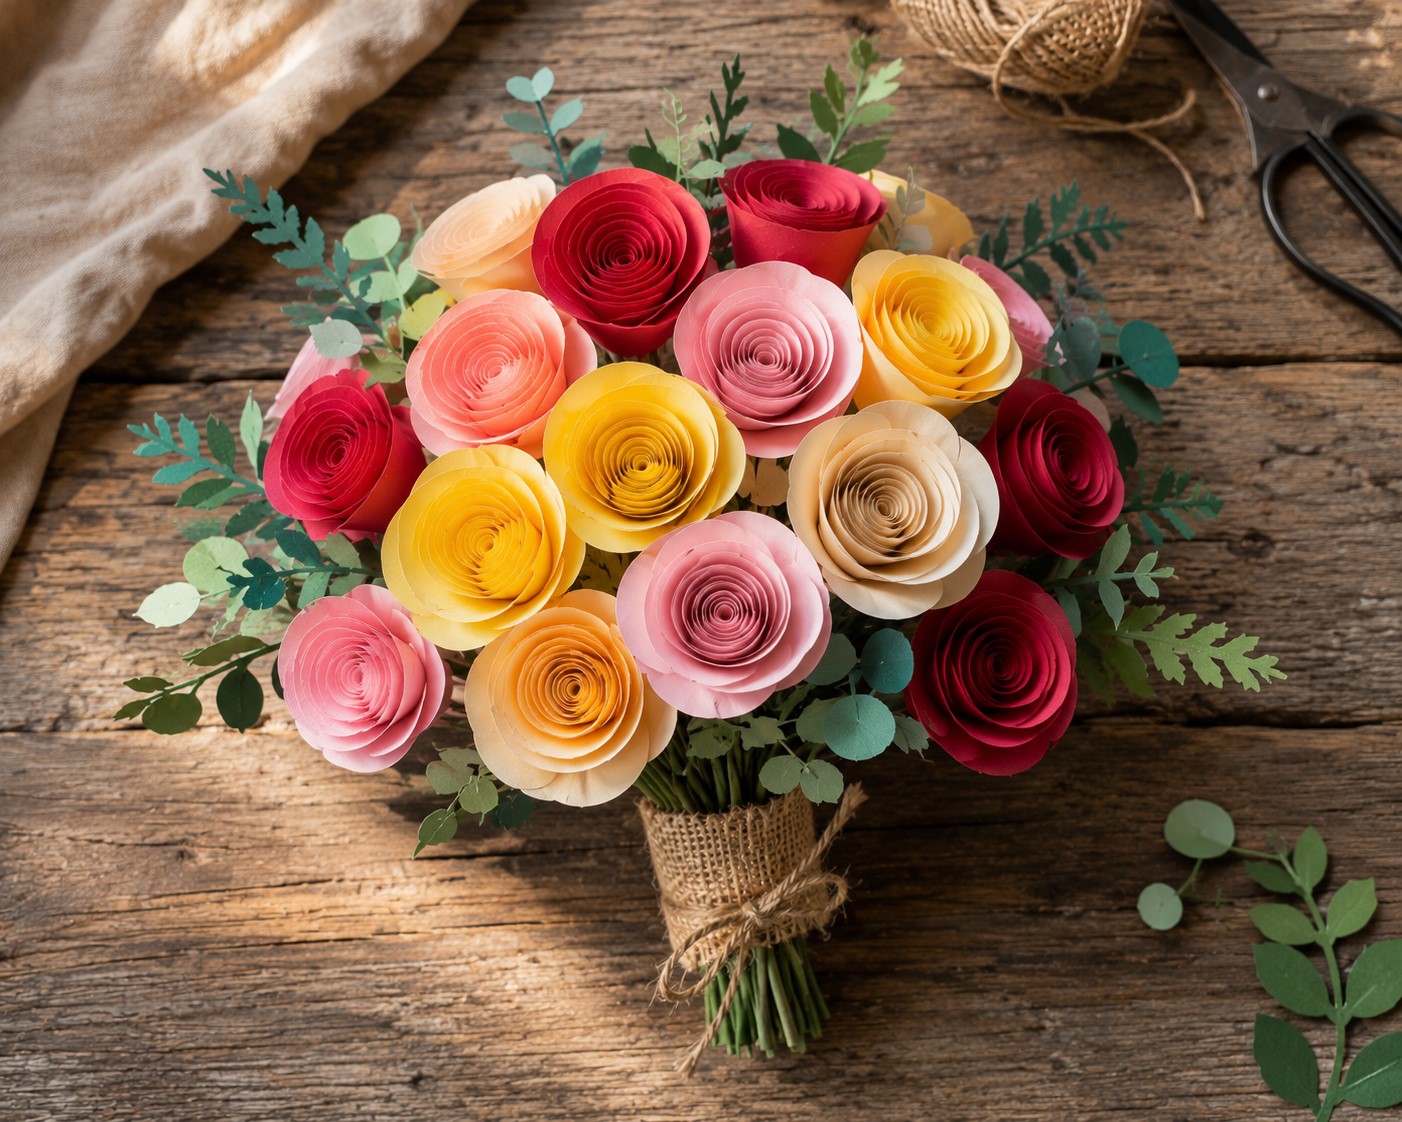
6. Rolled Paper Flowers
These are genuinely beautiful and take almost no time at all to make. The results look far more impressive than the effort involved and kids feel enormously proud of them.
Cut a circle from colored paper. Then cut a spiral from the outside edge of the circle working inward continuously until you reach the center. You should end up with one long spiral strip still attached at the center point.
Starting from the outside end of the spiral, roll the paper tightly inward toward the center. When you reach the end, release slightly and let the coil loosen just a little. Hold the center base and glue it to a small square of paper to hold the flower shape in place as it dries.
The result is a beautiful three-dimensional paper rose that looks genuinely stunning. Additionally, different paper colors and sizes produce completely different flower varieties. A group of kids making rolled flowers together ends up with a gorgeous paper bouquet in minutes. These make wonderful gifts, cards, and room decorations that genuinely impress anyone who receives them.
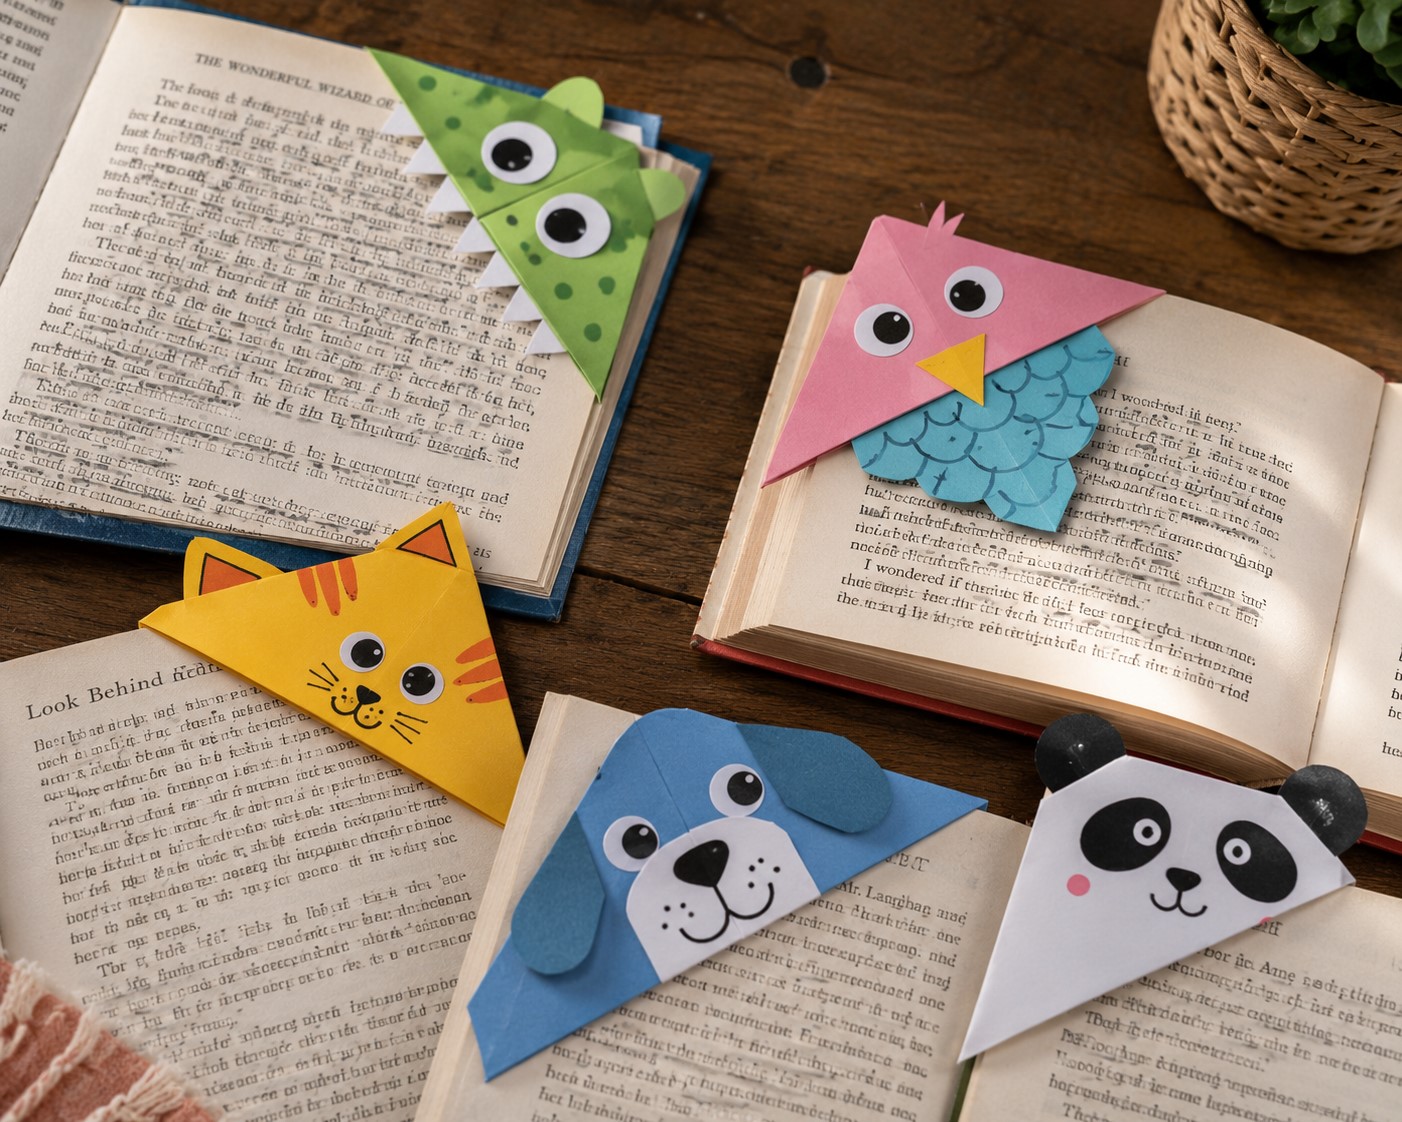
7. Paper Bookmark Corner
Every book-loving child needs this in their life. And even children who are not yet enthusiastic readers tend to love making these because the finished product is so satisfying and immediately useful.
Cut a square of paper approximately ten centimeters by ten centimeters. Fold it diagonally to form a triangle. Fold the right corner up to the top point and crease. Fold the left corner up to the top point and crease.
Unfold those last two folds. Tuck the right corner into the front pocket of the triangle. Tuck the left corner into the same pocket. You should now have a neat triangular pocket that fits perfectly over the corner of a book page.
Decorate the front with a face, pattern, or design using markers. A simple pair of eyes and a smile transforms it into a monster bookmark. A drawn beak and two wings make it a bird. The decorating possibilities are honestly endless.
Moreover, this craft has a built-in purpose that makes it feel genuinely meaningful rather than decorative. Kids use it immediately. They show everyone their bookmark. They protect it carefully. A paper craft that becomes a daily-use item is always a winner.
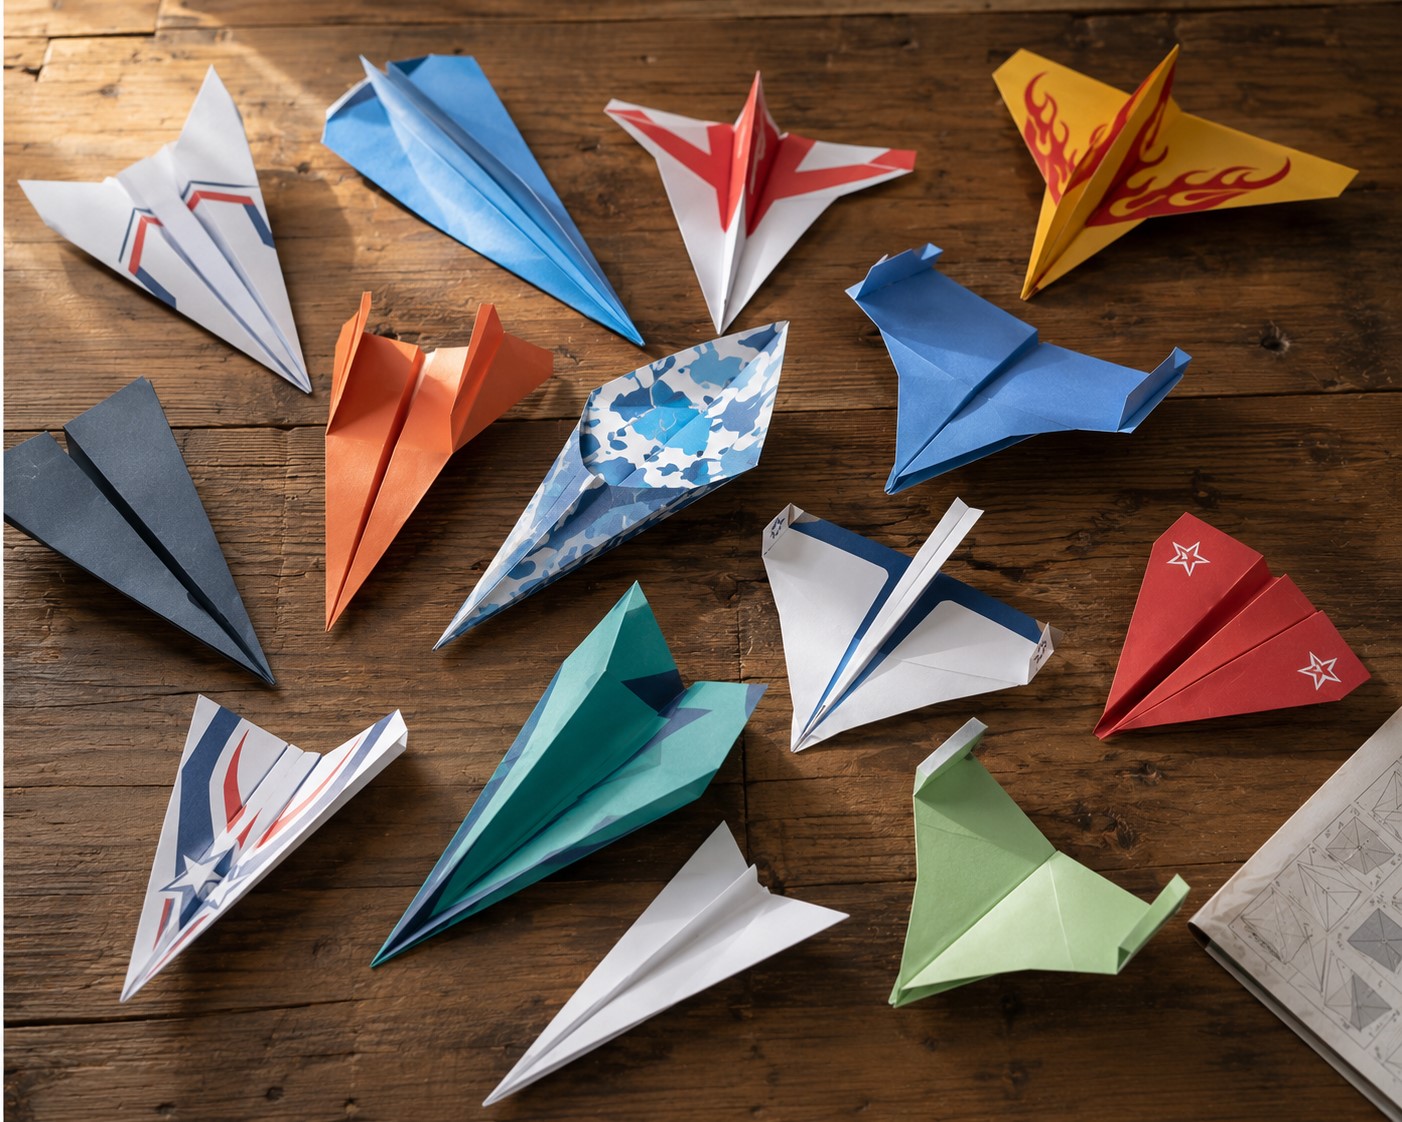
8. Paper Airplane Fleet
No list of ten-minute paper crafts is complete without paper airplanes. Obviously. However, instead of just making one airplane, challenge kids to build a whole fleet of different designs and then test which design flies best.
The classic dart is the fastest and most straightforward.
Fold the paper in half lengthwise to create a central crease. Next, bring the top corners down so they meet at the center line. Then fold the new diagonal edges inward toward the same center crease again. Finally, fold the shape in half along the original crease, and bring the “wings” down so they sit neatly alongside the body. Launch with a confident flick of the wrist.
The wide glider uses the same basic steps but the wings are folded much wider and flatter. This design sacrifices speed for gentle floating distance. The stunt plane involves folding small winglets up at the ends of the wings which causes it to curve and loop during flight.
Subsequently, testing all three designs side by side teaches kids naturally about aerodynamics, wing shape, and the relationship between design and performance. Distance competitions, accuracy competitions, and stunt competitions all emerge organically from this one activity. Therefore, a paper airplane session can genuinely fill an entire afternoon once the competitive element takes hold.
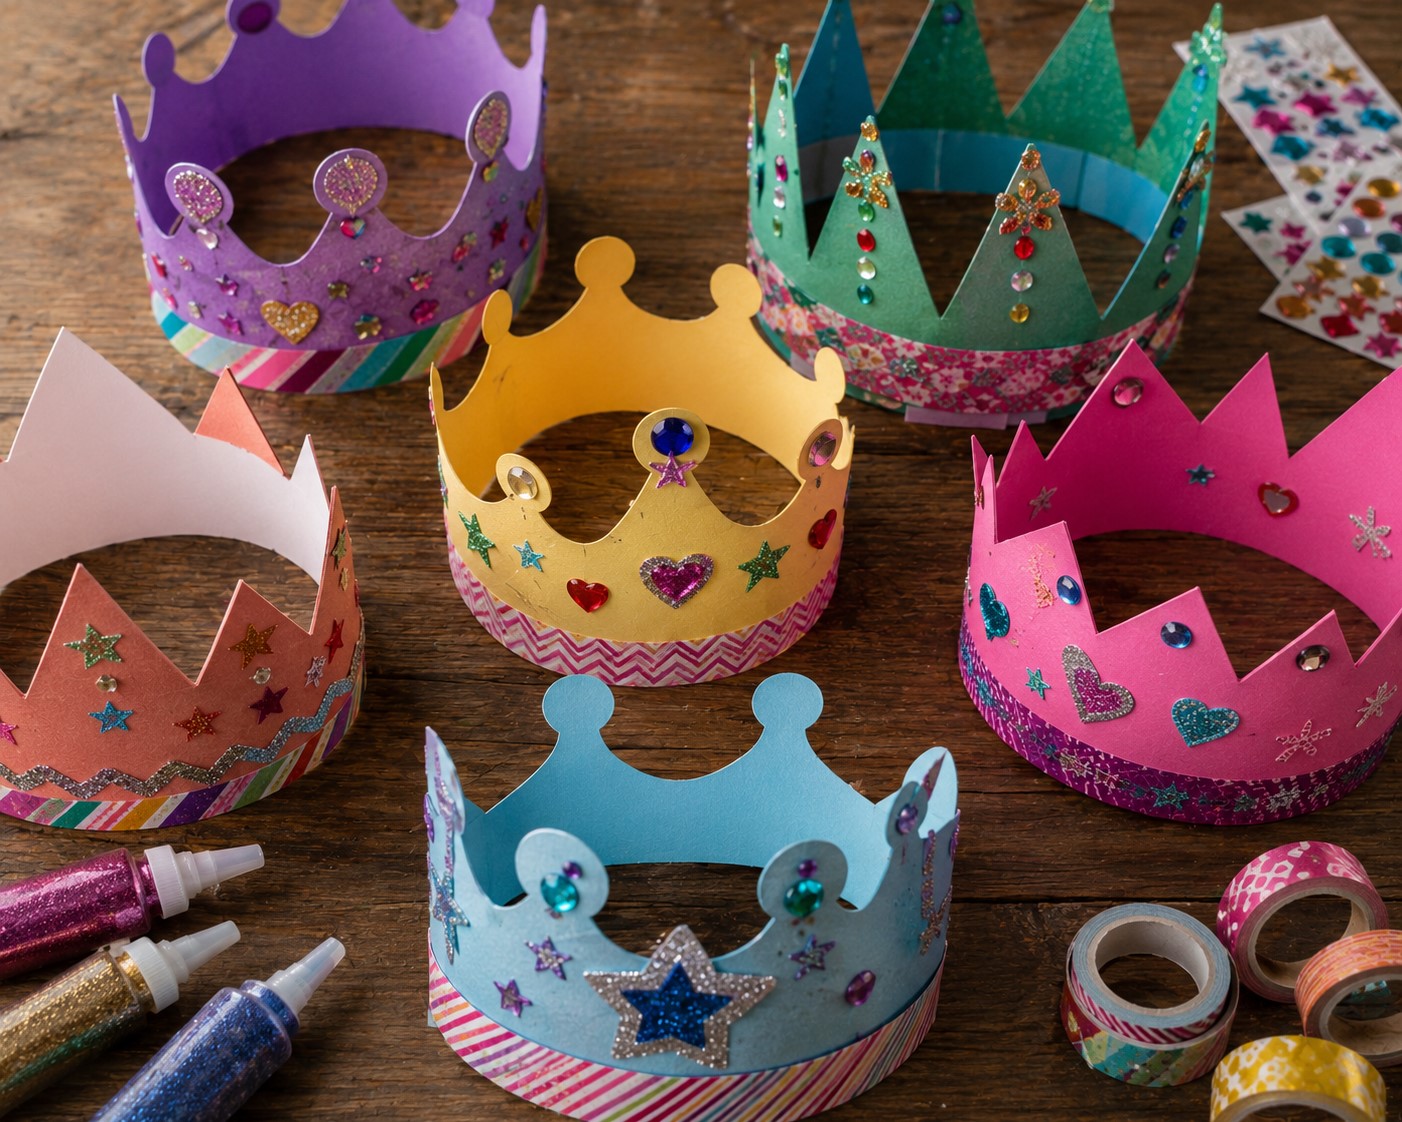
9. Paper Crown
Every child deserves a crown at some point. And making your own is significantly more satisfying than wearing a store-bought one that belongs to no one in particular.
Take a long strip of paper approximately eight centimeters wide and long enough to wrap around a child’s head with overlap. Along the top edge, draw and cut a series of points, zigzags, or rounded battlements to create the crown silhouette. Decorate with markers, stickers, glitter glue, and washi tape before assembling.
Overlap the ends and tape or staple them together to fit the child’s head perfectly. The crown is complete in minutes and the child wearing it will genuinely act differently for the rest of the afternoon. There is something about a crown, even a paper one, that activates a child’s imagination and confidence simultaneously.
Additionally, themed crowns make wonderful accessories for imaginative play sessions. A gold and red crown for a medieval knight. A blue and silver crown for an ice queen. A green leafy crown for a forest ruler. Each theme opens up a completely different imaginative world that keeps kids engaged long after the ten minute making session has ended.
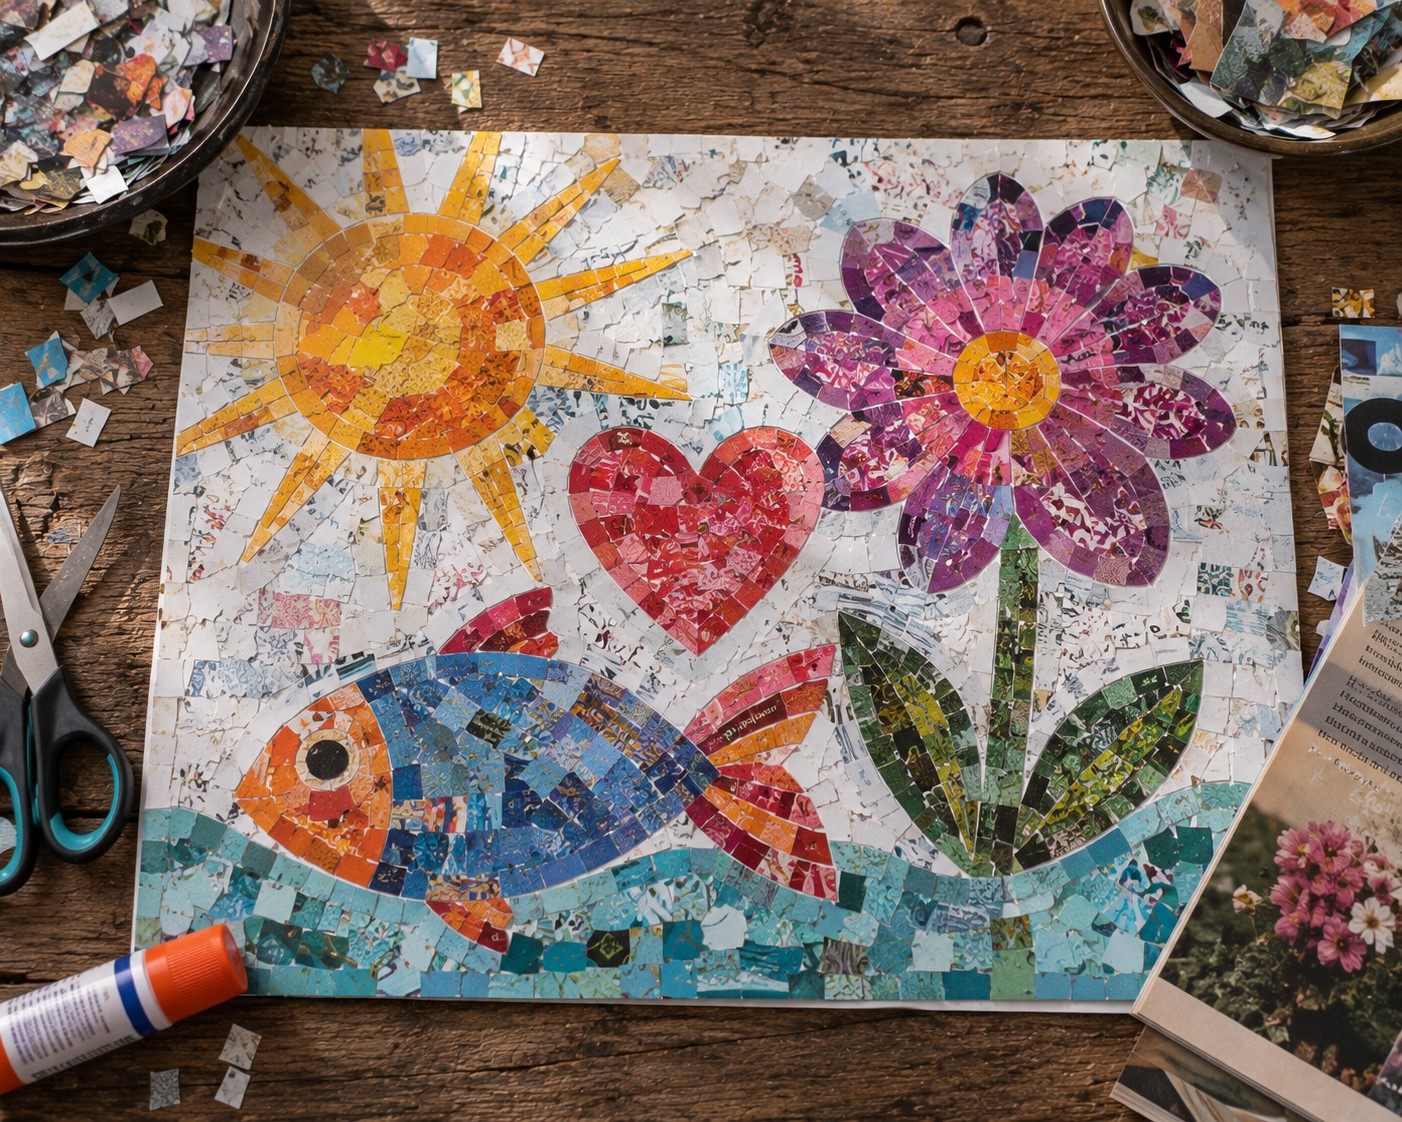
10. Paper Mosaic
This one is quieter and more focused than some of the others on this list. Consequently, it works beautifully for children who enjoy detailed, careful work and need a calming creative outlet.
Tear or cut old magazines, colored paper, or junk mail into small irregular pieces approximately one centimeter square. Draw a simple bold outline shape on a piece of white paper. A sun, a house, a fish, a flower, or a heart all work perfectly. Then fill the outline by gluing the small paper pieces inside it, fitting them together like a mosaic puzzle with tiny gaps between each piece.
The results look genuinely artistic and sophisticated. Moreover, the process is meditative and focused in a way that calms busy minds noticeably. Kids who are ordinarily restless often surprise themselves by sitting with this activity for far longer than ten minutes without realizing how much time has passed.
Furthermore, using magazine pages produces gorgeous color variety and unexpected texture combinations that a single color paper simply cannot achieve. The finished mosaic pieces look like real artwork and make wonderful additions to a bedroom wall or refrigerator gallery.
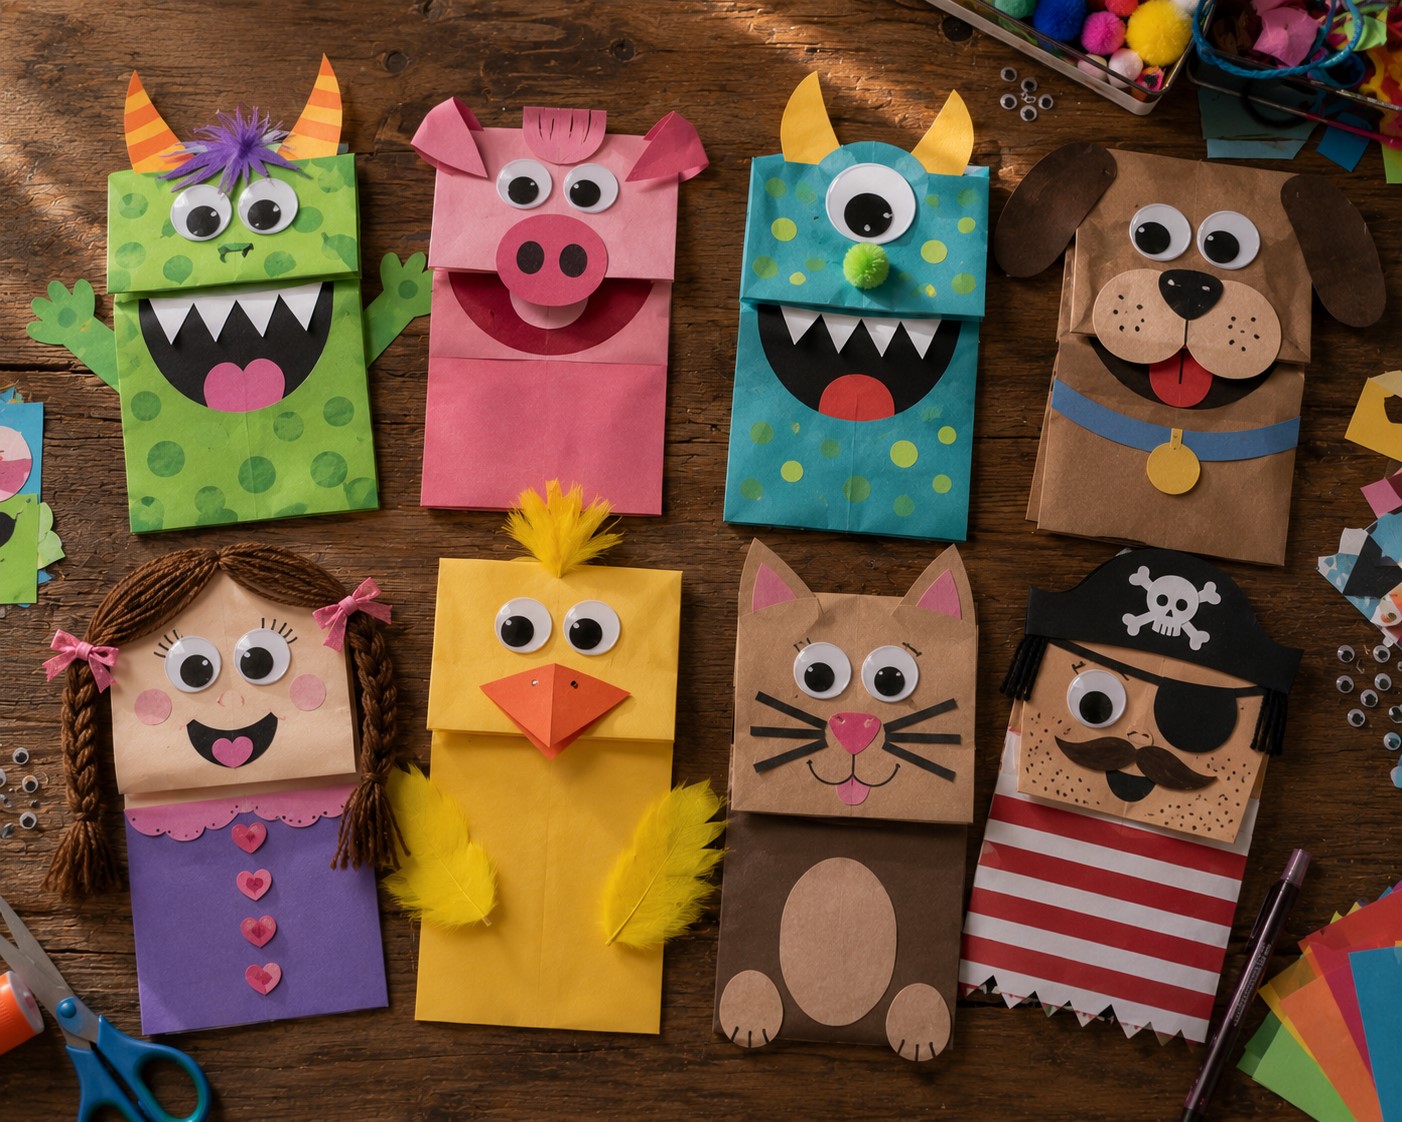
11. Paper Bag Puppet
If you have any paper bags in the house, this craft is waiting to happen. Paper bag puppets are fast to make and immediately inspire performance and storytelling the moment they are finished.
Flatten a paper bag so the rectangular bottom flap faces upward. This flap becomes the puppet’s mouth. Draw eyes and a nose on the upper part of the bag just above the flap. Draw teeth, lips, or a tongue on the inside of the flap itself so they show when the mouth opens. Add hair made from paper strips, ears cut from paper, and any other features that bring the character to life.
Slip your hand inside the bag with fingers in the upper section and thumb in the lower flap. Open and close your hand to make the puppet talk. The effect is immediate and delightful.
Additionally, making a cast of different puppet characters naturally leads to a puppet show. Older kids will write scripts. Younger kids will dive straight into improvised performances. Either way, the creative play that follows the making often lasts significantly longer than the ten minutes spent making the puppets themselves.
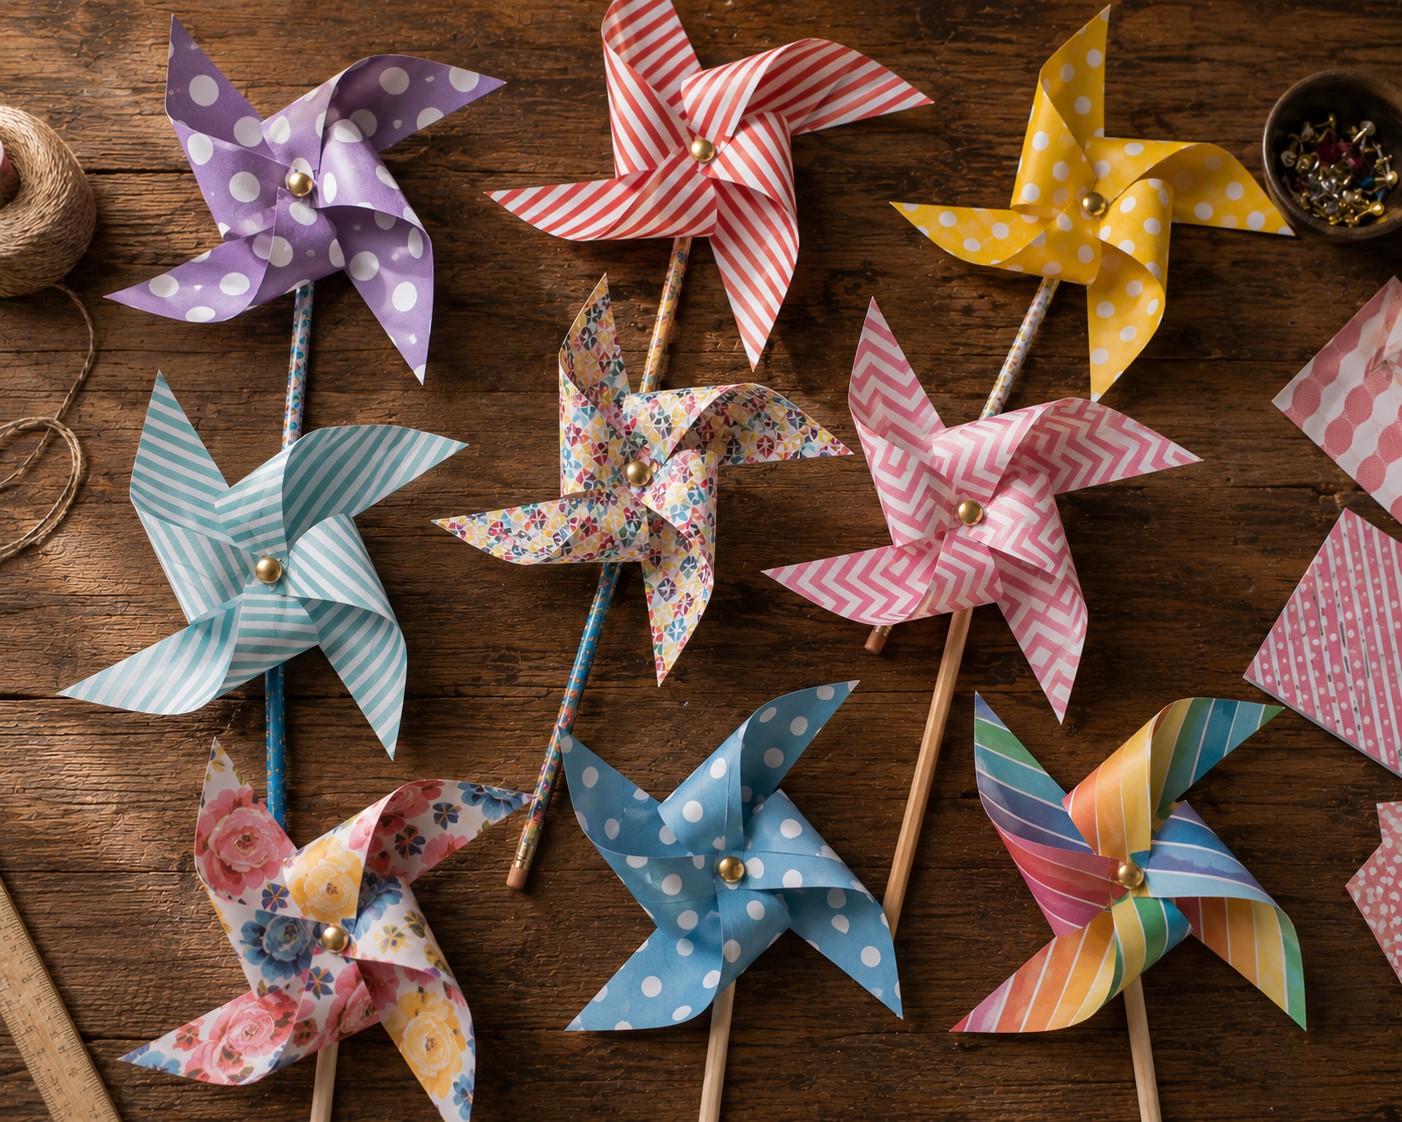
12. Paper Windmill
This one has the added thrill of movement. A paper windmill that actually spins in the breeze is one of those crafts where the finished product feels almost magical to a child who made it with their own hands.
Start with a square piece of paper. Draw light diagonal lines from each corner to the center without folding. Cut along each diagonal line from the corner toward the center, stopping about two centimeters before the center point. You should have eight loose points radiating from an uncut center square.
Fold every other point into the center and hold in place. Push a brass fastener through all four layered points and then through the center of the windmill. Open the fastener at the back to secure everything together. Attach to a pencil or stick and blow gently to test the spin.
The windmill spins beautifully and kids immediately take it outside to run with it or hold it out of a car window. Therefore, this craft has a built-in outdoor extension that gets children moving after the making session. Moreover, decorating the paper before cutting, with stripes, patterns, or gradient colors, produces a spinning color effect that looks genuinely mesmerizing in motion.
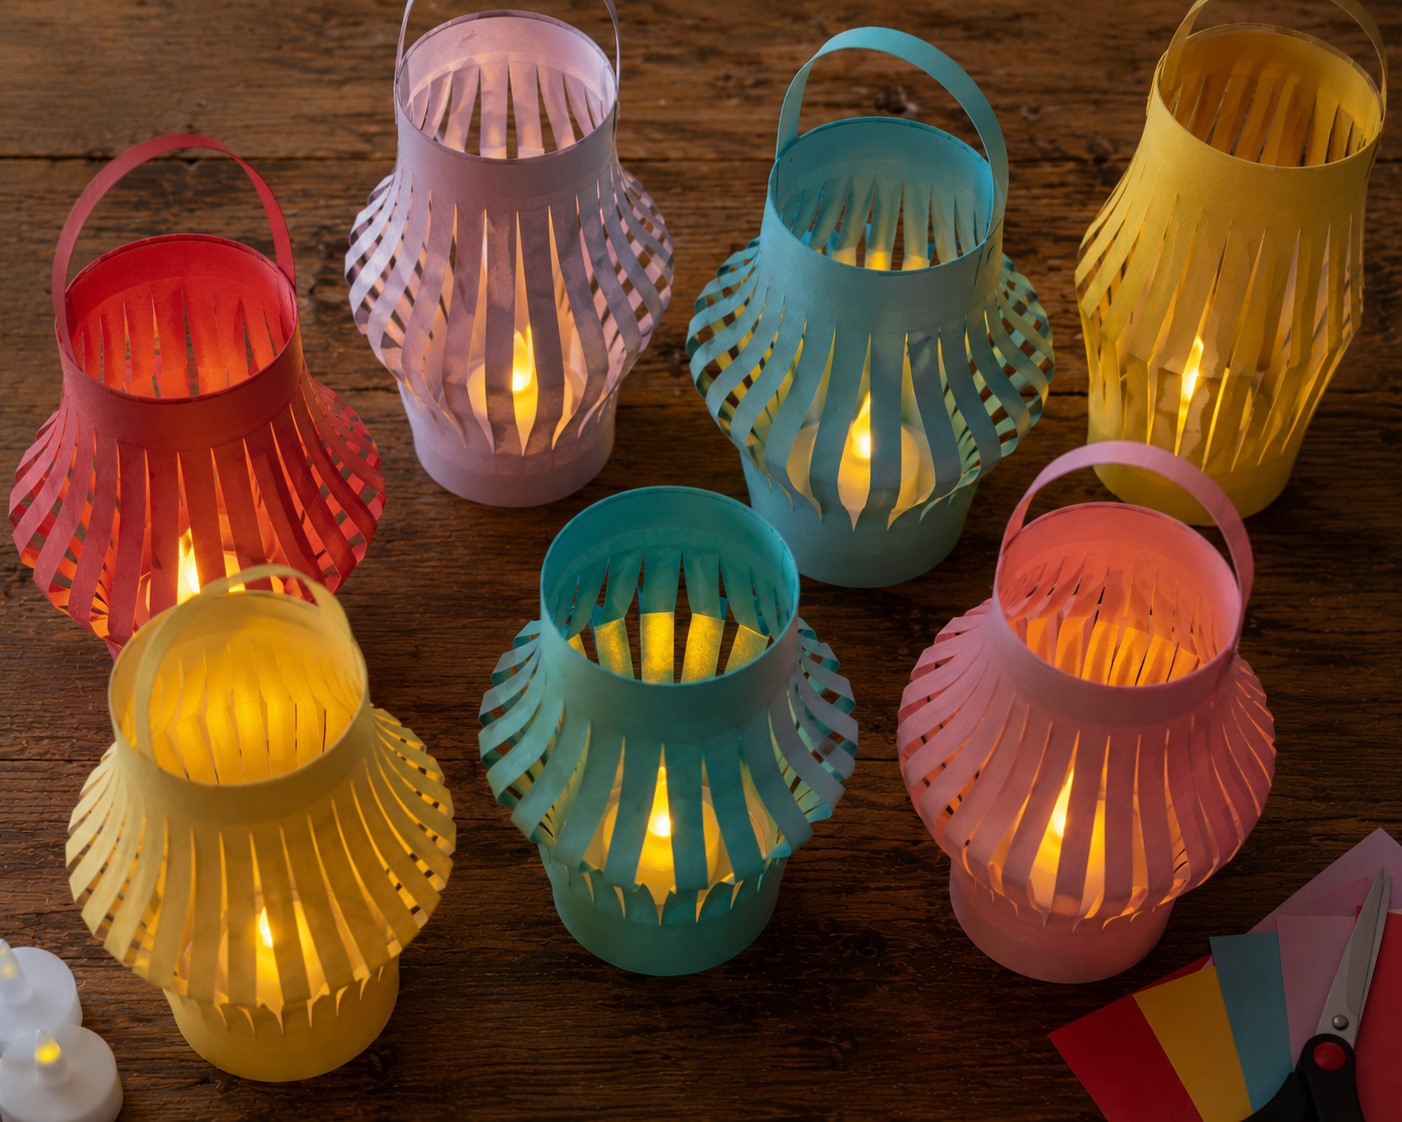
13. Paper Lantern
We actually covered a more detailed version of paper lanterns in a previous post on this blog. However, the basic version is quick enough to comfortably fit into a ten-minute craft session and the results are always beautiful.
Take a rectangle of colored paper. Fold it in half lengthwise. Starting from the folded edge, cut parallel lines across the paper stopping about two centimeters from the open edge. Unfold and roll into a cylinder, connecting the two short edges with tape or glue. Add a handle strip across the top.
The slits fan outward as the cylinder forms, creating the classic lantern silhouette. Place a battery-operated tea light inside for a safe and beautiful glowing effect. Consequently, this quick version works perfectly as a party decoration, a bedroom light, or a festive seasonal display for any occasion.
Don’t miss this: How to Turn Old Crayons Into New Ones Using a Muffin Tin
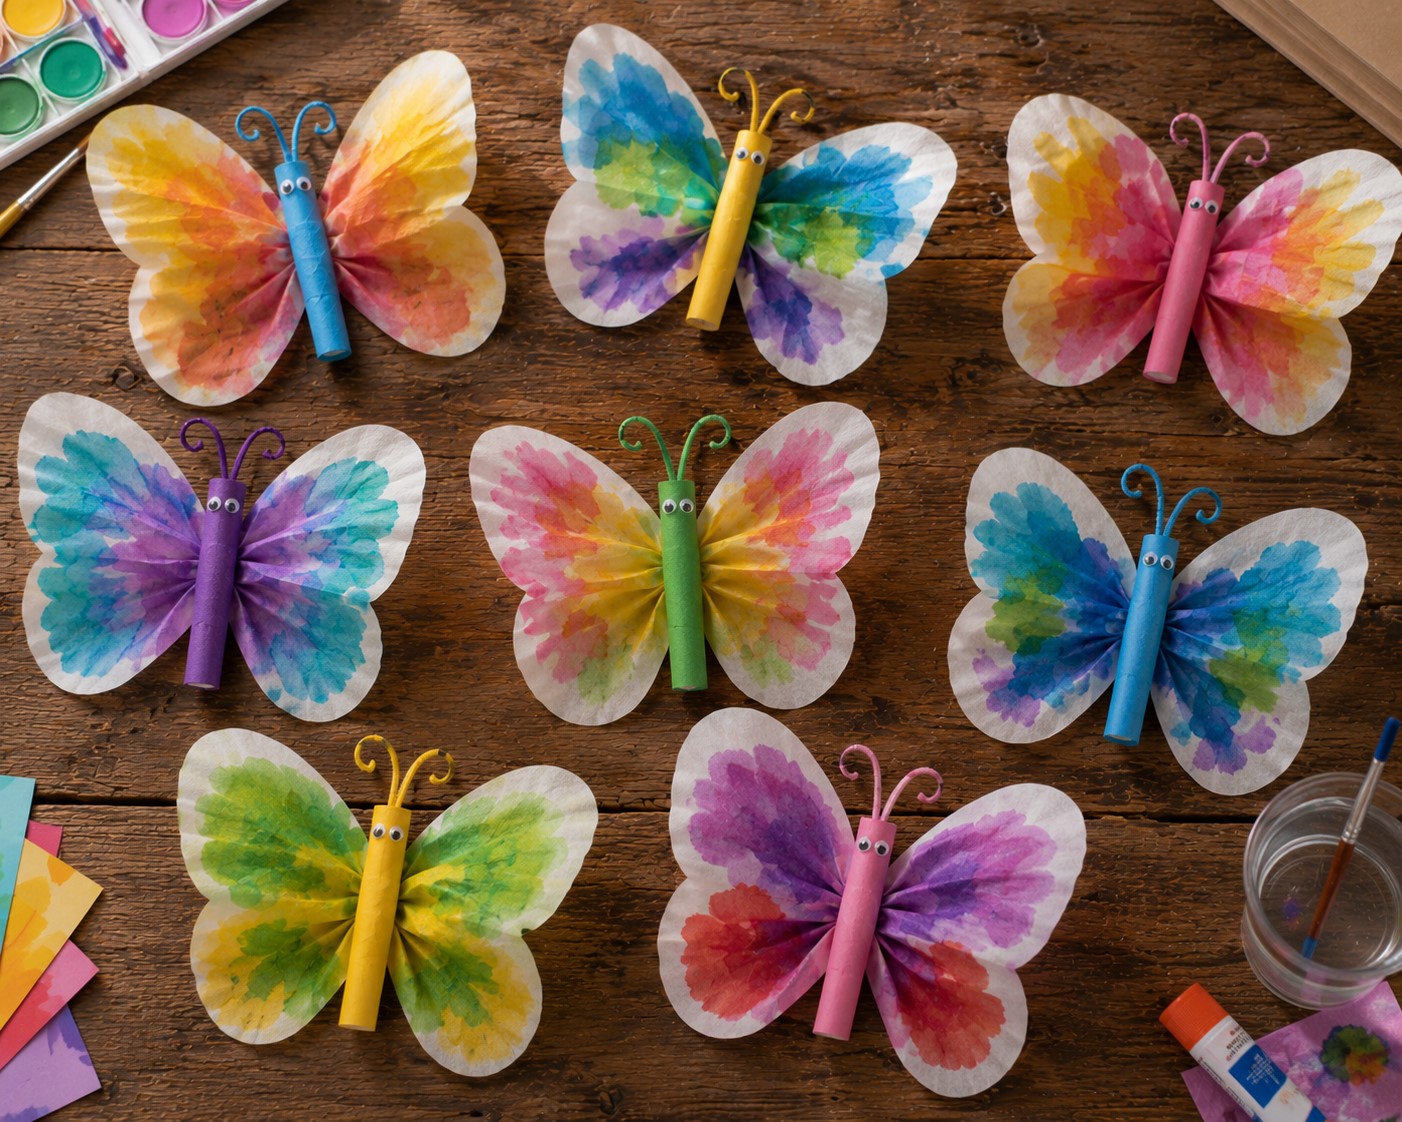
14. Paper Butterfly
This craft uses the satisfying symmetry of paint blotting to create butterfly wings that look genuinely stunning with almost zero artistic effort required.
Fold a piece of white paper in half. Open it flat. On one half only, drop small spots of different paint colors using a brush or your fingertip. Fold the paper closed again and press firmly all over the surface with your palm. Open carefully to reveal a perfectly symmetrical paint pattern on both halves.
While the paint dries, cut a simple butterfly wing outline from the folded paper so both wings are identical. Add a rolled paper body glued down the center. Draw antennae with marker or twist small pipe cleaners and tuck them under the body.
Furthermore, no two butterfly prints ever look the same. Each one is genuinely unique because the paint spreads unpredictably every time. That unpredictability is part of the magic. Kids who are self-conscious about their artistic abilities love this craft specifically because the beautiful result happens almost by itself with very little skill required.
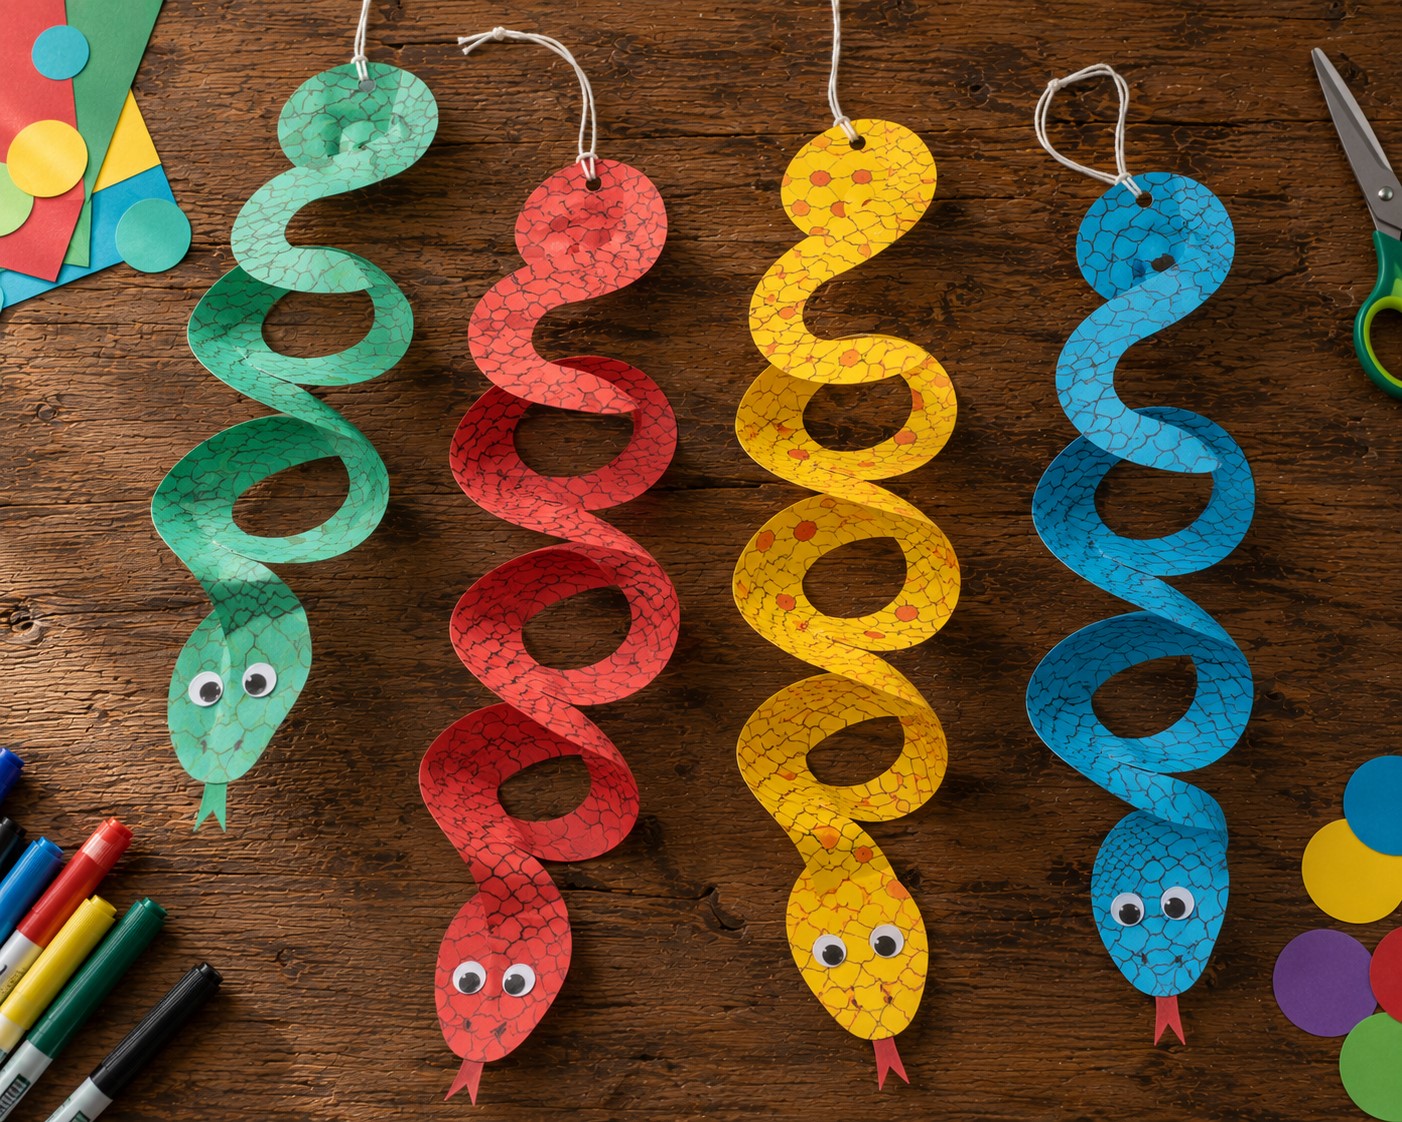
15. Paper Snake
This is the last craft on our list and it is honestly one of the most satisfying of all fifteen. The paper snake is simple, fast, and the finished result wiggles and moves in a way that genuinely delights every child who makes one.
Cut a circle from colored paper. Starting from the outside edge, cut a continuous spiral inward toward the center just as you did for the paper flower earlier. However, instead of rolling this one up, leave it flat and cut a small triangular snake head at the center end.
Draw scales, patterns, and eyes with markers to bring the snake to life. Hold the head end up and watch the body spiral hang and sway below it. The snake wiggles realistically with every small movement of the hand holding it.
Additionally, making a collection of snakes in different sizes and colors produces a hanging mobile when they are suspended from a stick or coat hanger with different lengths of thread. The mobile sways and twists gently in air currents and looks genuinely beautiful as a room decoration. Therefore, this simple ten-minute craft has the potential to become a beautiful and lasting piece of room decor with very minimal extra effort.
Making the Most of Your Paper Craft Session
Now that you have fifteen ideas ready to go, let me share a few practical tips that will make your craft session run smoothly from start to finish.
First of all, set everything up before the kids sit down. Having paper cut to the right sizes, markers uncapped, and glue sticks ready means the session starts with momentum rather than fidgety waiting. That first minute of engagement is genuinely crucial for keeping younger children focused and enthusiastic throughout.
Additionally, resist the urge to demonstrate too thoroughly before letting kids try. A quick one-sentence explanation followed by hands-on trying works far better than a long demonstration that children sit through passively. Let them make mistakes. Let them figure things out. The learning that happens through doing is always deeper and more lasting than the learning that happens through watching.
Furthermore, display the finished crafts immediately and prominently. Tape them to the wall. Line them up on the windowsill. Hang them from a string across the room. When kids see their finished work displayed and valued, they feel proud, motivated, and eager to make more. That positive feedback loop is honestly one of the most powerful things you can create in a craft session.
Finally, keep a dedicated paper craft box stocked and accessible at all times. A shoebox filled with colored paper, a few pairs of scissors, a glue stick, and some markers means that the next time you see that bored restless look on a child’s face, you can simply point to the box and watch the magic happen all by itself.
Because ultimately, paper and a pair of scissors in the hands of a child is one of the most powerful creativity tools in the world. It always has been. And it always will be.
If you love this post then take a look at my other craft post below for even more inspiration:
-
A Step-by-Step Guide to Making Air Dry Clay Bowls With Your Kids
-
How to Make the Cutest DIY Butterfly Mobile With Your Kids This Weekend
-
A Parent’s Guide to Starting a Mini Craft Corner for Your Kids at Home
-
How to Do Easy Block Printing With Kids Using Sponges and Foam
Leave a Reply