Okay, so picture this: it’s Saturday morning, the to-do list is staring you down, but honestly? You just want to do something fun and memorable with your daughter. Something that doesn’t involve screens, doesn’t cost a fortune, and doesn’t require you to be some kind of Pinterest-perfect parent.
That’s where the fairy garden comes in.
I’ve been doing crafts with kids in my classroom for years crafts like sensory bins, science experiments, collage projects, you name it and I can tell you with full confidence: a DIY fairy garden is one of those rare activities that feels like pure magic to kids while being surprisingly relaxed for adults. It’s open-ended, it’s creative, and it lets little imaginations run absolutely wild.
Whether your daughter is 4 or 10, whether you have a backyard or just a windowsill, this project is completely doable. So grab a cup of coffee, pull out some supplies, and let’s make something enchanting together.
And hey, if you’re still warming up to crafting with your kids in general, go check out How to Start Crafting with Kids as a Beginner first, it’s a great place to ease into things without feeling overwhelmed.
What Even Is a Fairy Garden?
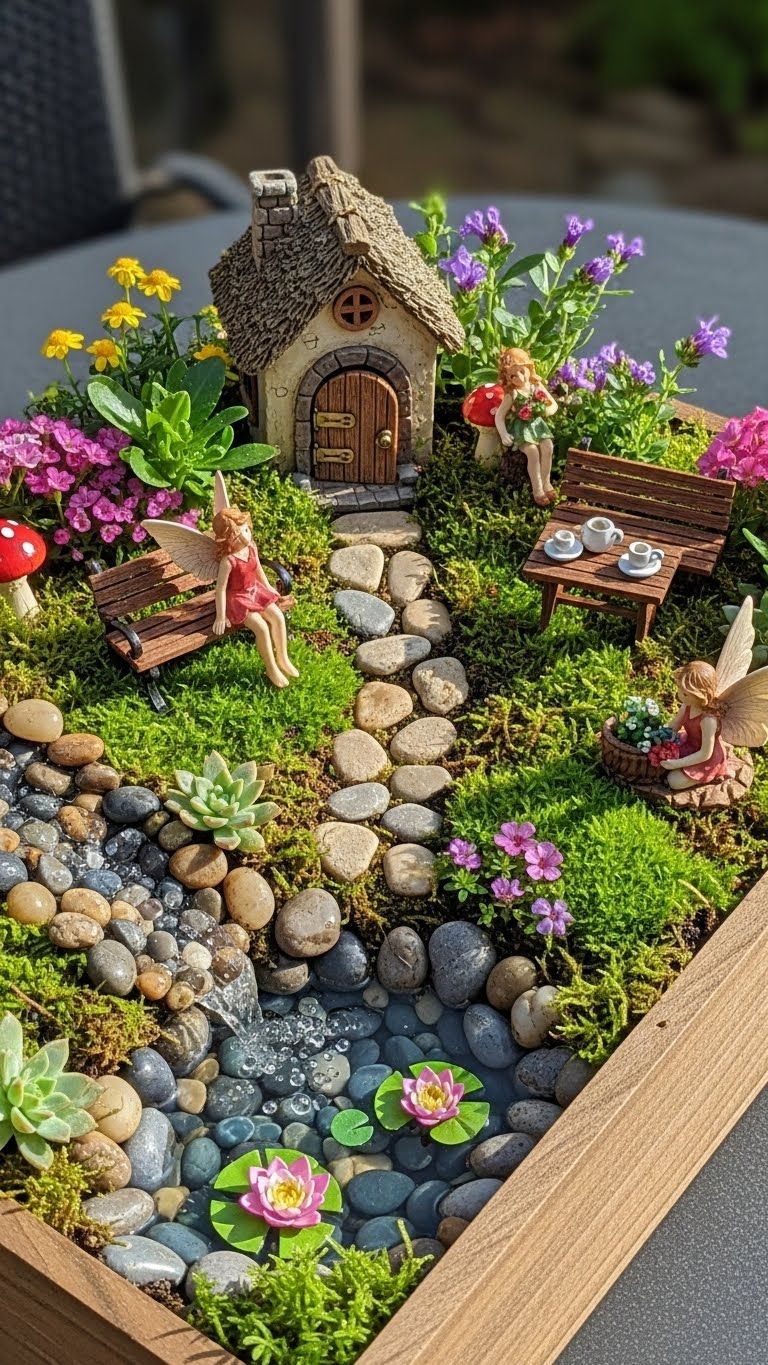
If you’ve never made one before, a fairy garden is basically a miniature world like a tiny, whimsical landscape designed for (imaginary) fairies to live in. Think little houses made from twigs, pathways lined with pebbles, teeny flower beds, maybe a tiny bench or a wishing well. It’s essentially a dollhouse, but outdoors (or in a pot), and made mostly from natural and found materials.
The beauty of it is that there’s no right or wrong way to do it. Every fairy garden ends up being totally unique because it reflects whoever made it. Your daughter’s garden might have a glittery fairy door and a rainbow bridge. Or it might have a gnome village with a mushroom market. The story is entirely hers to tell.
As a teacher, I love this kind of project because it blends storytelling, fine motor skills, nature exploration, and artistic expression all at once. It’s basically a curriculum unit disguised as pure fun.
What You’ll Need (Nothing Fancy, I Promise)

Here’s the thing about fairy gardens the supply list looks a little different every time because half the fun is foraging for materials. That said, here’s a good starting point:
For the container, you can use a terracotta pot, an old wooden crate, a shallow plastic bin, or even a corner of your actual garden bed if you have outdoor space. A wide, shallow container works best because it gives you room to create different “zones” in your fairy world.
For the base, you’ll need potting soil, sand, or a mix of both. If you want some of your garden to be an actual living space for real plants, go with potting mix. If it’s purely decorative, sand or regular dirt from the yard works perfectly.
For the landscaping, think of small rocks, pebbles, and gravel for pathways. Moss (real or fake) makes gorgeous ground cover. Pinecones, bark pieces, and twigs become furniture and fencing. Shells can line little ponds. Acorns become tiny bowls or seats.
For structures, this is where it gets creative. You can buy miniature fairy garden accessories at craft stores they’re usually pretty affordable or you can make everything from scratch using sticks, clay, bottle caps, and whatever you have lying around.
For plants, small succulents, moss, thyme, and clover all work beautifully and stay in scale with the miniature world. If you want to double up on the fun, you could even incorporate a mini herb garden into the design. Speaking of which How to Create a Mini Herb Garden Planter Craft With Kids has some really lovely ideas for weaving living plants into a craft project like this.
Setting Up Your Workspace
Before you dive in, take five minutes to set up your space in a way that makes the whole process easier and less chaotic. I know from experience (classroom life, remember?) that a little prep goes a long way when you’re crafting with kids.
Lay down an old tablecloth or some newspaper to protect your surface. Set out all your materials in small piles or bowls so everything is visible and reachable. Have a spray bottle of water nearby if you’re using soil or clay. And if you’re working indoors, put a little tray or rimmed baking sheet under your container to catch soil and mess.
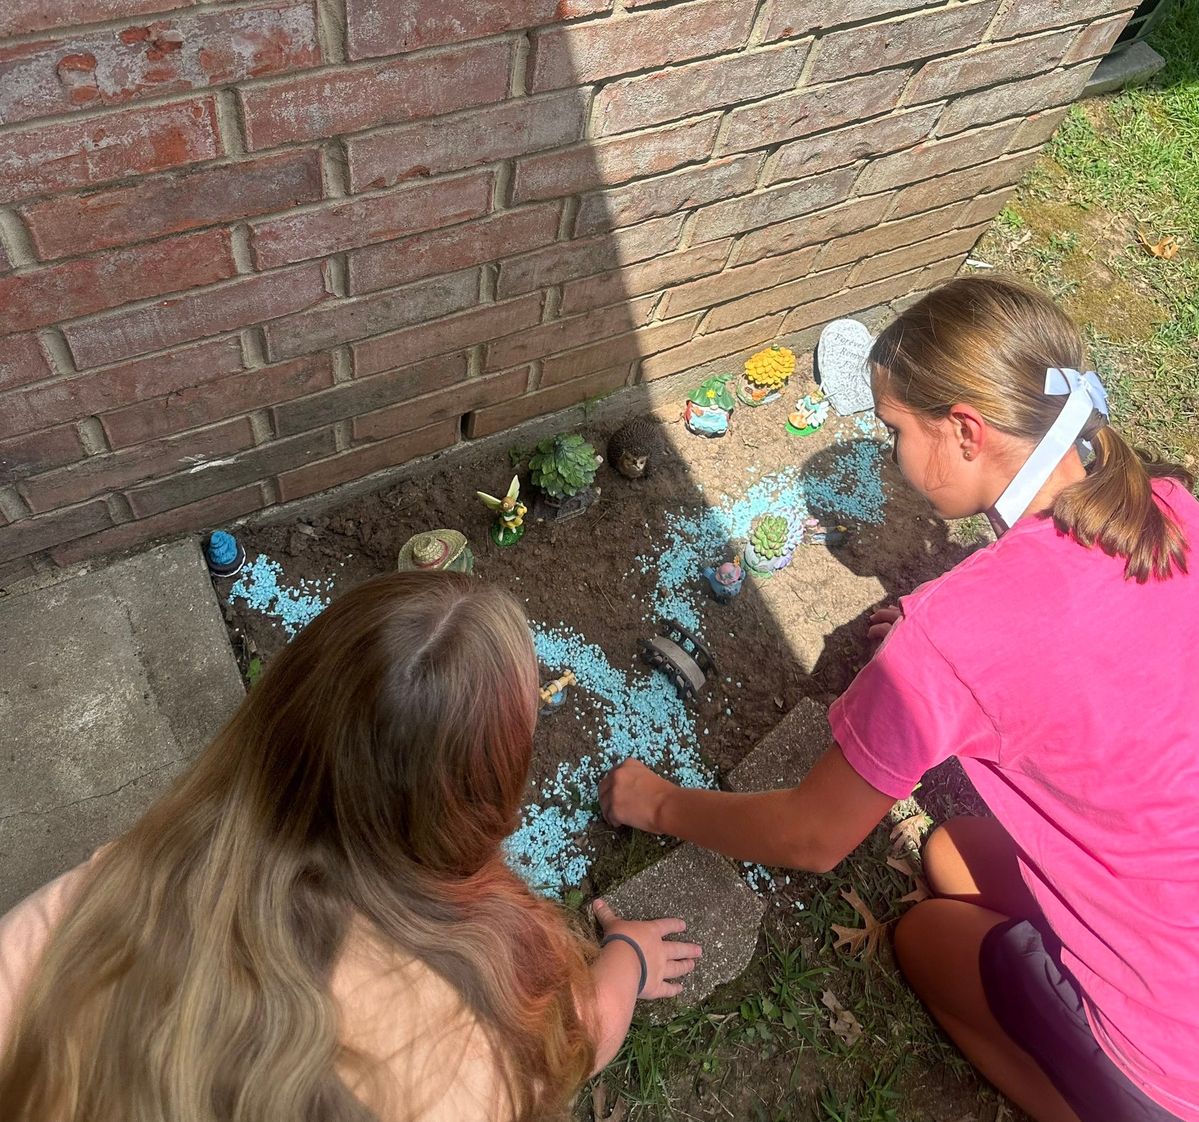
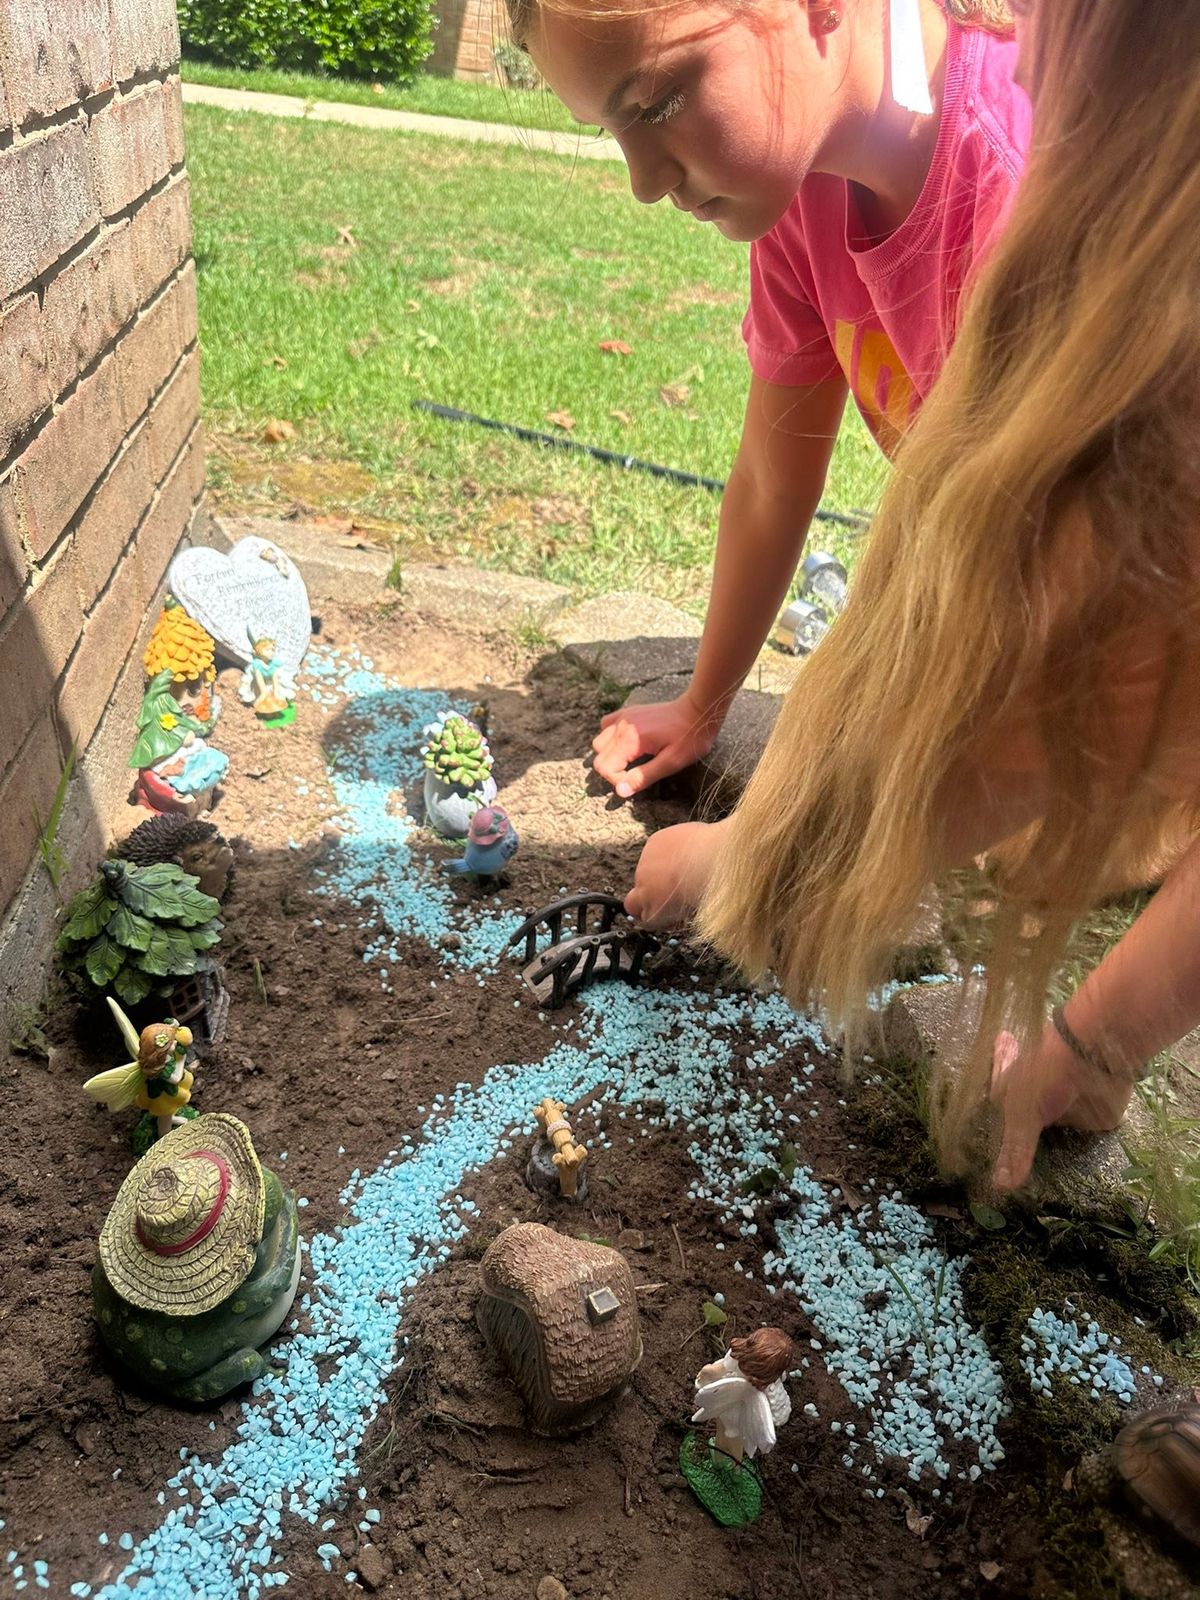
Talk with your daughter before you start about what kind of fairy world she wants to create. Does the fairy like flowers? Does she have a pet dragon? Is it a forest fairy or a beach fairy? Does she have any friends? The more of a story you build together upfront, the more intentional and meaningful the whole garden becomes.
This is also a great time to mention that if you’re thinking of creating a dedicated craft space at home for future projects, A Parent’s Guide to Starting a Mini Craft Corner for Your Kids at Home is full of practical tips that make crafting a regular and easy! part of your routine.
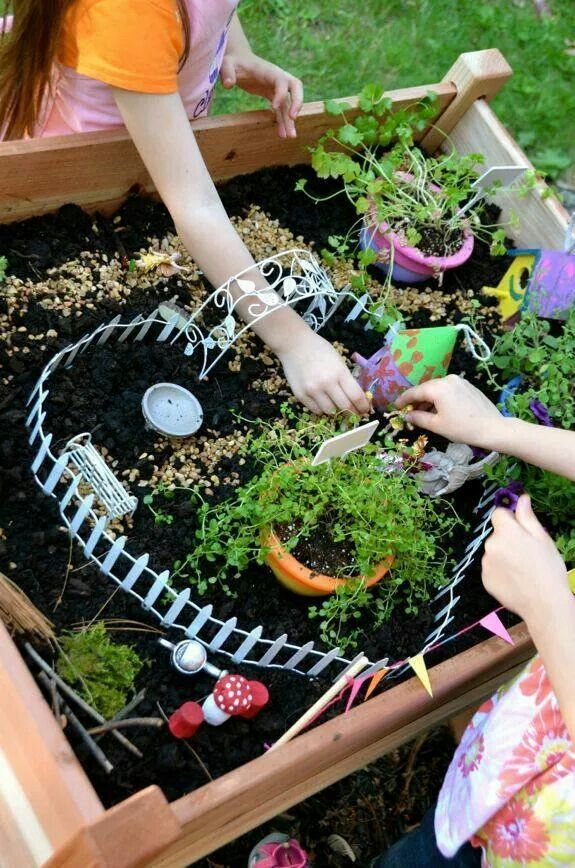
Step One: Build the Landscape
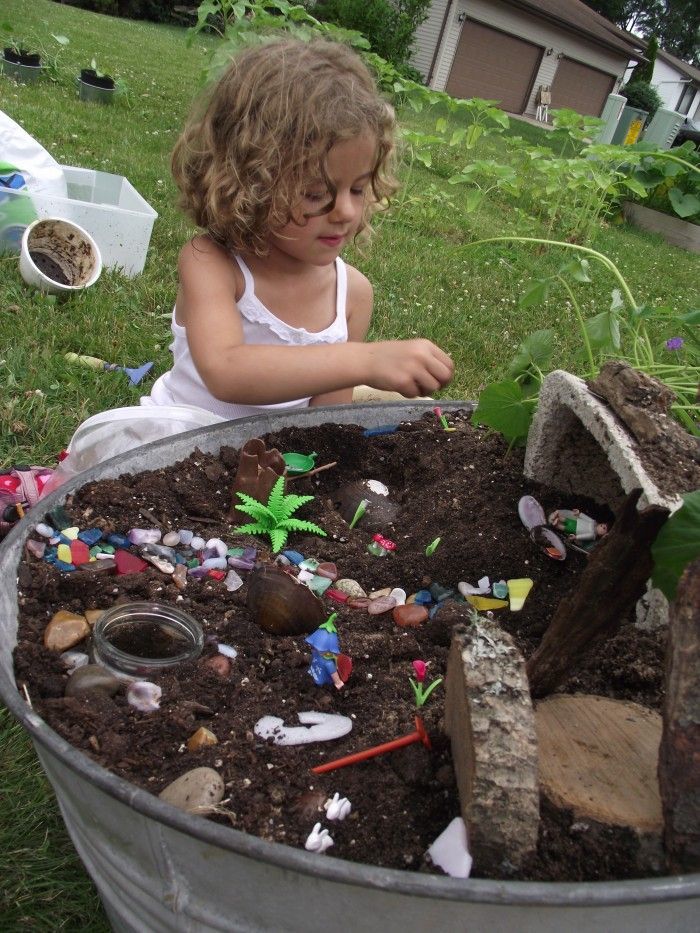
Start by filling your container about two-thirds full with your base material…soil, sand, or a mix. Now comes the fun part: shaping the land.
Push the material into hills and valleys to create different levels of terrain. A slight mound in one corner could become a fairy hill with a tiny door nestled into the side. A low, flat area could become the village square. Press down a little hollow and line it with small stones to make a fairy pond, you can even add a bit of blue cellophane or aluminum foil at the bottom to make it look like water.
Let your daughter lead this part. Her instincts about where things should go are going to be more imaginative than anything you plan out in advance. Your job here is mostly to be the “yes, and…” co-creator offer suggestions when she gets stuck, but mostly follow her vision.
Add pathways using gravel, crushed shells, or flat pebbles. Wind them around the garden to create the sense of a little world with places to go and things to discover.
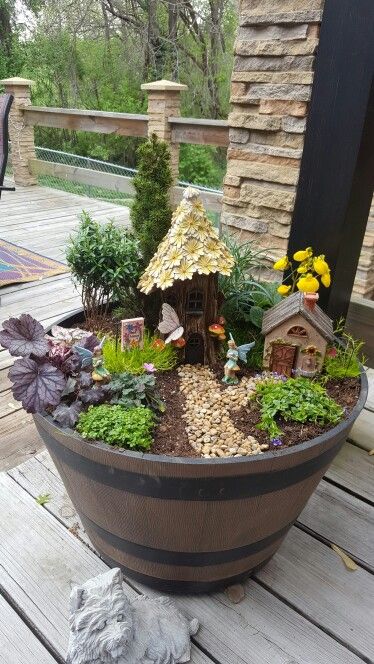
Step Two: Make the Fairy Furniture and Structures
This is probably the most creative part of the whole project, and honestly, it’s where the hours quietly disappear.
Twigs can be lashed together with string or hot-glued (you handle the glue gun) to make fences, tiny log cabins, arched doorways, and benches. Pinecone scales make great roof tiles. A large flat stone becomes a patio. Acorn caps turned upside down are perfect tiny bowls or fairy hats.
If you want to make a fairy door which is always a hit, cut a small arch shape from cardboard, paint it in a bright colour, and press it against a rock or a chunk of bark. Add a tiny button as a doorknob and your daughter will be convinced the fairies come and go through it at night.
For more elaborate structures, air dry clay is your best friend. You can sculpt mushroom houses, stone wells, little bridges, and stepping stones with it. It dries overnight without any baking and takes paint beautifully once it’s set. If you want to get really into it with clay, 20 Fun Air Dry Clay Crafts for Kids is packed with inspiration. And if you want to try making little bowls or dishes specifically, A Step-by-Step Guide to Making Air Dry Clay Bowls With Your Kids walks you through the whole process.
Step Three: Plant the Garden
Now it’s time to add the living elements, which are what really bring a fairy garden to life.
Small succulents are perfect because they’re hardy, stay small, and require almost zero maintenance. Thyme and creeping Jenny both have a lush, almost mystical look that works beautifully in miniature landscapes. Moss whether it’s the sheet moss you can buy at a craft store or real moss you find in your garden makes gorgeous ground cover between pathways and around rocks.
If you’re including real plants, make sure your container has drainage holes or you’re being careful not to overwater. Nestle the plants into the soil and press them in firmly so they’re stable. Then tuck smaller decorative elements likes pebbles, mushroom figurines, fairy doors in around the plants to fill in the gaps.
This is also a lovely moment to talk to your daughter about how plants grow, what they need, and what it means to take care of a living thing. Built-in nature lesson, right there.
Step Four: Add the Magic Details
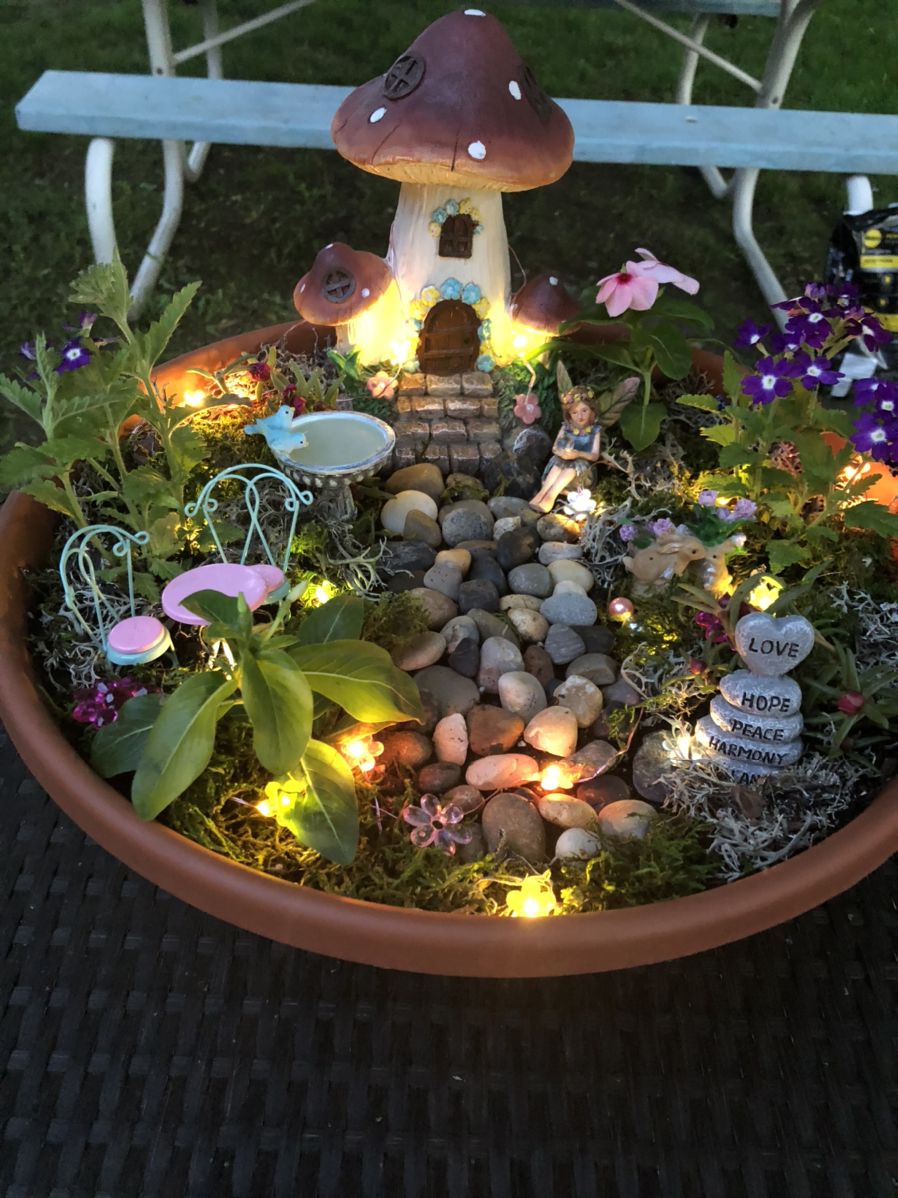
The difference between a nice little garden and a truly enchanting fairy garden is in the tiny details. This is where your daughter’s personality really shines through.
String a bit of twine between two twigs and hang tiny paper bunting flags from it. Scatter a few glass beads or rhinestones in the grass to look like dewdrops or fairy dust. Push a bent piece of wire into the soil to make a tiny lamp post, and add a small bead or button at the top as the light. Write your fairy’s name on a small flat stone with a paint pen to create a personalised welcome sign.
If your daughter loves butterflies and honestly, what kid doesn’t? you could also add a few hand-crafted butterflies to the garden as decorations, perched on flowers or fluttering near the door. How to Make the Cutest DIY Butterfly Mobile With Your Kids This Weekend has a beautiful tutorial that translates perfectly into garden decor.
Encourage her to think about what the fairy’s daily life looks like. What does she eat? Where does she sleep? Where does she go when it rains? The more specific the story, the richer the details in the garden.
Ways to Keep the Fun Going
One of the best things about a fairy garden is that it doesn’t have to be a one-and-done project. You can come back to it over and over again.
Add seasonal decorations like tiny pumpkins in the fall, a little snowflake in winter, flowers blooming in spring. Write little notes “from the fairy” and leave them in the garden for your daughter to discover. Add new structures as your skills grow. Let her rearrange things whenever she wants, the garden is her world to control and create in.
You can also extend the creative energy from this project into other crafts. Block printing with sponges and foam is a great way to create fairy-themed wrapping paper or greeting cards, for example How to Do Easy Block Printing With Kids Using Sponges and Foam is a really accessible tutorial even for younger kids.
And if you end up with broken crayons from all this crafting? Don’t throw them out. How to Turn Old Crayons Into New Ones Using a Muffin Tin is a satisfying little project that turns crayon chaos into something colourful and useful.
The Most Important Ingredient
Here’s what I’ve learned from years of doing crafts with children in classrooms and in my own home: the end result matters far less than the process. The finished fairy garden might lean a little to one side. The clay mushroom might look more like a blob than a toadstool. The fairy door might not stay glued on perfectly.
None of that matters.
What matters is that you sat side by side on a lazy Saturday and built a tiny world together. That she got to tell a story with her hands. That she learned she could make something out of almost nothing. That you were present, unhurried, and genuinely delighted by what she created.
Those are the kinds of afternoons kids remember. Not because it was perfect, but because it was real and it was yours.
So go find a pot, grab some sticks from the backyard, and let the fairy magic begin. I promise you won’t regret it.
Leave a Reply