There is something genuinely special about a dreamcatcher hanging in a child’s bedroom. The way it moves gently in a breeze. The way the feathers catch the light. The way a child looks at it before falling asleep, knowing it is there to catch anything scary that might drift through the night.
I have always loved this craft. Not just because the end result is beautiful, but because the process of making one is surprisingly meditative. For kids especially, the repetitive weaving motion has a calming quality that not many other crafts can match.
If you have been following along on this blog, you already know we love activities that are meaningful, accessible, and genuinely fun to make together. Our last post on How to Make a Paper Lantern With Your Kids for Any Celebration was all about color and festivity. This project, however, brings a completely different energy. This one is quieter. More intentional. And in many ways, even more personal.
The best part? You do not need to buy a single specialty supply to make a beautiful dreamcatcher. A forked stick from the backyard, some yarn from your craft drawer, and a handful of beads and feathers are genuinely all it takes. So let us sit down together and make something truly magical.
The Story Behind the Dreamcatcher

Before we get into the making, I want to share a little background because I think it genuinely enriches the craft when you understand where it comes from.
Dreamcatchers originate from the Ojibwe people, one of the largest groups of Native Americans in North America. The original dreamcatcher was called an “asabikeshiinh,” which loosely translates to “spider.” It was traditionally made from a hoop of willow wood with a web woven inside using sinew or plant fibers.
The belief was beautiful in its simplicity. Good dreams know their way through the web and slide down the feathers to the sleeping person below. Bad dreams, on the other hand, get caught in the web and are destroyed by the first light of morning.
Over time, dreamcatchers became known more broadly as a symbol of protection and positive energy. Today they are made and displayed by people all over the world as decorative and meaningful objects.
As you make this with your child, sharing even a simple version of this story adds real depth to the activity. It transforms it from a craft project into a genuine conversation about different cultures, different beliefs, and the very human desire to feel safe while we sleep.
Save this guide: How to Create a No-Sew Fleece Blanket With Your Kids in One Hour
What You Need to Make Your Dreamcatcher
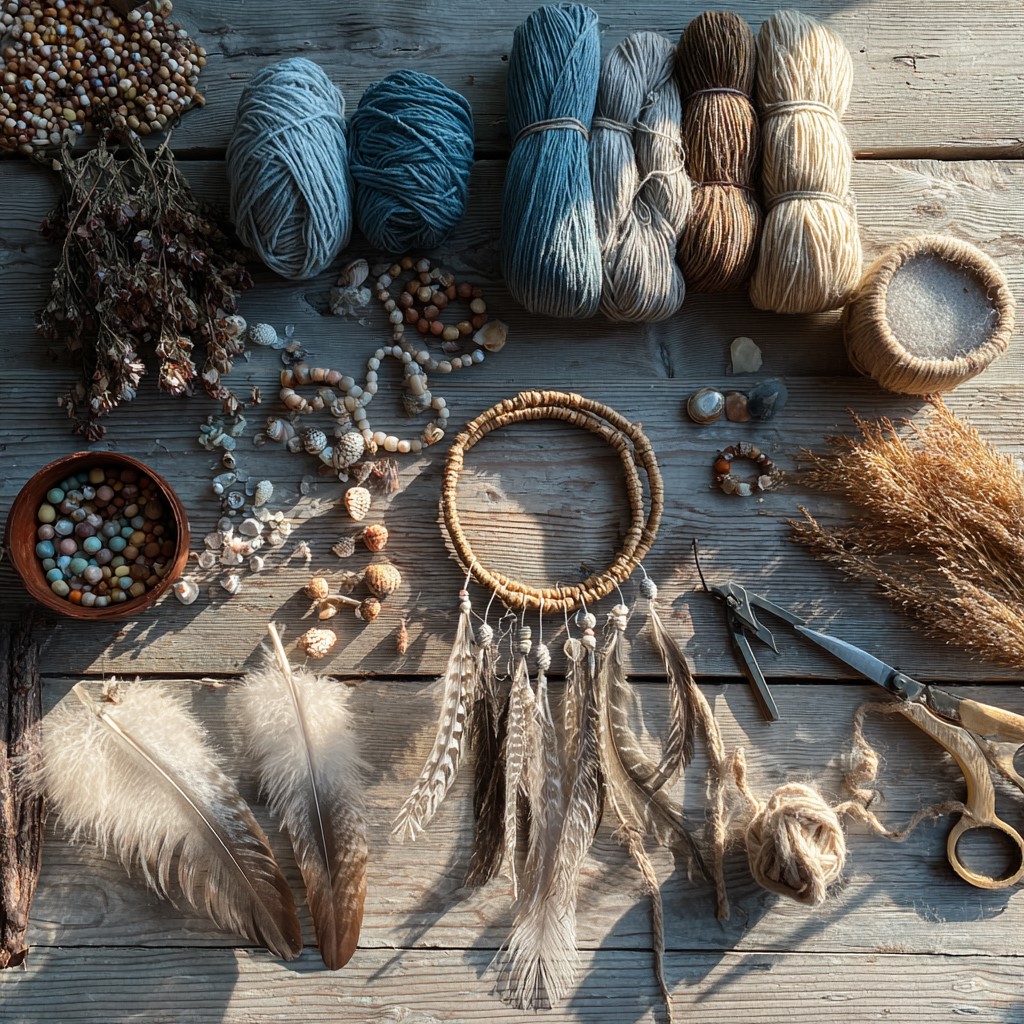
Now let us talk about supplies. One of the things I love most about this project is how naturally sourced most of the materials can be. You truly do not need to spend much money at all.
A hoop or forked stick
You have two options here. The traditional route is a circular hoop. You can buy embroidery hoops at any craft store very inexpensively. They come in multiple sizes and work perfectly. Alternatively, and this is my personal favourite for a rustic natural look, go outside and find a stick with a natural fork in it. Bend it gently into a rough circle and tie the ends together with yarn. The imperfect, organic shape of a hand-bent twig hoop gives your dreamcatcher a beautiful handmade quality that store-bought hoops simply cannot replicate.
Yarn
Choose whatever colors speak to you or your child. Neutral tones like cream, tan, and brown give a very traditional, earthy look. Bold bright colors produce something vivid and playful. Metallic yarn adds a touch of magic. Have at least two or three colors on hand so you can weave in some variation.
Beads
Wooden beads, glass beads, plastic pony beads, or any beads you have in your craft supplies work perfectly. Beads are threaded onto the yarn during weaving or added to the hanging strands at the bottom. They add texture, color, and beautiful detail.
Don’t miss this: How to Make Pressed Flower Art That Will Last for Years
Feathers
You can buy craft feathers inexpensively at any craft store. Alternatively, if you are comfortable with it, look for naturally shed feathers outdoors. Wash and dry any found feathers thoroughly before using them. A combination of large feature feathers and small fluffy ones looks stunning.
Scissors
Sharp ones for adults. Blunt-tipped ones for younger kids handling yarn.
A tapestry needle or large plastic craft needle
This makes weaving the web significantly easier, especially for smaller hands.
Optional extras
Dried flowers, small crystals, shells, ribbons, or charms can all be incorporated into your dreamcatcher for extra personality. This is genuinely where creativity takes over and every dreamcatcher becomes completely unique.
Preparing Your Hoop
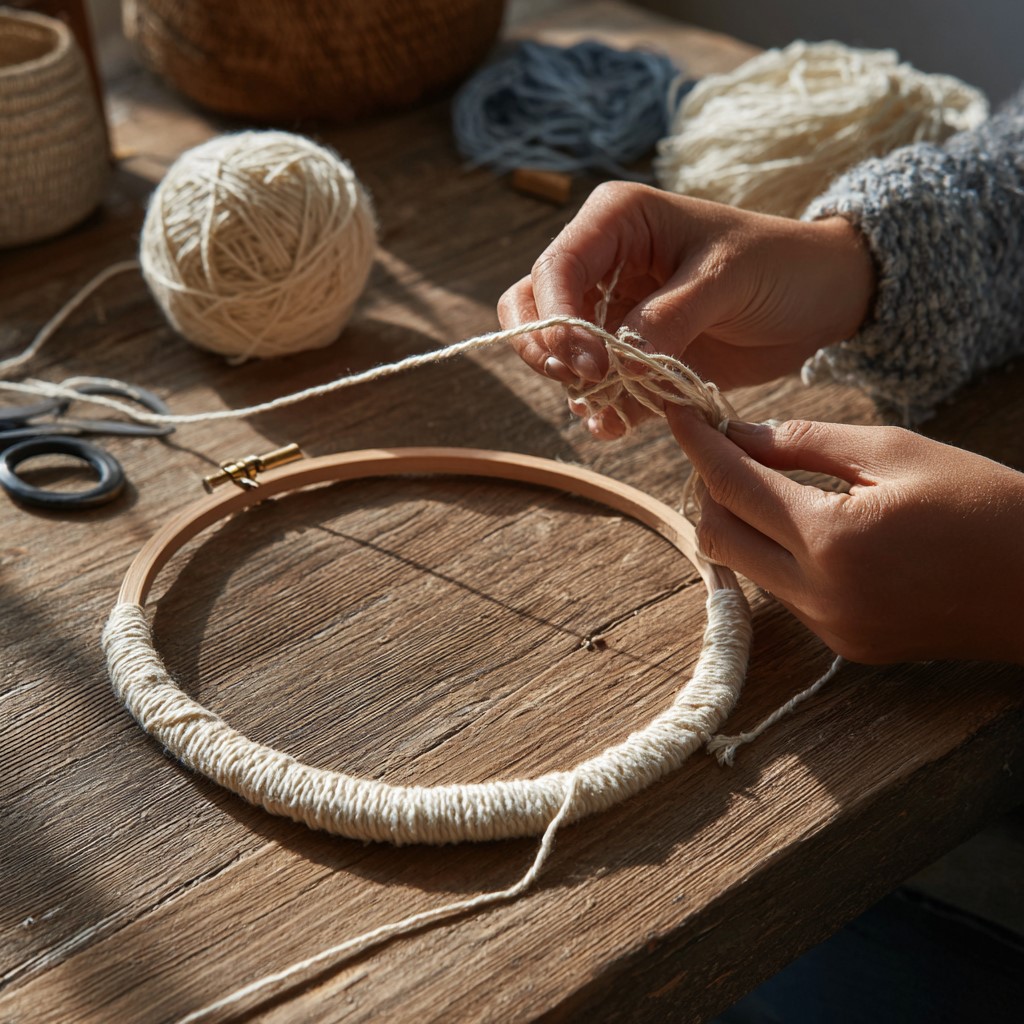
Before you start weaving, your hoop needs to be wrapped. This step serves two purposes. First, it gives your yarn something to grip and anchor to as you weave. Second, it creates a beautiful, finished look for the outer frame of your dreamcatcher.
Start by tying your yarn securely to your hoop with a tight double knot. Leave a short tail of about two inches. You will tuck this under the wrapping as you go so it disappears completely.
Begin wrapping the yarn tightly around the hoop, working in one direction consistently. Keep your wraps snug and close together so no bare hoop shows through. This is an excellent task for kids of all ages. It requires minimal dexterity and produces satisfying visible progress very quickly.
You’ll love this too: How to Make Homemade Bubble Solution That Actually Creates Giant Bubbles
Choosing Colors for Your Wrapping
You can wrap the entire hoop in one color for a clean, unified look. Alternatively, switch colors midway through for a two-tone effect. To switch colors, simply tie the new yarn to the end of the old piece with a tight knot. Pull the knot to the inside of the hoop where it will be hidden. Then continue wrapping with the new color.
Some people wrap the entire hoop before weaving the web. Others wrap as they go, working in sections. Either approach works well. For younger kids, wrapping the whole hoop first and then moving to the web tends to be easier. It breaks the project into clear, separate stages and prevents overwhelm.
Once the entire hoop is wrapped, tie off the yarn securely on the back side of the hoop with a firm double knot. Trim any excess tail to about half an inch.
Weaving the Web: The Heart of the Dreamcatcher
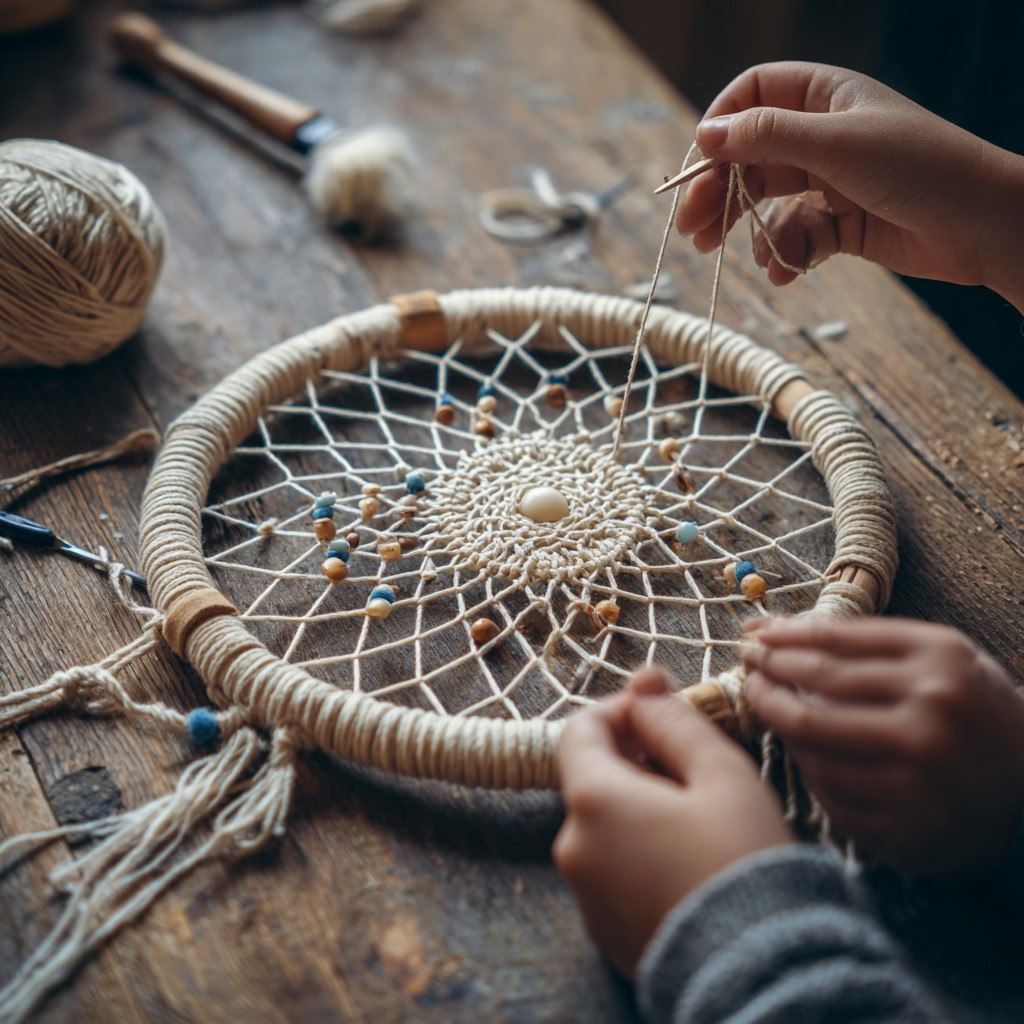
This is the most involved part of the whole project. It is also the most satisfying. Consequently, take your time here and do not rush. The web is what makes a dreamcatcher a dreamcatcher.
Cut a length of yarn approximately three times the circumference of your hoop. You can always add more if you run out, so do not stress about getting the exact length right on the first try.
Tie one end of your yarn securely to the top of your wrapped hoop. This is your starting point.
The basic weaving pattern works like this.
Stretch your yarn across the inside of the hoop and loop it around the opposite side. Pull it snug but not so tight that it distorts the shape of the hoop. Now move along the hoop by about two finger-widths and loop the yarn around the hoop again. Continue working your way around the entire hoop, creating a series of evenly spaced loops.
When you have completed the full circle back to your starting point, you begin the second round. Instead of looping around the hoop itself, you now loop around the midpoint of each strand from the first round. Pull each loop snug as you go.
Continue working inward in this spiral pattern, round after round, always looping around the midpoint of the previous round’s strands. As you work toward the center, the web naturally tightens and the spaces between strands get smaller. This is exactly what should happen.
Try this craft next: How to Make a DIY Fairy Garden With Your Daughter on a Lazy Saturday
Adding Beads as You Weave
This is a detail that elevates your dreamcatcher significantly. Before making a loop in the web, slide a bead down your yarn so it sits in the center of that loop. The bead gets locked in place as you pull the next loop snug. Repeat this at random intervals as you weave.
The beads catch the light beautifully. They add dimension and color to the web. And kids absolutely love this step because it feels like they are hiding tiny treasures inside the weaving.
Finishing the Center
When your web has been woven to within about an inch of the center, stop. Tie off your yarn with a firm knot around the last loop. Trim any excess. Leave a small open circle at the very center of the web. This is intentional. According to the original legend, this central hole is where good dreams pass through. It is a beautiful detail to explain to your child as you finish.
What to Do When the Weaving Gets Tricky
Let me be honest with you for a moment. The weaving is the part of this project that requires the most patience. It is not difficult once you understand the pattern. However, it does require a steady hand and focused attention, especially in the later rounds when the spaces get smaller.
Therefore, here is my honest advice for working through the tricky parts.
Work slowly in the beginning. Rushing the first two rounds almost always leads to an uneven web that is frustrating to build on. Get those first rounds right and everything that follows feels much more manageable.
If a loop comes undone, do not pull the whole thing apart in frustration. Simply rethread your needle, find where the loop came loose, and redo just that section. A web that has been repaired in one or two places is completely indistinguishable from a perfect one once the dreamcatcher is hanging.
For younger children, do the first two rounds yourself as a demonstration. Then invite them to take over from round three onward. By that point the pattern is established and following it feels much more intuitive. Moreover, kids feel a sense of genuine accomplishment when they finish the bulk of the web themselves.
For older kids who want to do the whole thing independently, sit beside them and talk them through the first round step by step. After that, most kids around eight or nine years old can work through the remaining rounds on their own with just occasional guidance.
Check this guide out: The Easiest Kids Friendship Bracelet Tutorial for Complete Beginners
Creating the Hanging Strands
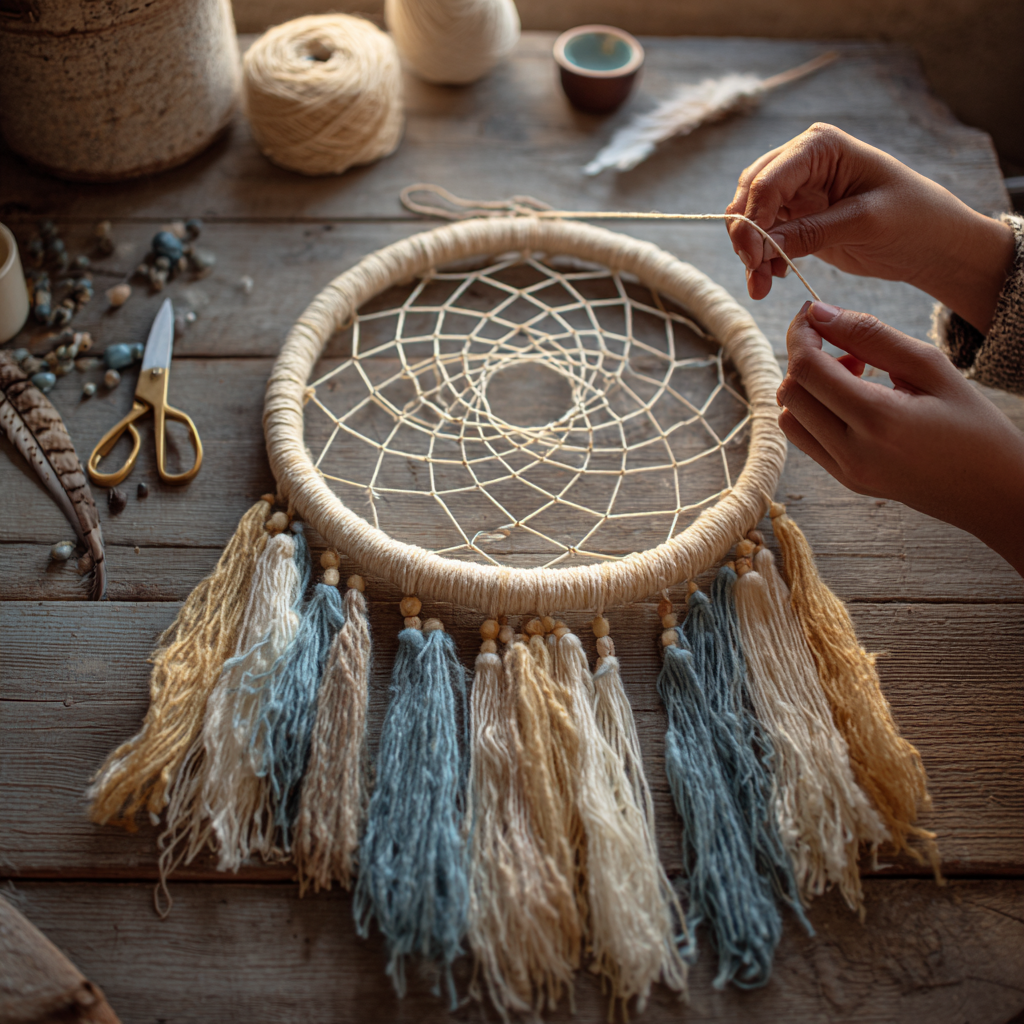
Once your web is complete and secured, it is time to add the hanging strands at the bottom. This is the part that gives a dreamcatcher its signature flowing, layered look. It is also, honestly, the part kids are most excited about because this is where the feathers come in.
Cut three to five lengths of yarn, each about twelve to fifteen inches long. These do not all need to be the same length. In fact, varying the lengths slightly looks more natural and beautiful.
Fold each length of yarn in half. Push the folded loop through the bottom of your hoop from front to back. Then pull the two loose ends of that yarn through the loop and pull snug. This creates a neat, secure attachment point. Repeat this for each strand, spacing them evenly along the bottom third of your hoop.
Adding Beads and Feathers to Your Strands
Now thread beads onto each hanging strand. There is no rule about how many beads or where to place them. Let your child make these decisions entirely. Some strands might have five beads clustered near the top. Others might have a single bead sitting right above the feather. It is all beautiful.
To attach feathers, hold the base of a feather against the bottom end of a yarn strand. Wrap a short piece of yarn tightly around both the feather stem and the yarn strand several times. Tie it off securely with a double knot. For extra security, add a tiny drop of craft glue to the wrapped section and let it dry completely before hanging.
You can attach a single feather to each strand or a cluster of two or three feathers of different sizes together. Mixing a large feature feather with one or two small fluffy feathers on the same strand creates a really beautiful layered effect.
If your kids enjoyed this, see: How to Do Easy Block Printing With Kids Using Sponges and Foam
Adding a Hanging Loop
Your dreamcatcher needs a way to hang. This is a very simple final step that takes about thirty seconds.
Cut a length of yarn about ten inches long. Fold it in half. Attach it to the top of your hoop using the same loop-and-pull method you used for the hanging strands. Pull it snug. Tie the two ends together in a knot, leaving a loop large enough to fit over a nail or hook.
Alternatively, if you want something more decorative at the top, braid three strands of yarn together for the hanging loop. You can also incorporate a few beads or a small charm at the top for extra detail.
Decorating Beyond the Basics
Once your dreamcatcher is fully assembled and functional, there are so many ways to personalize it further. This is a wonderful stage to hand over almost entirely to your child.
Dried flowers. Small dried flowers woven into the web or tied onto the hanging strands add a beautiful, natural, botanical element. Baby’s breath, lavender, and small dried rosebuds all work wonderfully.
Ribbons. Narrow satin or organza ribbons tied alongside the yarn strands add a beautiful contrast in texture and catch the light differently than yarn does. Let them trail longer than the yarn for a luxurious flowing effect.
Small charms or crystals. Thread a small crystal bead or charm onto one of the hanging strands as the very bottom element. Amethyst, clear quartz, or rose quartz crystals are especially popular in dreamcatchers and add a lovely meaningful touch.
Painted details. If your hoop is a natural twig, let your child paint sections of it before wrapping begins. Metallic gold or silver paint against natural bark looks absolutely stunning.
Glow in the dark yarn. This one is a game changer for a child’s bedroom dreamcatcher. Use glow in the dark yarn for the web weaving. During the day it looks perfectly normal. At night, after the lights go out, the web glows softly. The effect is genuinely magical and kids absolutely adore it.
For more ideas like this: A Parent’s Guide to Starting a Mini Craft Corner for Your Kids at Home
Choosing the Perfect Spot to Hang Your Dreamcatcher
Traditionally, dreamcatchers are hung above the place where a person sleeps. Above the bed headboard is the most common placement and it makes beautiful sense given the legend.
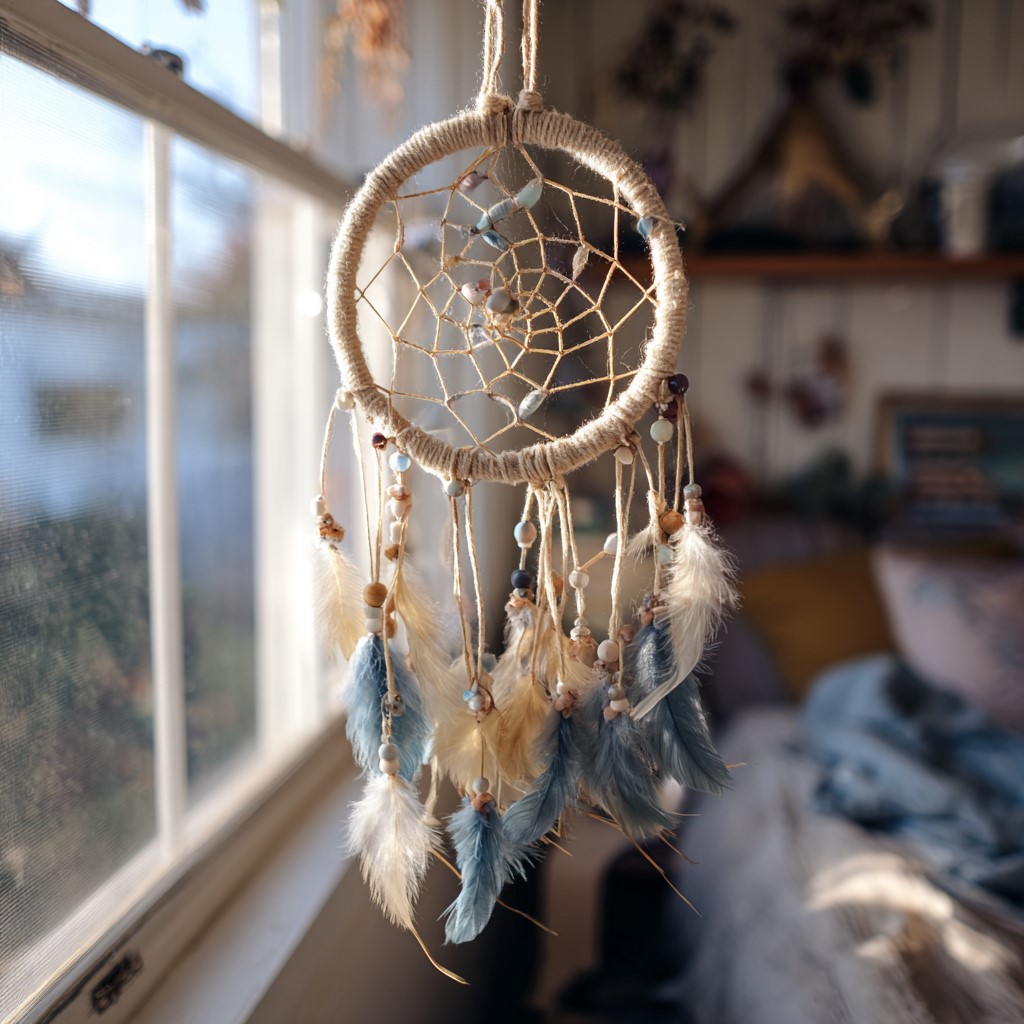
However, there are plenty of other spots where a handmade dreamcatcher looks stunning. A bedroom window is a wonderful choice because the natural light will illuminate the web and make the feathers sway gently in any breeze. A reading nook corner adds a cozy, magical atmosphere to an already beloved spot. A nursery wall with several dreamcatchers of different sizes clustered together creates a striking and soothing display.
When hanging your dreamcatcher, make sure the hanging strands and feathers have enough room to move freely. A dreamcatcher that is pressed flat against a wall loses much of its visual magic. Give it a little space to breathe and move.
Making Multiple Dreamcatchers Together
Once you and your child have made one dreamcatcher and gotten comfortable with the process, making a second or third one goes remarkably faster. Additionally, making several dreamcatchers together opens up some really lovely possibilities.
Make a matching set in coordinating colors for a shared bedroom. Make one for each child in different color schemes that reflect their individual personalities. Make a small dreamcatcher as a gift for a grandparent, a teacher, or a friend who needs a little extra good energy in their life. There is something profoundly generous about a child giving someone a handmade object. It teaches generosity in the most tangible way possible.
You can also make a dreamcatcher as part of a small group activity. If you work with kids in a class or community setting, this is an excellent project. Each child makes their own. Each one comes out completely different. And every single one of them is genuinely beautiful in its own way.
Here’s another fun craft: How to Turn Old Crayons Into New Ones Using a Muffin Tin
Tips for Making the Process Smoother
Let me leave you with a few practical tips that will make your dreamcatcher session go as smoothly as possible.
Prepare your yarn lengths in advance before sitting down with your kids. Cut several working lengths for the web weaving and several lengths for the hanging strands. Having everything pre-cut means the session flows without interruptions to measure and cut on the fly.
Use a bead tray or a muffin tin to organize your beads by color or size. This prevents beads from rolling off the table and also helps kids make intentional color choices rather than just grabbing whatever is closest.
Work on a non-slip surface. A yoga mat, a textured placemat, or even a damp tea towel laid flat on the table keeps your hoop from sliding around as you weave. This makes a surprisingly big difference to the ease of the whole process.
Finally, do not aim for perfection. The most beautiful dreamcatchers are the ones made with genuine intention and love, regardless of whether the web is perfectly even or the feathers are flawlessly spaced. An uneven web woven by a seven-year-old with complete focus and pride is infinitely more precious than a flawless one.
So find a stick. Wind some yarn. Thread some beads. And make something beautiful together tonight.
Because in the end, every child deserves something handmade hanging above their head while they sleep. Something that says, quietly and gently, that someone who loves them made this just for them.
Leave a Reply