Okay, let me start with a confession. The first time I tried making homemade bubble solution, it was an absolute disaster. The bubbles were tiny. They popped immediately. The kids looked at me like I had personally offended them. As a teacher who has worked with kids and crafts for years, that was a humbling moment.
But honestly that failure made me to start researching. I started researching, testing, and tweaking until I finally cracked the code. And now I am sharing everything with you so you don’t have to go through the same bubble tragedy I did.
By the way, if you love fun, simple activities to do with kids, you should also check out The Easiest Kids Friendship Bracelet Tutorial for Complete Beginners. It’s another great one to bookmark for your next kids’ activity day.
Now, let’s get into the bubbles. Trust me once you get this right, you will never buy store-bought bubble solution again.
Why Homemade Bubble Solution Is Worth the Effort
First, let me tell you why this even matters. Store-bought bubble solution is fine. But it’s basic. The bubbles are small. They pop fast. And honestly, where’s the fun in that?
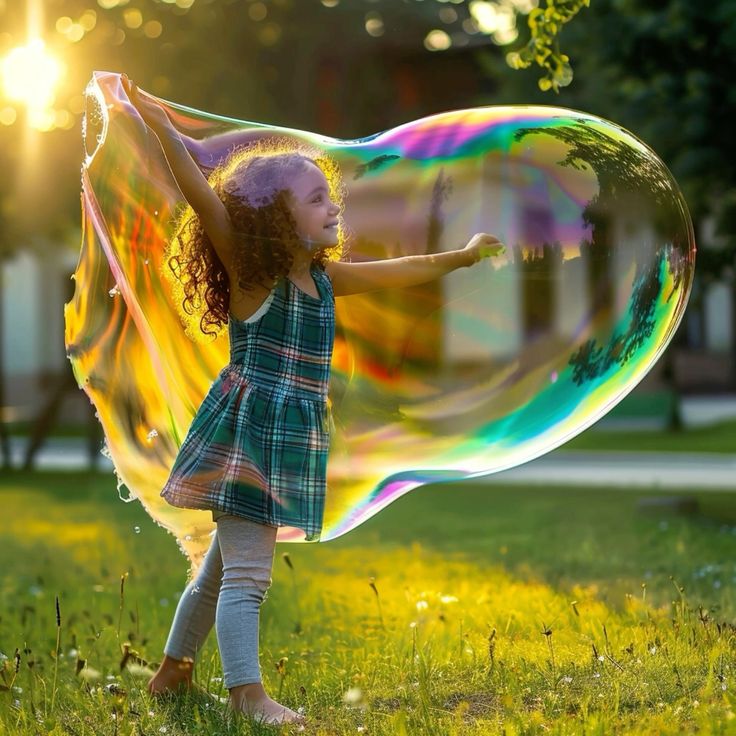
Homemade bubble solution, when made correctly, produces bubbles that are massive. We’re talking giant, floaty, iridescent bubbles that look almost magical. Kids absolutely lose their minds over them. So do adults, if I’m being honest.
Additionally, making your own solution is cheaper. You probably already have most of the ingredients sitting in your kitchen or bathroom cabinet. So it’s a win all around.
You might want to bookmark this: How to Make a DIY Fairy Garden With Your Daughter on a Lazy Saturday
What Makes a Good Bubble Solution?
Before we jump into the recipe, let’s talk about the science for a second. Don’t worry I’m not about to turn this into a chemistry lecture. I promise.
Basically, a bubble is a thin film of soapy water. The soap lowers the surface tension of the water. That’s what allows it to stretch and form a sphere instead of just breaking apart. Simple enough, right?
However, not all soap is created equal. This is where most people go wrong. They grab whatever dish soap is under the sink and wonder why their bubbles keep popping after two seconds.
The key to giant bubbles is elasticity. You need a solution that can stretch a long, long way without breaking. That’s why the ingredients you choose matter so much. There are three main things that affect bubble quality.
- Soap type: This controls elasticity.
- Water quality: Hard tap water can ruin your bubbles.
- A thickening agent: This is the secret weapon most people skip.
Let’s break each one down.
Pin this: How to Do Easy Block Printing With Kids Using Sponges and Foam
The Best Soap for Giant Bubbles
Okay, so this is probably the most important decision you will make in this whole process. Not all dish soaps work the same way.
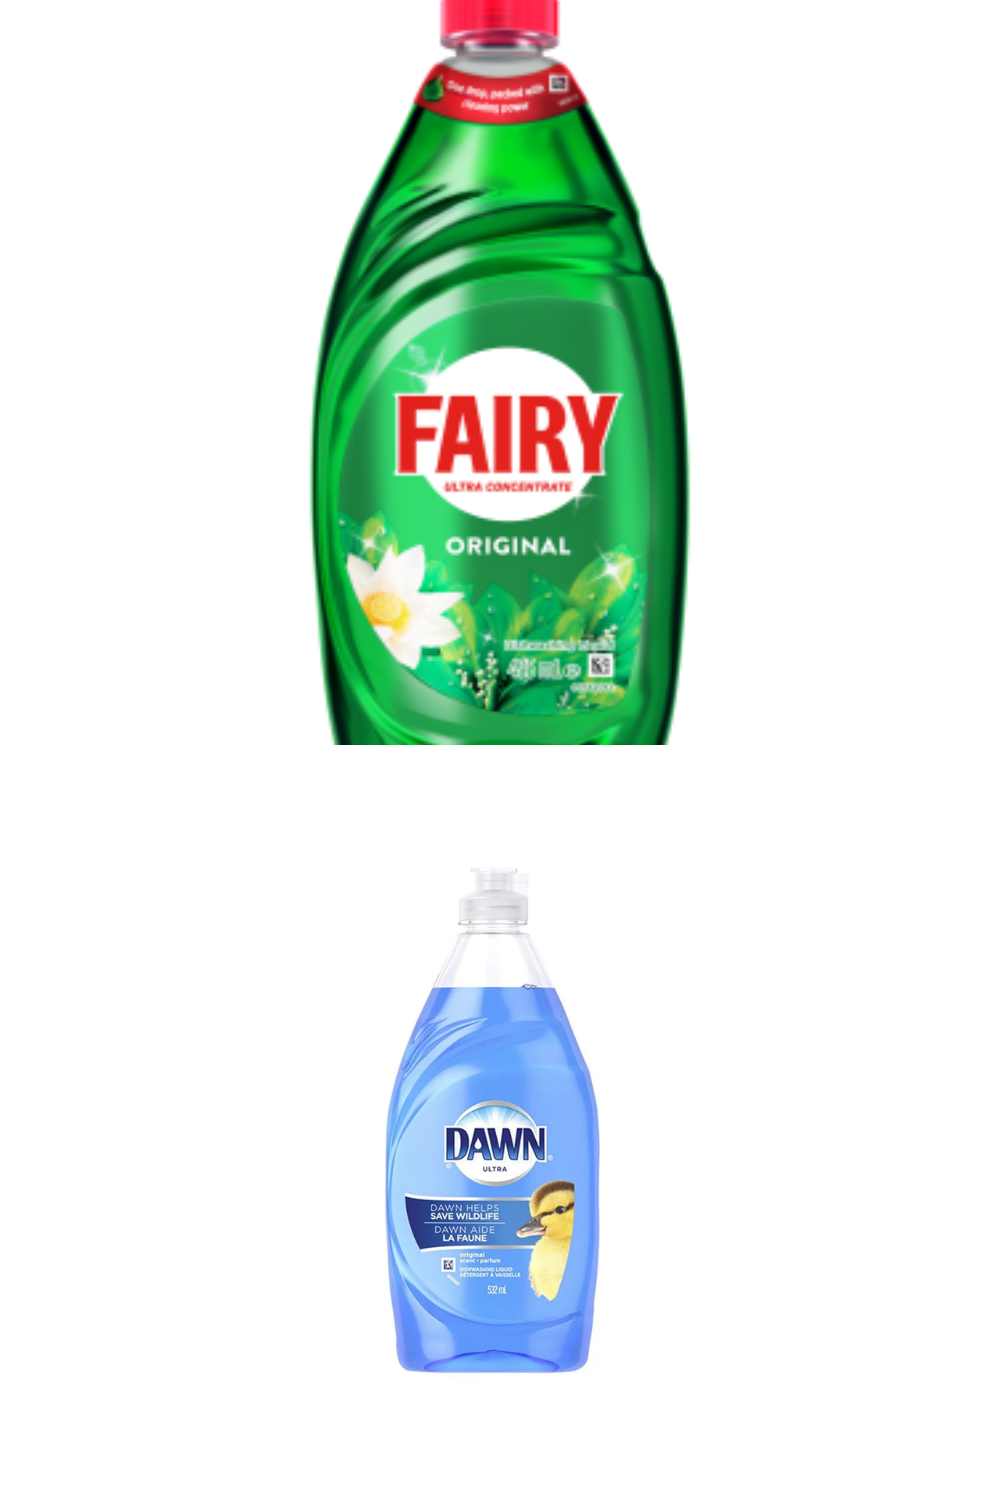
The top choice among bubble enthusiasts (yes, that’s a thing) is Dawn dish soap specifically the original blue Dawn. If you’re outside the US, look for Fairy dish soap. Both of these have the right chemical composition for stretchy, long-lasting bubbles.
What you want to avoid is any dish soap labeled “ultra concentrated” or anything with added moisturizers, antibacterial agents, or extra degreasers. Those additives interfere with the bubble film. They make it weaker and more likely to pop.
Furthermore, avoid any soap that produces a lot of foam when you shake it. Foam actually works against you here. You want a calm, smooth solution, not a bubbly mess in the bucket.
Try this next: A Parent’s Guide to Starting a Mini Craft Corner for Your Kids at Home
Why Water Quality Matters More Than You Think
Here’s something I did not know until I started really digging into this. The water you use genuinely affects your results.
Hard water which is tap water with a high mineral content weakens the bubble film. The minerals interfere with the soap. So if your tap water is hard, your bubbles will be less impressive.
The fix is simple, though. Use distilled water. You can grab a jug at any grocery store for less than a dollar. It makes a noticeable difference. Alternatively, you can let your tap water sit out overnight in an open container. This allows some of the chlorine to evaporate, which helps a little.
If you’ve been struggling with flat, unimpressive bubbles despite using good soap, the water might honestly be your culprit.
The Secret Ingredient
This is the part that most online recipes leave out. And it’s honestly the thing that takes your bubbles from “okay” to “absolutely jaw-dropping.”
You need to add something to thicken the bubble film slightly. A thicker film = bigger bubbles that last longer. There are a few options that work really well.
Option 1: Glycerin Glycerin is the classic choice. It’s a clear, slightly syrupy liquid. You can find it at most pharmacies or craft stores. It bonds with water molecules and slows down evaporation. That’s what keeps your bubble alive longer.
Option 2: Corn Syrup This is the budget-friendly alternative. Regular light corn syrup works perfectly. It adds that same thickness and helps the bubble film hold together. This is actually what I use most of the time because it’s easy to find.
Option 3: J-Lube If you want to go full bubble-nerd mode, look up J-Lube online. It’s a powdered lubricant originally made for veterinary use. Sounds weird, I know. But the bubble community swears by it for record-breaking giant bubbles. A little goes a very long way.
For a beginner, just start with glycerin or corn syrup. You will already get incredible results.
Save this guide: How to Make the Cutest DIY Butterfly Mobile With Your Kids This Weekend
The Giant Bubble Recipe
Alright, here it is. The recipe I have tested, tweaked, and finally landed on.
Ingredients
- 6 cups distilled water
- ½ cup Dawn dish soap (or Fairy)
- ½ cup light corn syrup OR 1 tablespoon glycerin
- 1 tablespoon baking powder (optional but helpful more on this below)
Instructions
Step 1: Mix gently. Combine everything in a large bowl or bucket. Stir slowly. This is important do not shake it or stir vigorously. You don’t want foam. Treat it like you’re mixing something delicate.
Step 2: Let it rest. This step surprises people. Cover your solution and let it sit for at least one hour. Overnight is even better. Resting allows the ingredients to fully combine. The bubbles you get after resting are noticeably better than fresh solution.
Step 3: Check the consistency. Your solution should be slightly slippery and smooth. It should not look foamy or cloudy. If it looks too soapy, add a little more water. If it feels too watery, add just a tiny bit more corn syrup.
Step 4: Use it on a slightly humid day. Bubbles hate dry, windy weather. Ideally, head outside on a cloudy or slightly humid day. Early morning and evening tend to work better than dry afternoon heat.
You can also try this: How to Turn Old Crayons Into New Ones Using a Muffin Tin
What’s the Baking Powder For?
I mentioned baking powder in the ingredients and I want to explain that quickly. It’s not in every recipe. But I’ve found it helps stabilize the solution, especially in warm weather.
Baking powder slightly adjusts the pH of the mixture. That makes the bubble film a little more resilient. Basically, your bubbles are less likely to pop when they hit the air.
However, if you don’t have any, don’t stress about it. The recipe still works beautifully without it. Think of it as an optional upgrade.
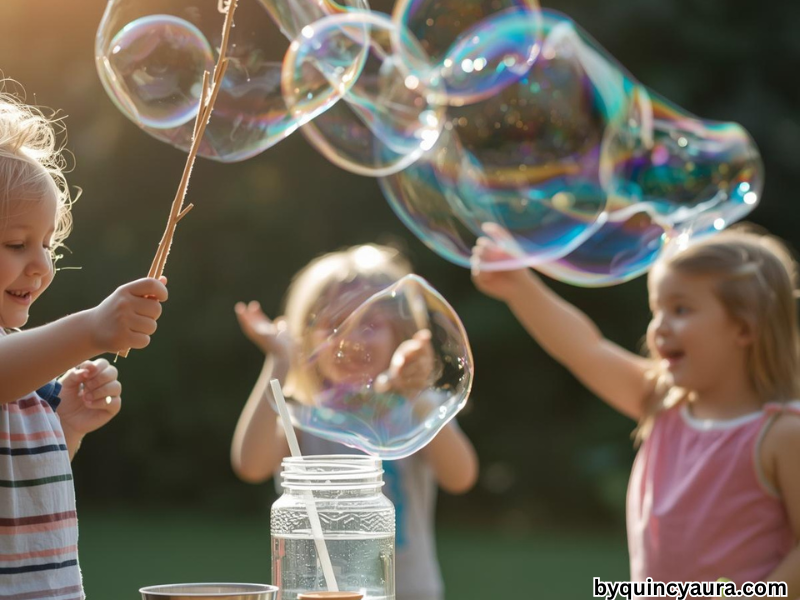
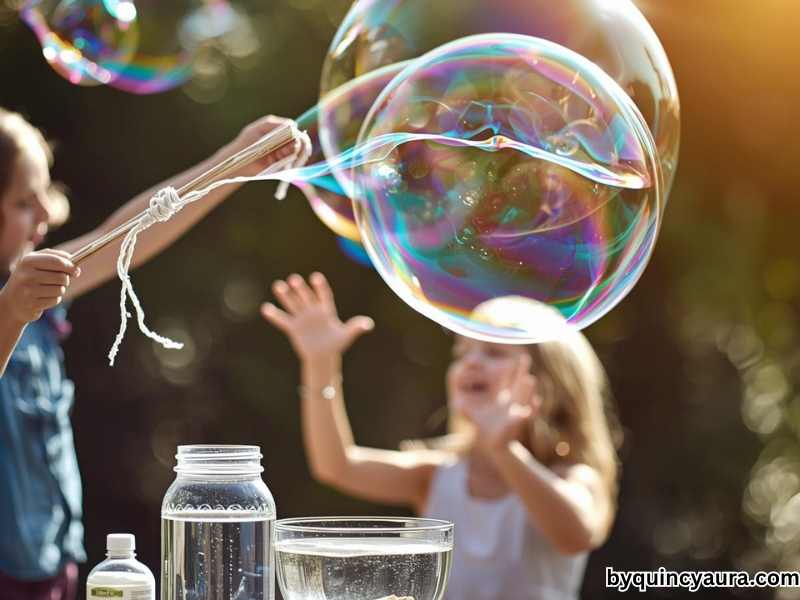
How to Make Giant Bubbles
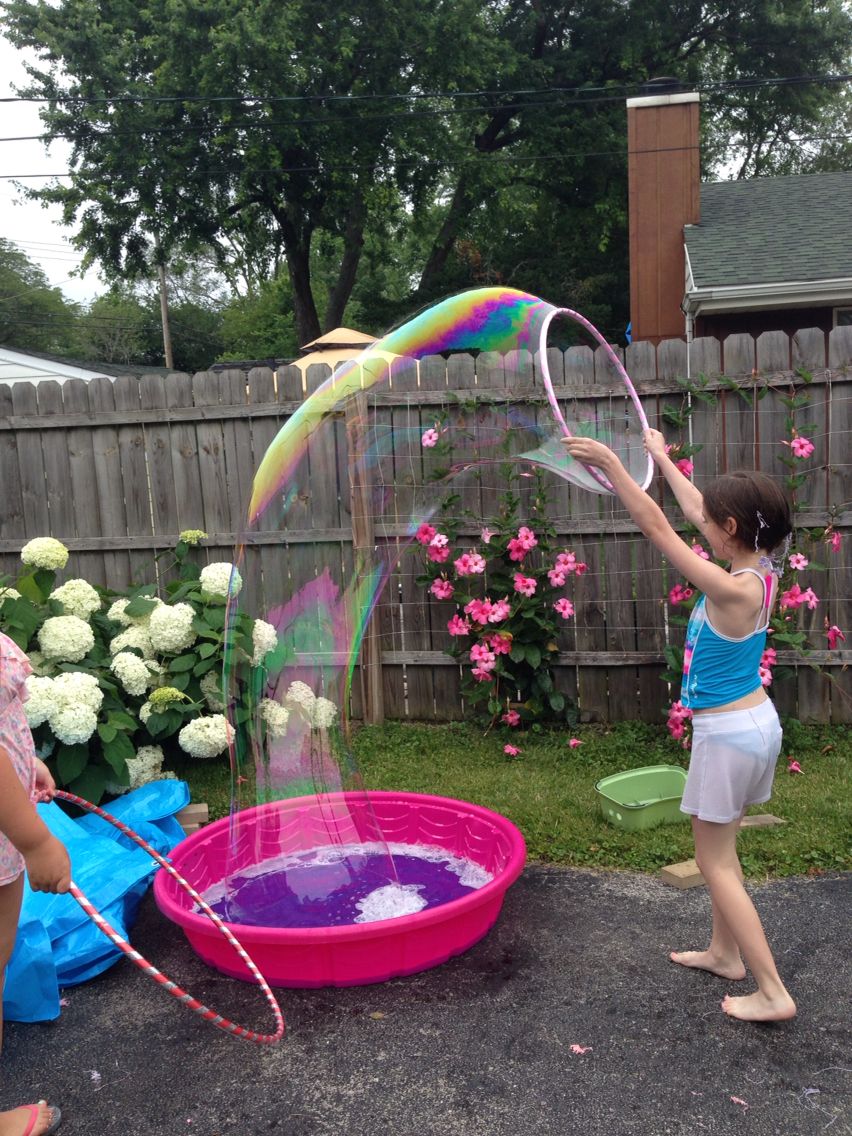
Here’s something people overlook. Even with perfect solution, the wrong wand will limit your bubble size. Those little plastic wands that come with store-bought solution are not going to cut it for giants.
For truly enormous bubbles, you need a bigger wand opening. There are a few easy options.
DIY String Wand This is my personal favourite and it’s ridiculously easy to make. Take two sticks or dowels about 50cm each. Tie a loop of cotton string between them. The string should form a triangle with a small weight (like a washer or nut) at the bottom. Dip the whole thing in your solution slowly, then pull it open gently as you walk forward or let the wind do the work. The bubble that comes out will genuinely amaze you.
Cookie Cutters Large cookie cutters work surprisingly well for medium-sized bubbles. Kids love this because they can try to make different shapes.
Slotted Spoons and Funnels In a pinch, a large slotted spoon or a wide funnel works. They won’t give you the absolute biggest bubbles. But they’re a fun quick option.
For more ideas like this: How to Create a Mini Herb Garden Planter Craft With Kids
Troubleshooting: Why Are My Bubbles Still Popping?
So you followed the recipe and the bubbles are still not behaving. Don’t panic. Let’s work through the most common problems.
Problem: Bubbles pop immediately. This usually means your solution is too soapy. Try adding more water, a quarter cup at a time. Also, make sure you let the solution rest, fresh solution performs much worse.
Problem: Bubbles are small, not giant. Check your wand size first. A small wand opening will never give you giant bubbles no matter how good your solution is. Also, try adding a little more corn syrup or glycerin to thicken the film.
Problem: Solution keeps foaming up. You’re probably stirring too fast. Slow down. Also, let the foam settle before you use the solution. Foam on the surface is normal just scoop it aside and dip into the clear solution underneath.
Problem: Bubbles won’t hold their shape in the wind. Wind is the enemy of bubbles. Try to find a sheltered spot. Or wait for a calmer day. There’s genuinely no recipe fix for strong wind.
Problem: The solution worked great yesterday but not today. Temperature and humidity changes affect performance. If it’s a hot dry day, your solution will struggle more. Try adding a tiny bit more water and moving to a shadier spot.
Want more like this? See: How to Start Crafting with Kids as a Beginner
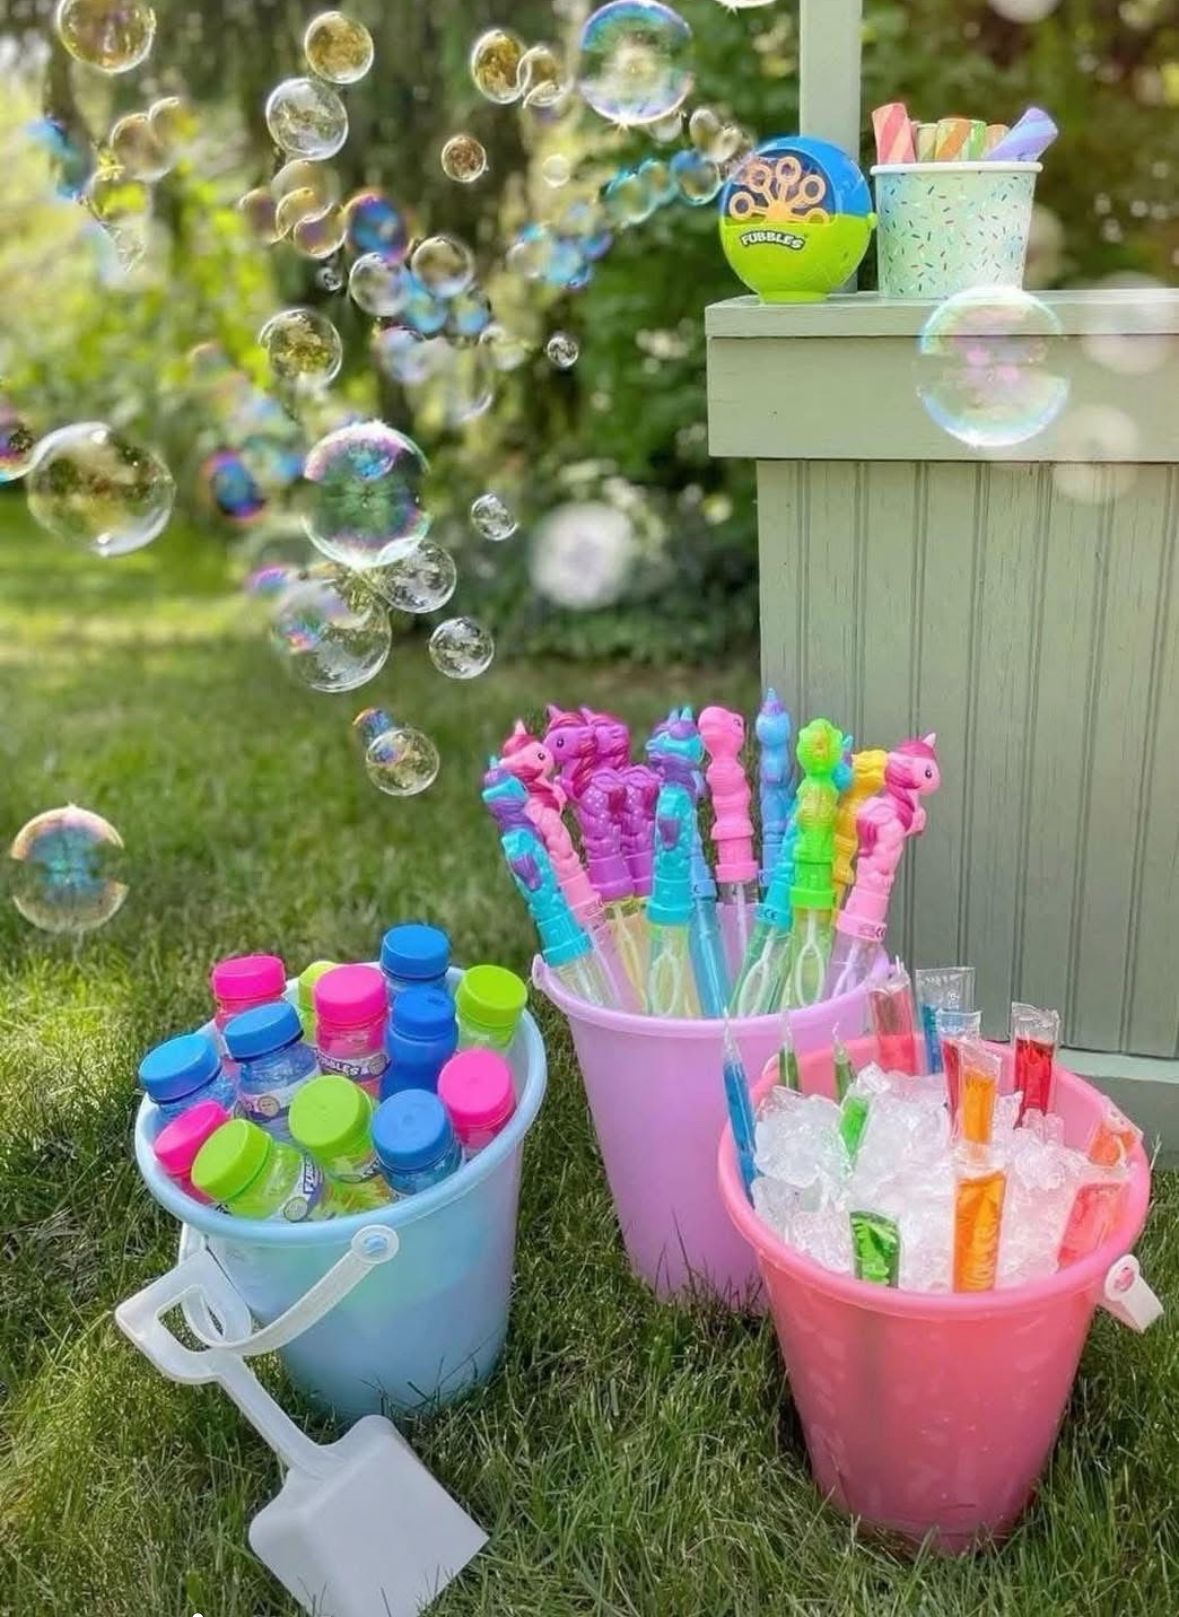
Fun Ways to Use Your Bubble Solution With Kids
Okay so now you have this magical solution. What do you actually do with it? Beyond the classic wand-and-blow approach, here are some ideas that kids absolutely love.
Bubble snakes. Cut the bottom off a plastic bottle. Stretch a sock over the cut end and secure it with a rubber band. Dip the sock end in solution and blow through the bottle opening. Out comes a long, wriggly snake of bubbles. Kids go absolutely wild for this one.
Bubble painting. Add a little food colouring to small portions of your solution. Blow bubbles onto paper and let them pop. The colour rings they leave behind make beautiful abstract art. This one is surprisingly stunning as wall art.
Bubble towers. Wet a flat surface like a tray or the inside of a bowl. Blow bubbles directly onto the wet surface. The bubbles stack on top of each other and you can build a tower. It’s weirdly satisfying and surprisingly difficult. Even adults end up competing.
Catch a bubble. Wet your hands with a little solution. Now try to catch a bubble without popping it. Dry hands pop bubbles instantly. But wet hands can hold them for a moment. Kids love trying to figure out why this works.
This is worth a look: 20 Fun Air Dry Clay Crafts for Kids
Storing Your Bubble Solution
Good news this solution stores really well. Pour any leftover solution into an airtight container or old jar. Store it in a cool place out of direct sunlight.
It will keep for up to two weeks easily. Some people say it actually gets better after sitting for a few days. I’ve found that to be true. The ingredients continue to bond over time.
Just give it a gentle stir before using it again. And if any foam has formed on top, scoop it off before dipping your wand.
You’ll love this too: A Step-by-Step Guide to Making Air Dry Clay Bowls With Your Kids
One Last Thing Before You Go
I want you to actually try this. Not just read it and think “that’s cool.” Actually go make it. It genuinely takes about five minutes to mix everything together. Then you just wait for it to rest.
The moment you pull out that first giant bubble and watch it float up into the sky, you will completely understand why I got obsessed with this. There is something almost meditative about it. Kids and adults alike just stop and stare.
Furthermore, this is one of those activities that has zero screen time, zero batteries, and zero complicated setup. Just a bucket of solution and some open space. Honestly, those are often the activities that kids remember the most.
Leave a Reply