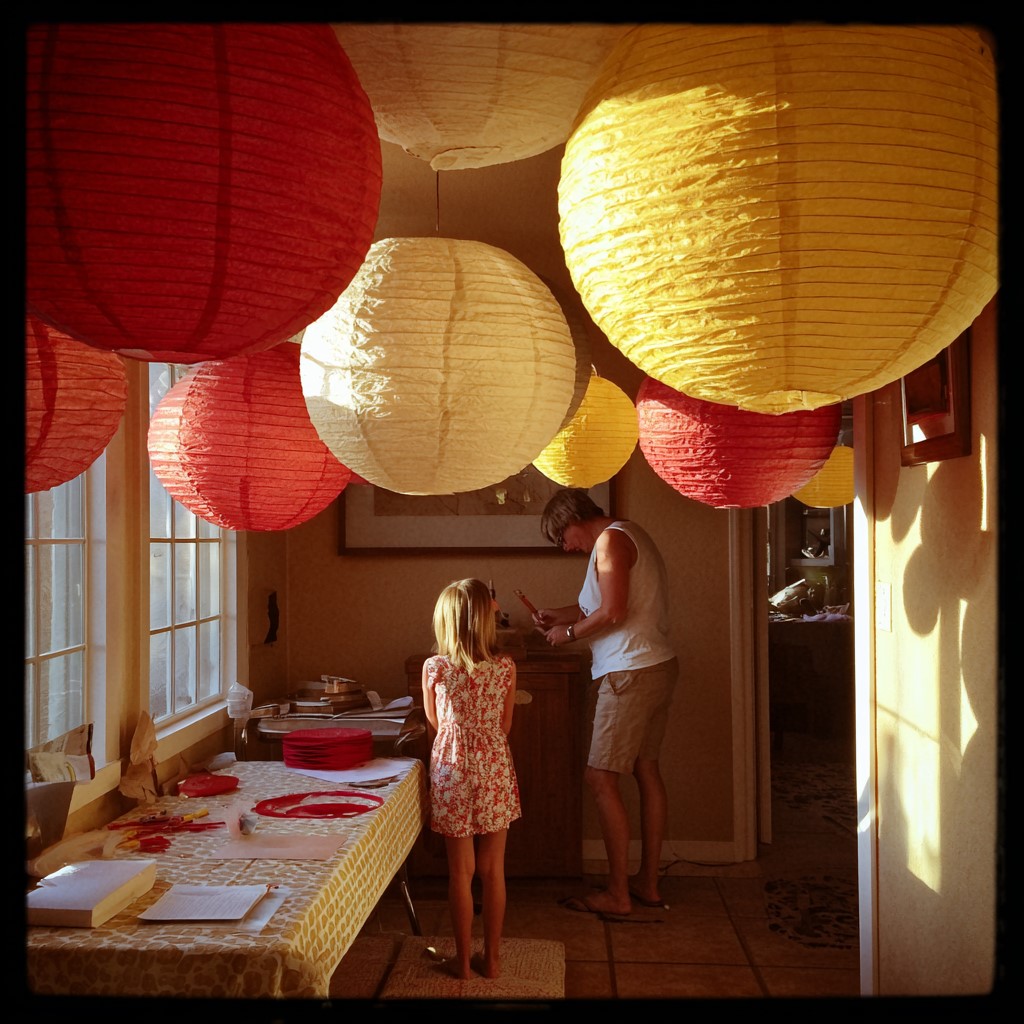
You know that feeling when you walk into a room decorated with glowing lanterns and everything just looks magical? The warm light, the soft colors, the way the whole space feels instantly festive and alive. It’s one of those decorating tricks that looks expensive and complicated but honestly doesn’t have to be either of those things.
Paper lanterns made by hand are one of the most satisfying crafts you can do with kids. They’re colorful, they’re celebratory, and they work for literally any occasion. Birthday party? Perfect. Christmas? Absolutely. Diwali, Eid, a random Tuesday when you just want to make something pretty? All of it works.
If you’ve been following along here on the blog, you’ll remember our last post on How to Create a No-Sew Fleece Blanket With Your Kids in One Hour. That project was all about cozy and functional. This one, however, is pure celebration. Pure color. Pure joy hanging from your ceiling.
The best part is that you don’t need anything fancy to pull this off. Some paper, scissors, glue, and a little imagination are genuinely all it takes. So let’s get into it together and make something your kids will be incredibly proud of.
Why Paper Lanterns Are the Perfect Kids’ Craft
Before we jump into the how, let’s talk about the why for just a moment. Because not every craft earns a permanent spot in the rotation. Paper lanterns, though, absolutely do.
First of all, they are endlessly versatile. Unlike a craft that only works for one specific holiday or season, paper lanterns fit every celebration imaginable. You can change the colors, the patterns, the size, and the decorations to match any theme or occasion. That kind of flexibility makes this skill genuinely worth learning.
Secondly, the technique is accessible to a really wide age range. Kids as young as four or five can participate in meaningful ways. Older kids and teenagers can take on more complex versions independently. Even adults find the process surprisingly meditative and enjoyable.
Furthermore, paper lanterns are a genuinely useful finished product. They’re not just something you make and set aside. You hang them up. You display them. They transform a space. Watching your kids see their own creation decorating a party or a bedroom ceiling is a genuinely special moment.
Additionally, the cost is almost laughably low. You can make stunning lanterns with nothing more than colored construction paper or cardstock. Everything else is optional decoration. This is the kind of craft that makes you feel like you’ve gotten away with something wonderful.
Save this guide: How to Make Pressed Flower Art That Will Last for Years
A Little Background on Paper Lanterns
Now, I find this part genuinely interesting, so bear with me for just a moment. Paper lanterns have a history that stretches back over two thousand years. They originated in China, where they were used in festivals, religious ceremonies, and as practical lighting sources long before electricity existed.
Over time, the tradition of lantern-making spread across Asia and eventually throughout the entire world. Today, lanterns are a central part of celebrations in Chinese New Year, the Mid-Autumn Festival, Diwali, and countless other cultural events globally. Each culture has added its own designs, materials, and meanings to the basic form.
Understanding that history, even briefly, makes the craft feel more meaningful. When you sit down with your kids to make paper lanterns, you’re participating in a tradition that humans have shared across thousands of years and dozens of cultures. That’s actually pretty cool to think about.
Add this to your list: How to Start Crafting with Kids as a Beginner
What You Need: The Supply List
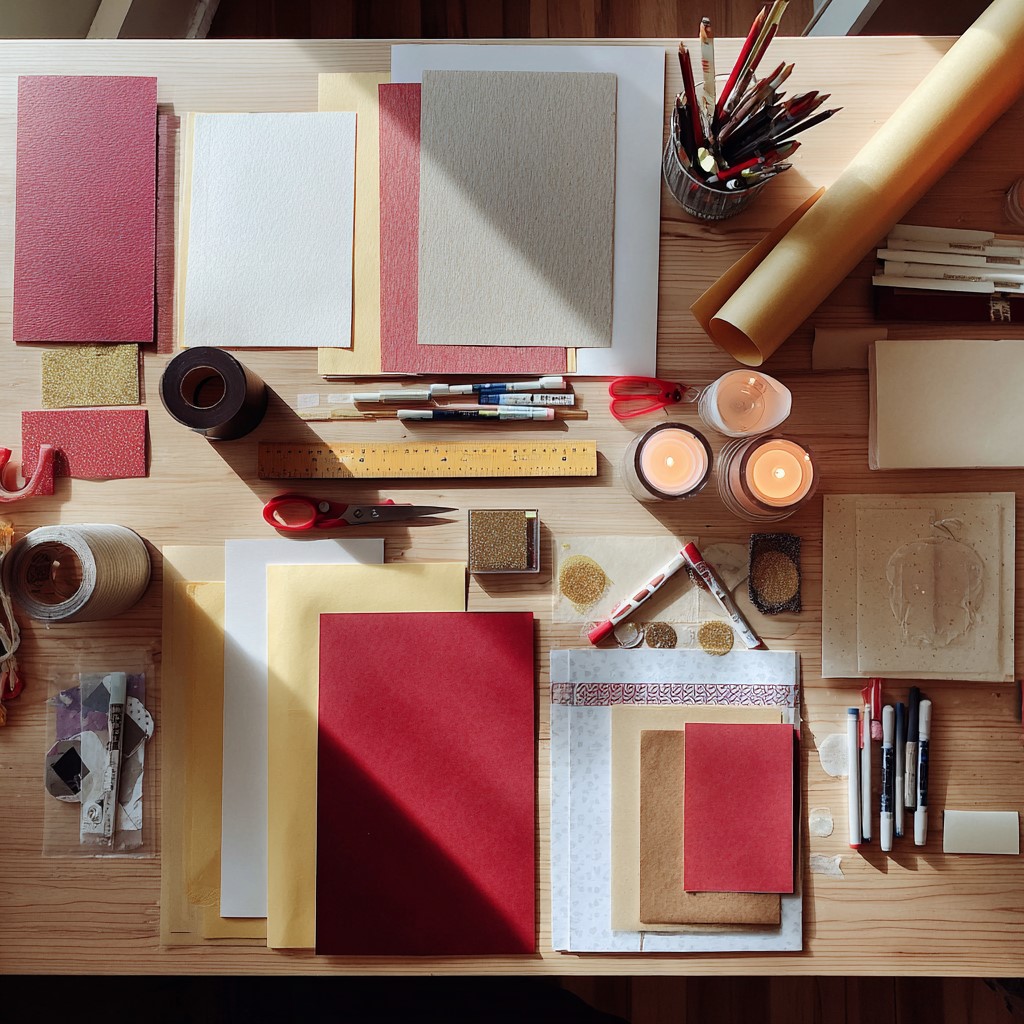
Alright, let’s get practical. Here is everything you need to make beautiful paper lanterns at home.
Colored paper or cardstock. Construction paper works perfectly for a classic, simple lantern. Cardstock gives a sturdier result that holds its shape better and lasts longer. Patterned scrapbook paper produces absolutely stunning results if you have some on hand. For a glowing effect, try tissue paper or vellum when light passes through these, the effect is genuinely breathtaking.
Scissors. Every person working on lanterns needs their own pair. Use age-appropriate scissors for younger kids and sharper craft scissors for older ones and adults.
A ruler. Essential for keeping your cuts straight and even. Trust me eyeballing it leads to wonky lanterns that won’t roll into a proper cylinder.
A pencil. For marking your cut lines before you start cutting.
Glue stick or double-sided tape. Either works well. Double-sided tape, however, gives a slightly cleaner finish without the wet warping that glue sticks can sometimes cause on thinner paper.
A strip of paper or ribbon for the handle. This goes across the top of the lantern. It can match the lantern color or contrast beautifully.
Optional decorating supplies. Glitter glue, stickers, washi tape, markers, foam stickers, metallic pens anything goes here. This is where kids really get to express themselves fully.
Optional: battery-operated tea lights. These transform your lantern from a decoration into a glowing centerpiece. They’re inexpensive, widely available, and completely safe unlike real candles. If you want that warm, magical glow, grab a pack of these.
Don’t miss this: How to Make Homemade Bubble Solution That Actually Creates Giant Bubbles
The Classic Paper Lantern: Step by Step
This is the foundational version. Once you master this, everything else is just a variation. Consequently, take your time reading through all the steps before you start cutting anything.
Step 1: Start with your paper rectangle

Take your sheet of colored paper or cardstock. If you’re using a standard letter-sized sheet, it’s already close to the right proportions. However, for a taller, more elegant lantern, cut your paper to approximately 8 inches wide by 11 inches tall. For a smaller, rounder lantern, go with 6 inches wide by 8 inches tall.
Step 2: Fold the paper in half lengthwise

Fold the paper so that the long edges meet. Crease the fold firmly. Your folded paper should now be a long, narrow rectangle with the fold running along one of the long sides.
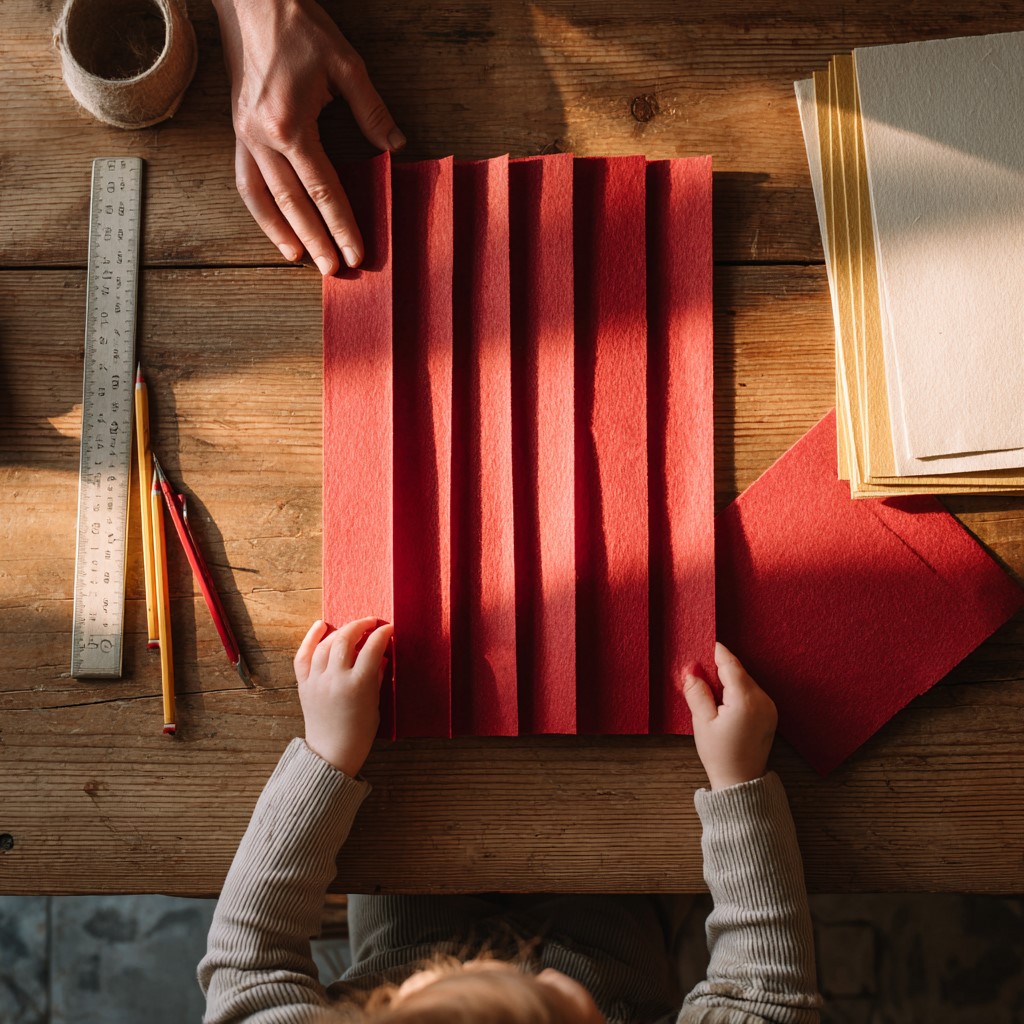
Step 3: Mark your cutting lines
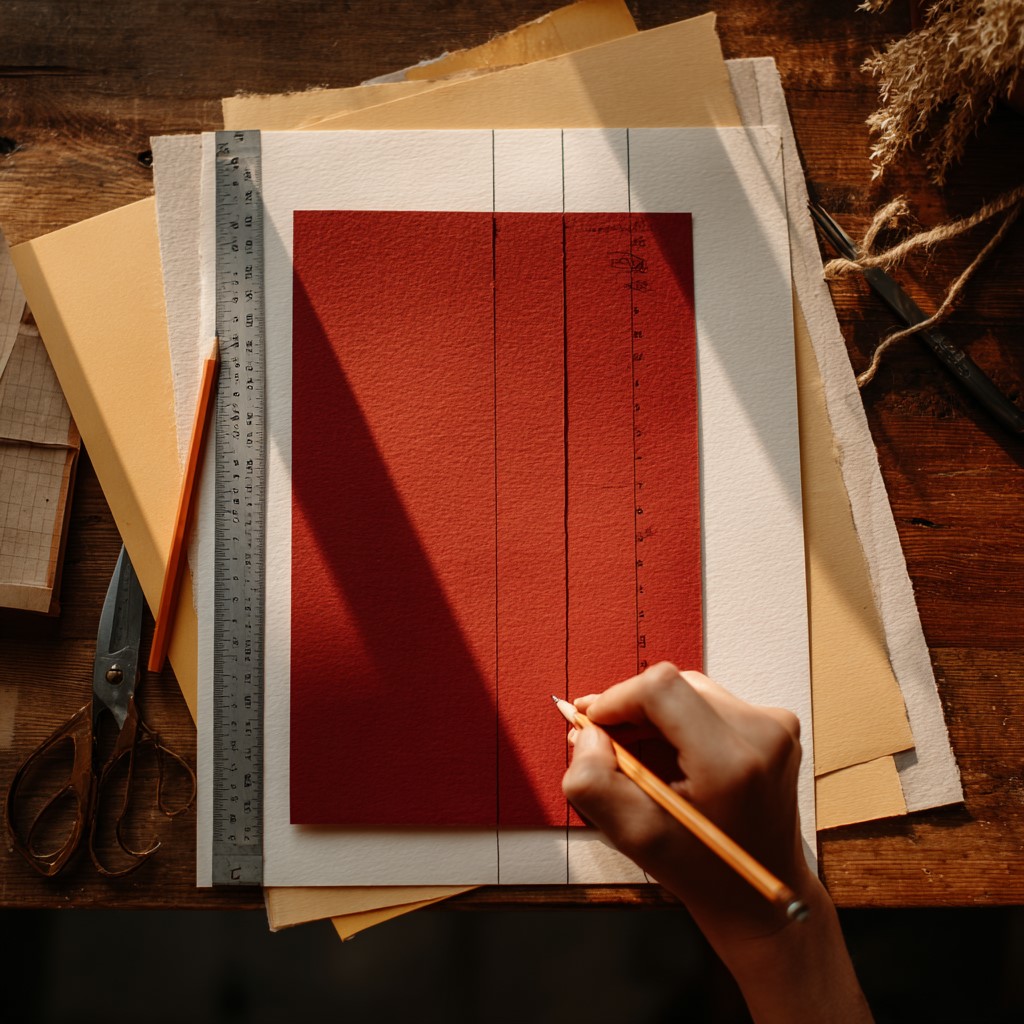
This is the step that creates those beautiful vertical slits that define the classic lantern look. Using your ruler and pencil, draw a line about one inch from the open edge of the paper running the entire length. This line marks where your cuts will stop, do not cut past it.
Starting from the folded edge, draw vertical lines across the paper every half inch to one inch, stopping at the line you just drew. These are your cut guides.
Step 4: Cut along your marked lines
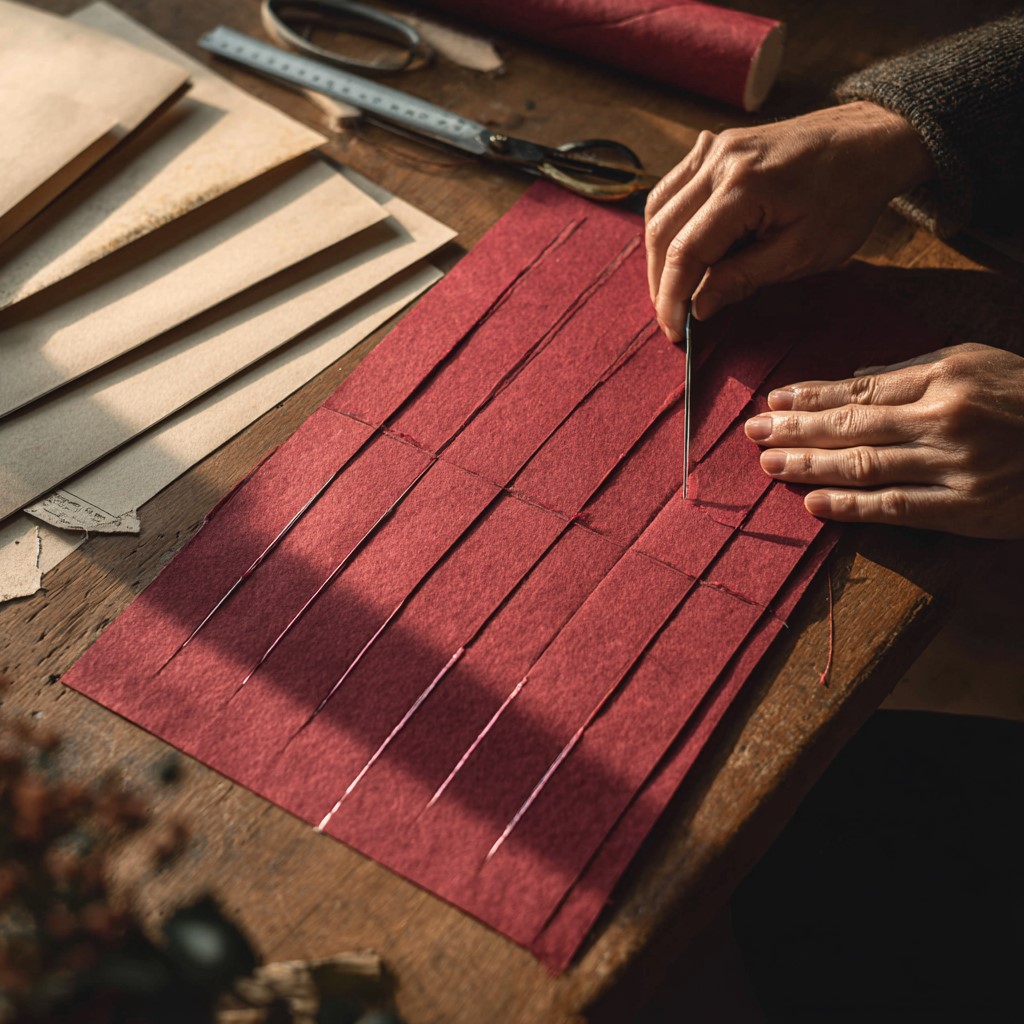
Now cut along each of those vertical lines carefully, starting from the fold and stopping at the guide line. Do not cut all the way through. Those uncut strips along the open edge are what hold the lantern together.
Step 5: Unfold the paper
Open the paper back up carefully. You should now have a sheet full of vertical slits running most of the way across it, with solid strips running along the top and bottom edges.
Step 6: Roll into a cylinder
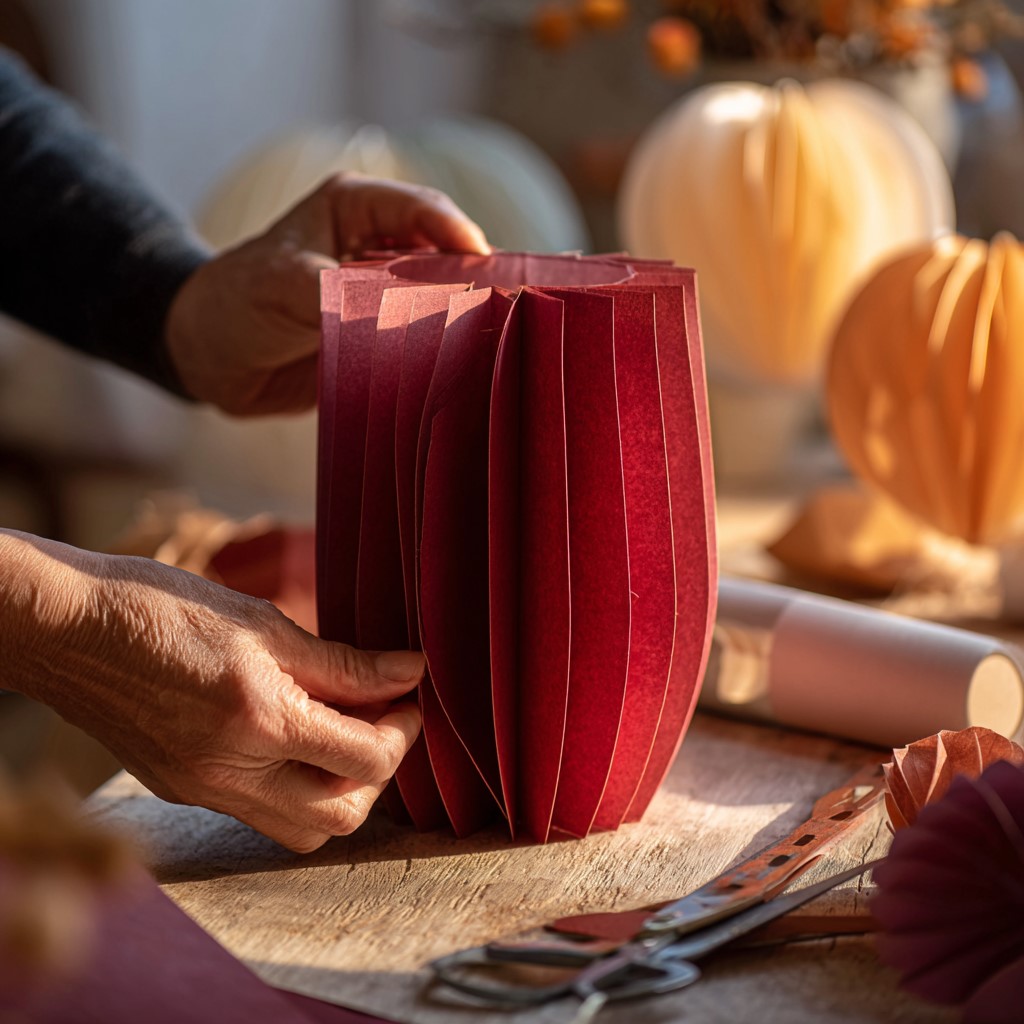
Gently curve the paper into a cylinder shape so that the two short edges meet. Overlap them slightly and secure with glue or double-sided tape. Hold it in place for a moment while the adhesive sets. The slits will fan outward slightly, creating that beautiful lantern silhouette.
You can also try this: How to Make the Cutest DIY Butterfly Mobile With Your Kids This Weekend
Step 7: Add the handle
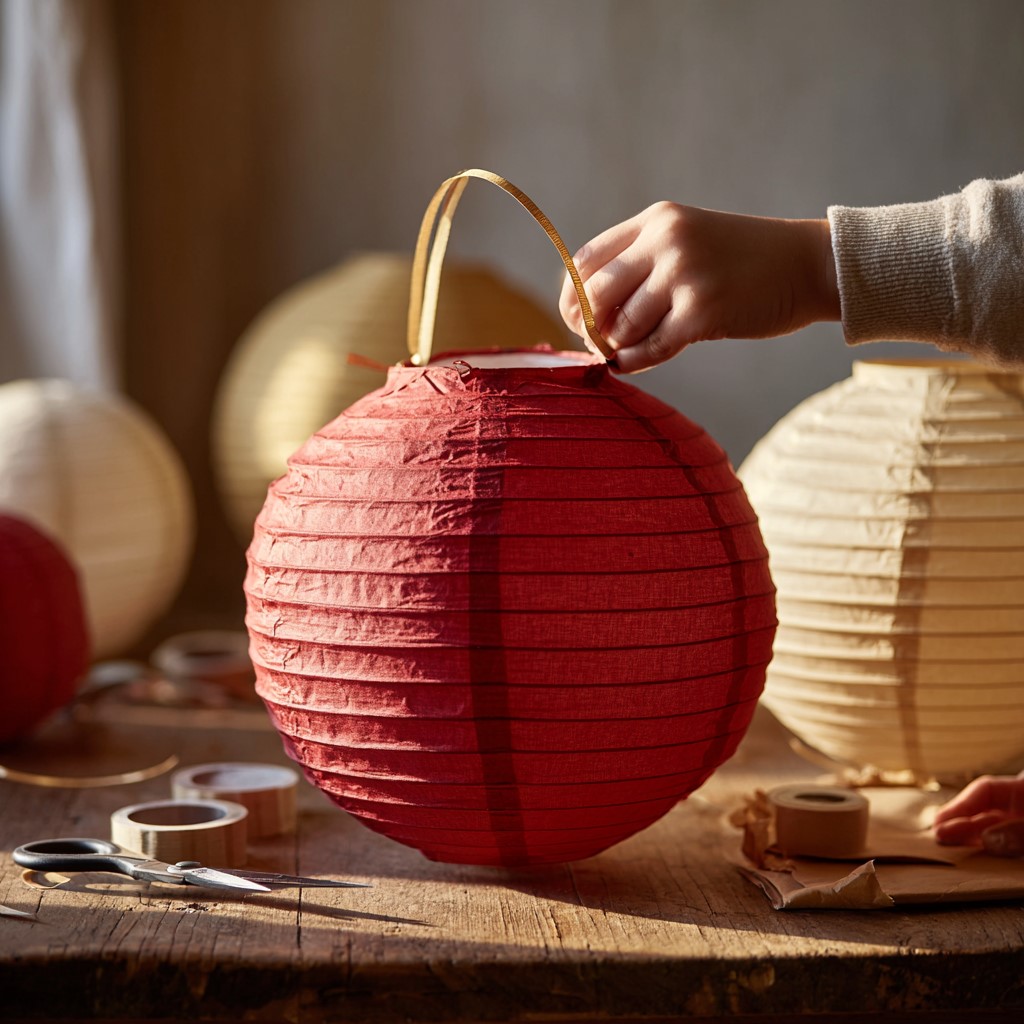
Cut a strip of paper about half an inch wide and six to eight inches long. Attach each end to the inside of the top opening of the lantern. This is the handle you’ll use to hang it or carry it. Reinforce the attachment points with extra glue or a piece of tape on the inside for durability.
Step 8: Drop in a tea light
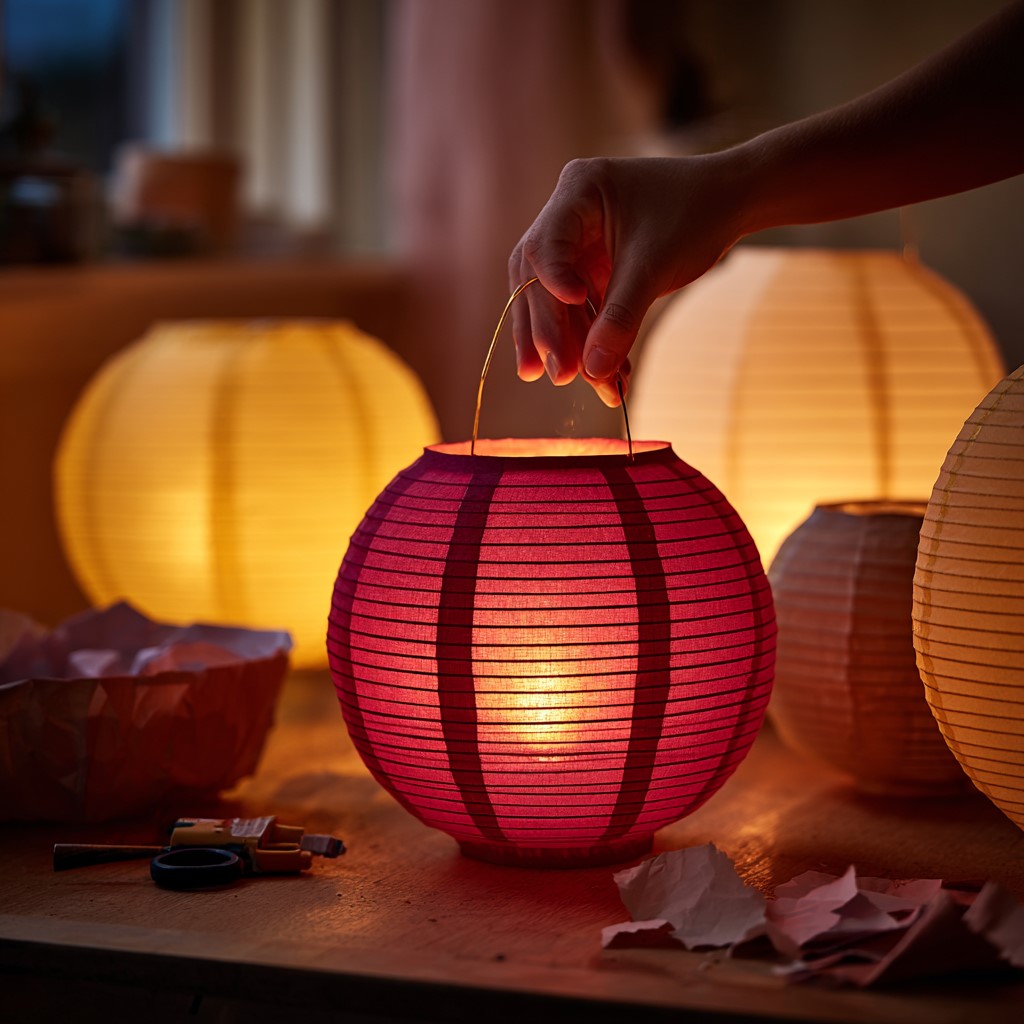
If you’re using a battery-operated tea light, simply place it inside the lantern through the bottom opening. Switch it on. Watch the light filter through the paper and the slits. The effect is genuinely magical, especially in a dimly lit room.
You’ll love this too: How to Make a DIY Fairy Garden With Your Daughter on a Lazy Saturday
Getting Your Cuts Right Every Single Time
Let me spend a moment on the cutting step specifically because this is where most beginners run into trouble. And honestly, the difference between a beautiful lantern and a messy one usually comes down to the cutting.
Spacing Your Slits Evenly
The spacing between your slits determines how open and airy your lantern looks. Slits spaced half an inch apart give you lots of strips and a very open, delicate lantern. Slits spaced one inch apart give you fewer, wider strips and a sturdier, chunkier look.
Neither is wrong. They just create different visual effects. Therefore, decide which look you prefer before you start marking, and then stay consistent all the way across the paper.
For younger kids who are doing their own cutting, wider slits spaced an inch apart are much easier to manage. The strips are wider and therefore less likely to tear accidentally during cutting or rolling.
Keeping Cuts Parallel
The key to neat, even slits is keeping your scissors perpendicular to the fold at all times. If you angle your cuts, the strips end up uneven and the lantern won’t roll into a clean cylinder.
One helpful trick is to score the cut lines lightly with a craft knife and ruler before cutting with scissors. This gives you a visible groove to follow and makes the cutting itself much more precise. Obviously, this part is for adults only, keep craft knives well away from younger children.
Try this next: The Easiest Kids Friendship Bracelet Tutorial for Complete Beginners
What to Do If a Strip Tears
It happens. A strip tears during cutting or while you’re rolling the lantern. Don’t panic and don’t scrap the whole project. Simply place a small piece of clear tape on the back of the torn strip to reinforce it. Once the lantern is rolled and assembled, the repair is completely invisible from the outside.
Decorating Your Lantern: Where the Real Fun Begins
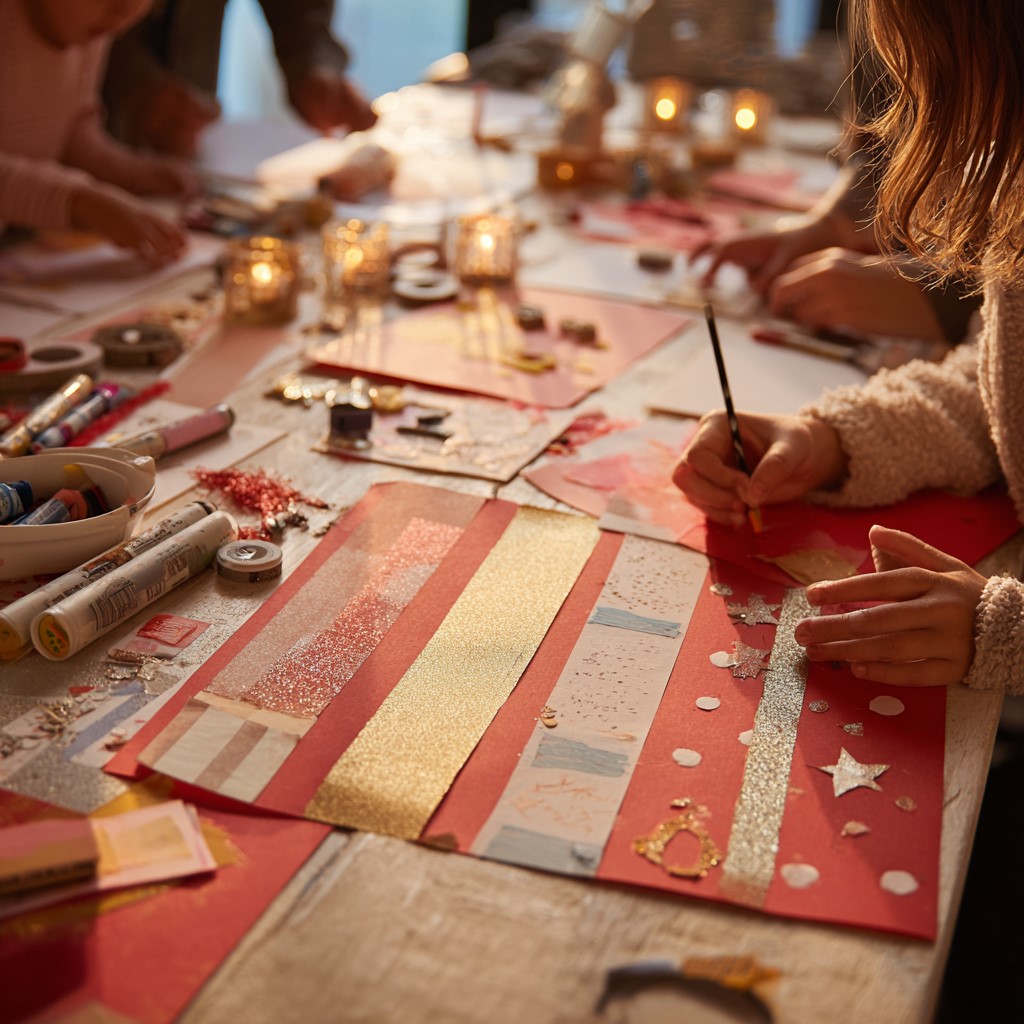
Okay, so now your lantern is assembled. But we’re not done yet. Decorating is honestly where kids go from interested to completely obsessed with this project.
Before rolling your lantern into its final cylinder shape, lay it flat and decorate the outside surface. This is much easier than trying to decorate a three-dimensional cylinder. Let kids go completely wild with whatever supplies you have available.
Stamping and printing. Dip sponges, bottle caps, or carved erasers into paint and stamp patterns onto the paper. Stars, circles, dots, and geometric shapes all look stunning on lanterns.
Washi tape stripes. Run strips of washi tape horizontally across the paper before cutting. The tape stripes add beautiful color and pattern without any painting required. This is especially great for younger kids who want to decorate independently.
Glitter glue details. Let kids trace the edges of the slits with glitter glue after assembly. When the light shines through, the glitter catches it and sparkles beautifully. This is genuinely one of the prettiest effects you can achieve with very minimal effort.
Tissue paper layers. Before rolling your lantern, glue small pieces of colored tissue paper over the open slits on the inside. When a tea light is placed inside, the tissue paper glows in gorgeous rich color. Different colors of tissue paper on different slits create a stained-glass effect that looks absolutely stunning.
Drawings and messages. For a deeply personal touch, let kids draw pictures or write messages on the paper before rolling. This works especially well for birthday lanterns or holiday gifts. Imagine a lantern with a child’s drawing of the birthday person glowing from inside. That’s the kind of thing people keep forever.
If your kids enjoyed this, see: How to Do Easy Block Printing With Kids Using Sponges and Foam
Variations to Try Once You’ve Got the Basics Down
Once your kids have made one or two classic lanterns and feel confident with the process, there are so many exciting directions to explore next. Additionally, trying variations keeps the activity fresh and engaging across multiple craft sessions.
This guide will help you next: How to Create a Mini Herb Garden Planter Craft With Kids
The Accordion Lantern
Instead of cutting slits from a fold, fold your paper in a zigzag accordion pattern first. Then cut the slits as normal. When you roll and secure the ends together, the accordion folds create a much more three-dimensional, dimensional lantern body with gorgeous depth and texture.
The Star Lantern
For this version, make four identical classic lanterns. Instead of assembling them individually, flatten each one and glue them together at the top and bottom edges in a cross shape. When you pull the sides outward and secure them, you end up with a beautiful multi-pointed star lantern. This one is more advanced and works best with older kids or as a parent-led project. Nevertheless, the result is absolutely worth the extra effort.
The Fringe Lantern
After cutting your slits, take a second piece of paper in a contrasting color and cut it into very thin fringe. Glue the fringe strip along the bottom edge of your main lantern paper before rolling it into a cylinder. The fringe hangs down from the bottom of the assembled lantern and sways gently when the lantern moves. It looks incredibly festive and adds beautiful movement to your display.
The Luminaria Bag
This variation requires a small paper bag rather than a sheet of paper. Fold the top edge of the bag down about two inches to create a cuff. Cut decorative shapes like stars, hearts, moons into the sides of the bag using scissors or a craft punch. Place a battery-operated tea light inside. The cut shapes glow beautifully when the light is switched on. These look absolutely magical lined up along a pathway or windowsill.
For more ideas like this: A Parent’s Guide to Starting a Mini Craft Corner for Your Kids at Home
How to Display Your Paper Lanterns
Making the lanterns is wonderful. Displaying them well, though, is what transforms your space into something truly special. So let’s talk about how to show them off properly.
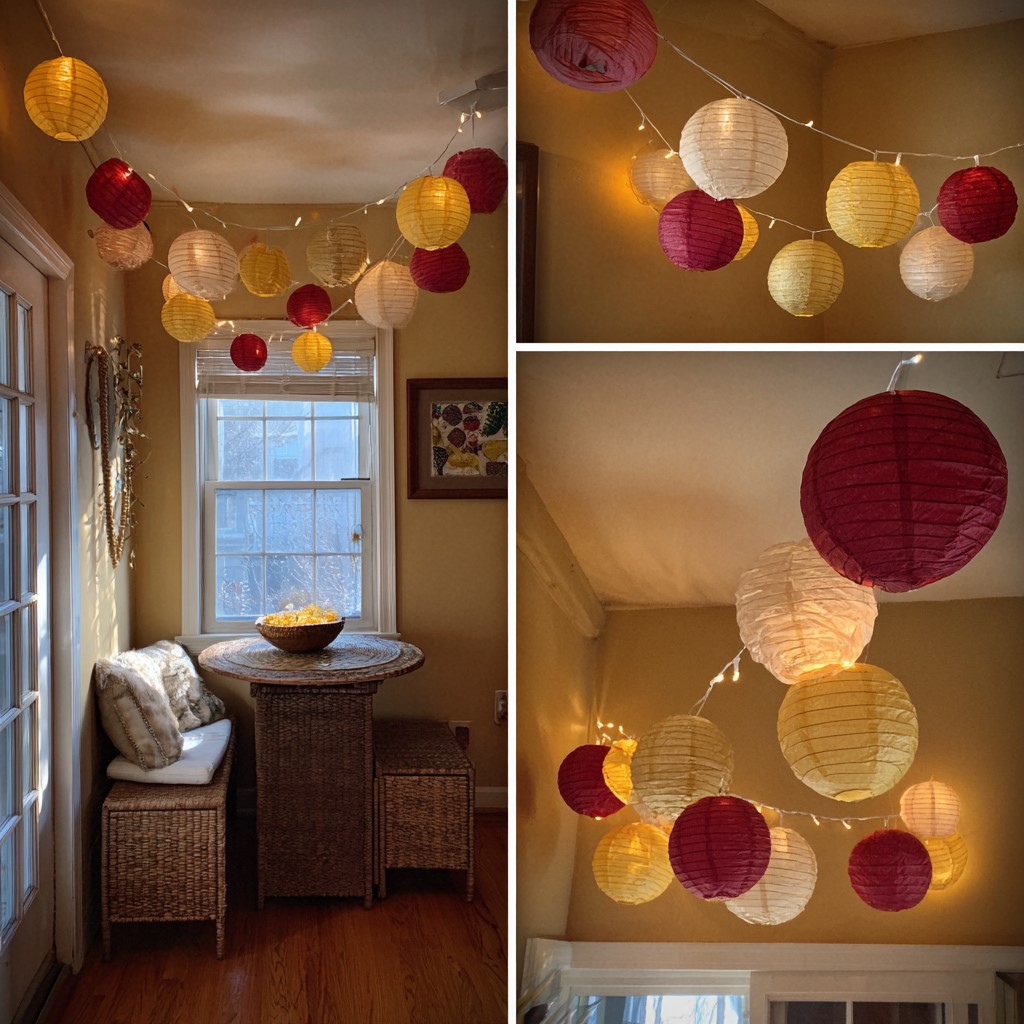
String them on a garland. Thread a length of string, twine, or ribbon through the handles of multiple lanterns and hang them in a line. This is the classic lantern display and it works beautifully indoors strung across a mantelpiece, along a staircase railing, or above a party table.
Hang them at different heights. Attach lanterns to strings of varying lengths and hang them from the ceiling in a cluster. Mix sizes and colors within the cluster. The effect looks deliberate and incredibly decorative. This works especially well above a dining table or in a corner you want to make into a focal point.
Fill a bowl or basket. Place several smaller unlit lanterns inside a large decorative bowl or wicker basket. This makes a beautiful centerpiece that requires no hanging at all. Simply add more lanterns to fill gaps as needed.
Line a windowsill. Place tea-light lanterns along a windowsill in the evening. From inside, they look warm and cozy. From outside, the effect is enchanting. This is especially magical during winter holidays.
Create a pathway. Line luminaria bag lanterns along a walkway, up a set of outdoor steps, or along the edge of a garden bed for an evening celebration. The soft glow of a dozen lanterns in a row is genuinely breathtaking.
You might want to bookmark this: How to Turn Old Crayons Into New Ones Using a Muffin Tin
Making Lanterns for Specific Celebrations
One of the things I love most about this craft is how easily it adapts to different occasions. Therefore, let me give you some specific ideas for the most common celebrations you might be planning for.
Birthday parties. Use the birthday child’s favorite colors. Write their name or age on the lanterns before rolling. Mix sizes for visual interest. Hang a cluster of lanterns above the gift table or dessert display for a beautiful focal point that didn’t cost much at all.
Christmas. Red and green are classic, obviously. But also consider deep gold, ivory, and burgundy for a more sophisticated feel. Add gold glitter glue details and star cutouts. These look absolutely stunning hanging in a window with candles flickering nearby.
Diwali. Go bold and rich with colors like deep orange, fuchsia, royal blue, and gold. Layer tissue paper in warm tones inside the slits so the light glows amber and gold. These feel genuinely festive and honor the spirit of the Festival of Lights beautifully.
Eid celebrations. Crescent moon and star shapes cut into luminaria bags are simple and meaningful. Use rich greens, golds, and whites. String them across a dining room for the family gathering.
Halloween. Black and orange paper with jack-o-lantern faces drawn on before rolling. Cut triangle eyes and jagged smiles into the paper itself so the light shines through the shapes. Genuinely spooky and genuinely easy.
New Year’s Eve. Gold, silver, and white with as much glitter as your household can tolerate. Hang them in a cluster to drop at midnight. Or alternatively, let kids each make one and write their wish for the new year inside before sealing it up.
If you need more inspiration, check this: 20 Fun Air Dry Clay Crafts for Kids
Keeping Kids Engaged Throughout the Process
Here’s something practical that’s worth addressing directly. Keeping kids focused and engaged through an entire craft project can sometimes be a challenge, particularly with younger children whose attention naturally wanders.
The key is giving each child a clear, specific role at every stage. During cutting, one child marks the lines while another does the cutting. During decorating, each child has their own lantern to work on independently. During assembly, older kids help younger ones roll and secure their cylinders.
Moreover, talking about what you’re making and why keeps the energy high. Tell them about the history of lanterns. Ask them what color they want their room to be when the lanterns are glowing. Let them decide where in the house their lantern will hang. That sense of ownership and anticipation makes kids remarkably patient and focused.
Finally, celebrate loudly and genuinely when the first finished lantern is held up to the light. That moment of seeing the glow come through the paper for the first time is genuinely exciting. Let kids experience that excitement fully. It motivates them to keep going and finish the rest.
Want more like this? See: A Step-by-Step Guide to Making Air Dry Clay Bowls With Your Kids
A Few Final Tips to Set You Up for Success
Before you gather your supplies and get started, let me leave you with a handful of final tips that will genuinely make a difference.
Use heavier paper for your first attempt. Cardstock is much more forgiving than thin construction paper. It holds its cylinder shape better and doesn’t tear during cutting or rolling. Once you and your kids are comfortable with the process, you can experiment with thinner, more delicate papers.
Make extra lanterns. They go faster than you expect once everyone gets into a rhythm. And having a collection of different sizes and colors always looks more impactful than a single perfect lantern.
Let imperfection be part of the charm. A lantern with slightly uneven slits or a wobbly cylinder made entirely by a six-year-old is infinitely more precious than a perfect one you made for them. Step back. Let them make it theirs.
Finally, take photos before you hang everything up. The process photos kids bent over their paper, tongues out in concentration, covered in glitter are often more treasured than photos of the finished display. Document the making, not just the result.
So go grab some colored paper. Clear the kitchen table. Put on some celebration music even if there’s nothing specific to celebrate yet. And make something glowing and beautiful together.
Because honestly? Any day you make something with your kids is worth celebrating.
Leave a Reply