Some of the best craft ideas come from the most ordinary objects. A plain white pillowcase sitting in your linen closet right now is honestly a blank canvas waiting to happen. It is smooth, it is flat, and it takes color beautifully. Most importantly, it is something your child will actually use every single night.
Over the years, I have done a lot of crafts with kids. Some of them get finished, admired for a day, and then quietly forgotten in a drawer somewhere. This one, however, is genuinely different. A pillowcase your child decorated themselves becomes part of their daily life. They sleep on it. They point it out to guests. They feel incredibly proud every single time they see it on their bed.
If you have been following along on this blog, you will remember our last project on How to Make a DIY Dreamcatcher With Your Child Using Yarn and Sticks. That was a craft full of intention and quiet creativity. This one, on the other hand, brings a completely different energy. This one is bold, expressive, colorful, and wonderfully messy in all the right ways.
The best part is that you do not need any artistic talent whatsoever to pull this off. Neither does your child. The techniques we are going to explore today are specifically designed to produce beautiful results regardless of skill level or age. So clear the table, lay down some newspaper, and let us turn something ordinary into something completely extraordinary together.
Read this before you start: How to Start Crafting with Kids as a Beginner
Why This Project Works So Beautifully for Kids
Before we get into supplies and techniques, let me first tell you why this specific project hits so differently compared to other fabric crafts.
First of all, the stakes feel wonderfully low. A pillowcase costs almost nothing. There is genuinely no pressure to be perfect. That low pressure environment is incredibly important for kids because it gives them the freedom to experiment without fear. And when kids experiment freely, the results are almost always more creative and interesting than anything you could have planned in advance.
Secondly, fabric art has a permanence that paper crafts simply do not have. Paint on paper can fade, tear, or get thrown away eventually. Paint on fabric, however, when set properly, stays for years. Washed dozens of times and still going strong. That durability makes the finished product feel genuinely significant to a child.
Furthermore, this is one of those projects where every child’s result looks completely unique. Two kids using the exact same colors and the exact same technique will produce two entirely different pillowcases. That individuality is deeply satisfying for children who want to feel seen and special.
You’ll love this too: How to Make the Cutest DIY Butterfly Mobile With Your Kids This Weekend
Why Every Age Group Can Join In
Additionally, the range of techniques available means this project scales beautifully across age groups. A toddler can participate meaningfully. A teenager can create something genuinely sophisticated. There is truly something here for every age and every ability level without exception.
Moreover, the finished product has real staying power in a child’s life. Unlike a drawing that gets shuffled into a folder, a decorated pillowcase stays visible and present. It becomes part of the bedroom. Part of the bedtime routine. Part of the story of that particular season of childhood. That kind of lasting presence makes all the difference.
What You Need to Get Started
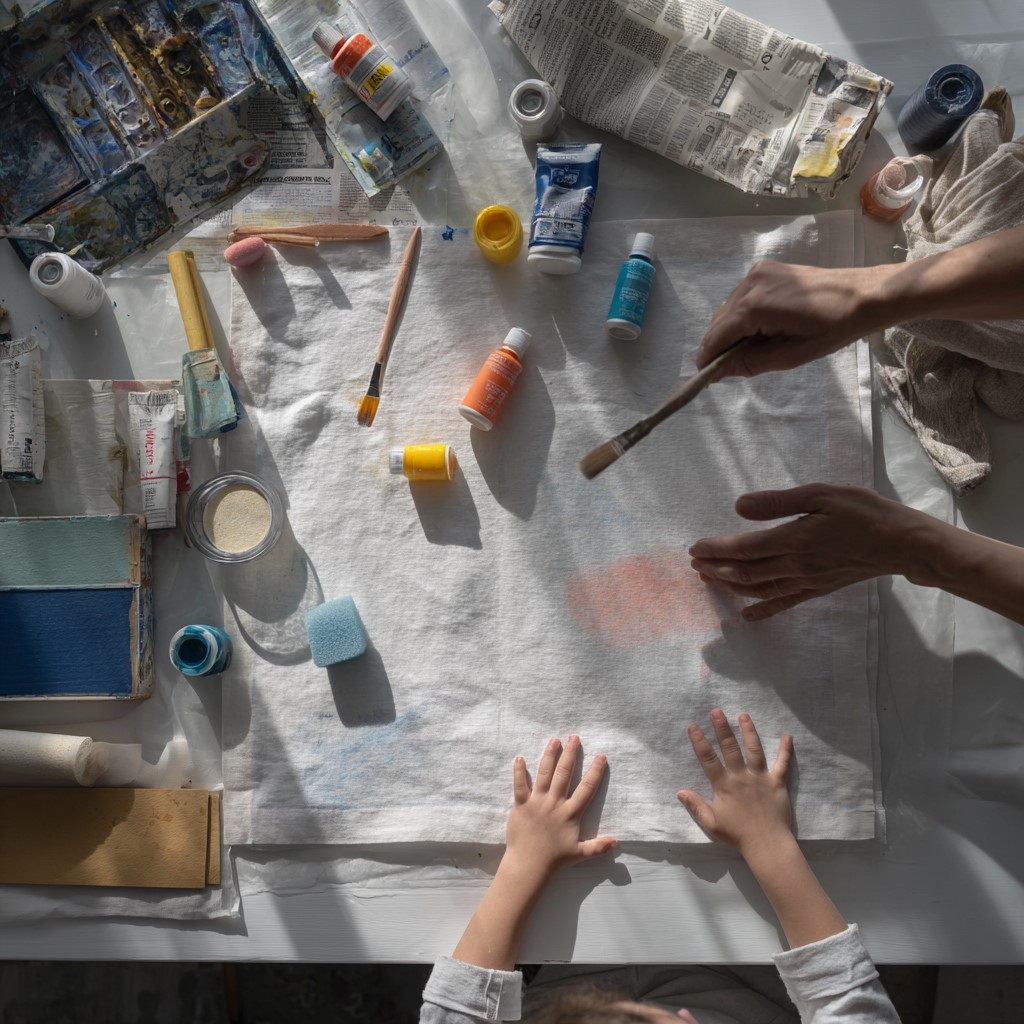
Now let us talk about supplies. As always, I want to keep this as accessible and affordable as possible for everyone.
Plain white pillowcases. Cotton or cotton blend pillowcases work best. The higher the cotton content, the better the paint absorbs and the more vibrant the colors look afterward. Avoid pillowcases with a high polyester content because paint tends to sit on top of synthetic fibers rather than soaking in properly. You can buy inexpensive white pillowcases at most home goods stores or online in bulk packs if you are planning this as a group activity.
Fabric paint. This is the one supply you genuinely should not substitute with anything else. Regular acrylic paint or poster paint will crack, peel, and wash off after just a few launderings. Fabric paint, on the other hand, is specifically formulated to bond with textile fibers and withstand repeated washing over time. It comes in a huge range of colors and is widely available at any craft store.
Fabric markers. These are wonderful for adding fine details, outlines, and text to your design. They work exactly like regular markers but the ink is permanent on fabric. Let kids use these to add names, messages, doodles, and small details that brushes simply cannot achieve.
Paintbrushes in various sizes. Wide flat brushes work well for large areas of color. Medium round brushes are great for general painting. Fine detail brushes handle small precise work beautifully. Having a range means kids are never limited in what they can express on the fabric surface.
Save this guide: How to Create a Mini Herb Garden Planter Craft With Kids
Additional Supplies Worth Having
Sponges and foam rollers. These are honestly some of the most fun tools for fabric painting. Sponges create beautiful textured marks that brushes cannot replicate. Foam rollers apply large areas of smooth, even color very quickly. Both are particularly great for younger kids who find brushes difficult to control confidently.
Cardboard or foam board. This goes inside the pillowcase during painting to prevent paint from bleeding through to the back side. This step is genuinely important and surprisingly easy to forget in the excitement of starting. Do not skip it under any circumstances.
Masking tape or painter’s tape. For creating clean lines, geometric patterns, and crisp borders. Tape off sections before painting and peel away to reveal precise edges. This technique produces results that look deliberately designed and very polished.
Newspaper or a plastic tablecloth. Protect your work surface thoroughly before you start. Fabric paint is permanent. On absolutely everything.
An iron. For heat setting the finished paint once it dries completely. This is what makes the design washable and truly permanent for years of use.
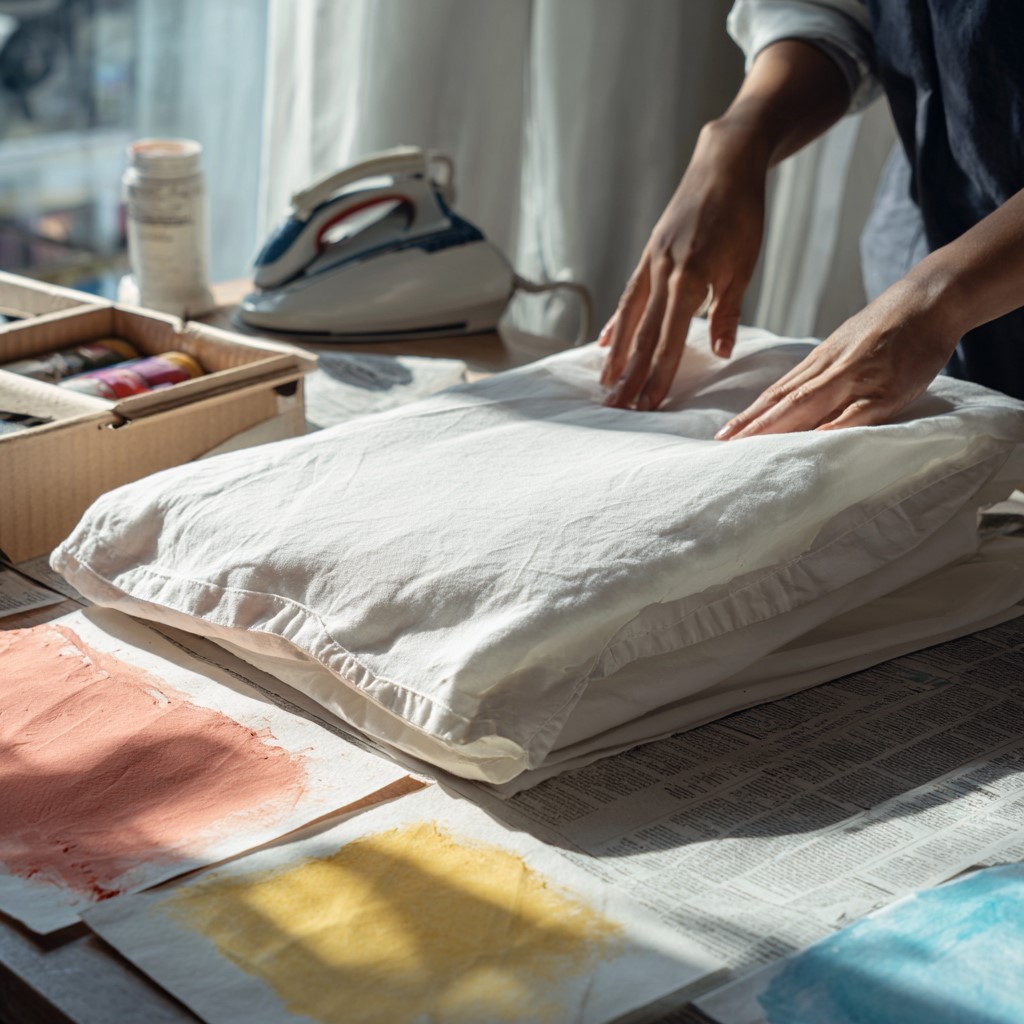
Preparing Your Pillowcase Before You Start
Preparation genuinely makes a significant difference in the quality of your finished result. Consequently, do not skip these steps even though they feel like the unglamorous part of the process.
Wash and dry the pillowcase first. New fabric often has a finishing treatment applied at the factory that prevents paint from absorbing properly into the fibers. A single wash removes this treatment effectively. Wash in warm water without fabric softener. Dry completely before you begin. Do not use fabric softener at any point during this project because it coats the fibers and directly interferes with paint adhesion.
Iron the pillowcase smooth. Wrinkles and folds in the fabric create uneven painting surfaces that are frustrating to work on. A quick press with a hot iron ensures your painting surface is perfectly flat and smooth. This makes a noticeable difference, especially if you are planning to use tape for geometric patterns.
Insert your cardboard. Slide a piece of cardboard or foam board inside the pillowcase before painting begins. The cardboard should fill the inside of the pillowcase fully so the fabric is stretched flat and taut. This step prevents paint from bleeding through to the back side and keeps the surface stable while you work.
Lay everything flat. Finally, place your prepared pillowcase on your protected work surface. Smooth out any remaining wrinkles with your hands. Now you are genuinely and completely ready to begin the fun part.
Don’t miss this: How to Make a Paper Lantern With Your Kids for Any Celebration
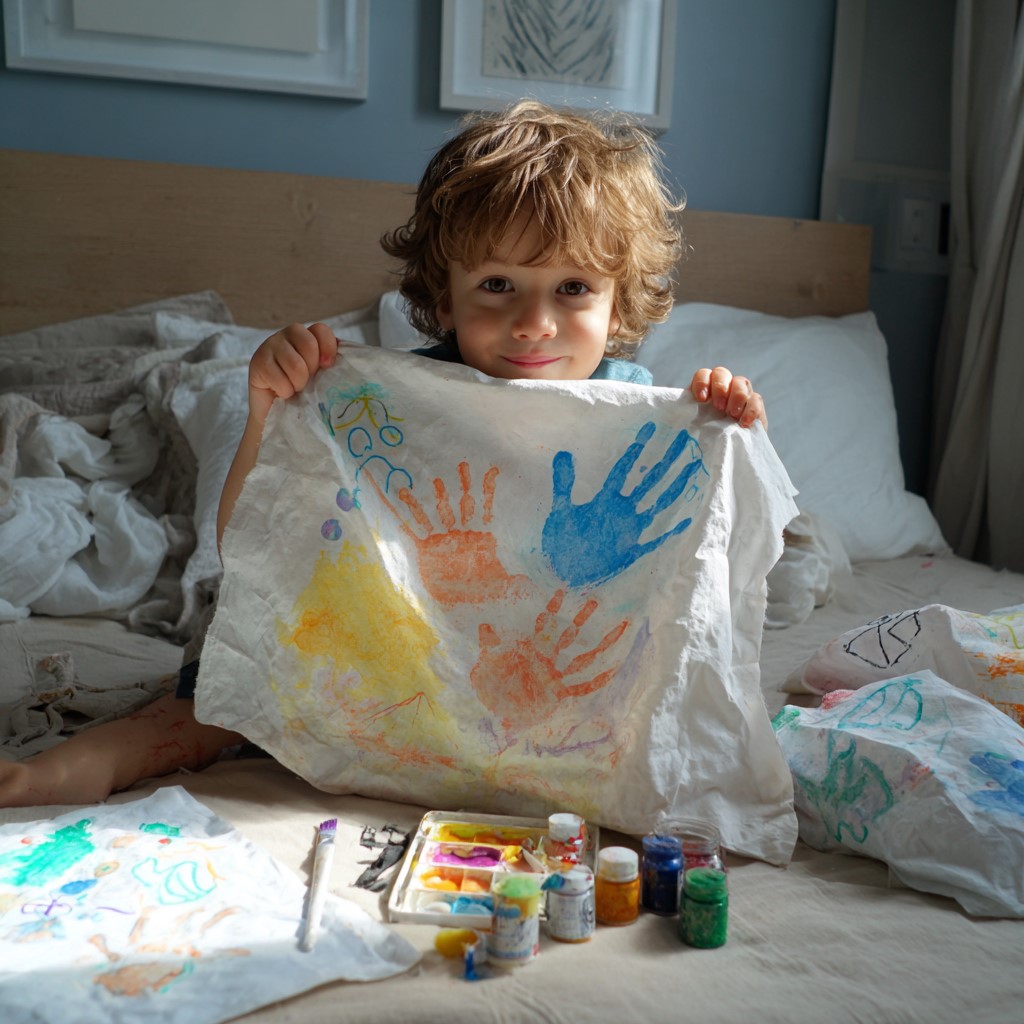
Technique One: Handprint and Footprint Art
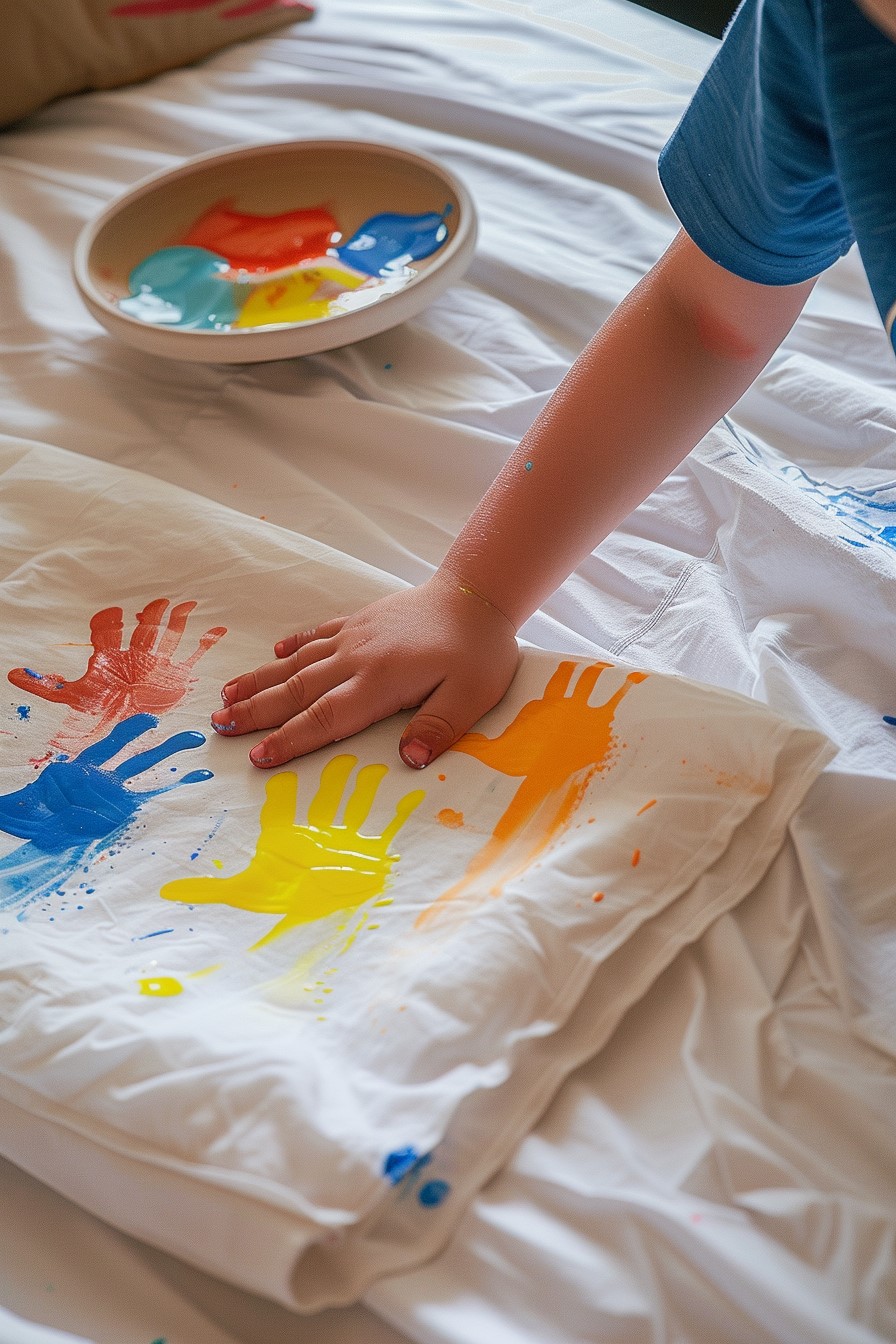
Let us start with the most classic and beloved fabric art technique of all time. Handprints and footprints never get old. They produce results that are genuinely precious and deeply personal. Moreover, they are so simple that even the very youngest children can fully and meaningfully participate.
Pour a small amount of fabric paint onto a flat plate or palette. Make sure the paint is spread into an even, thin layer. Too much paint produces a blobby, undefined print. Too little paint, on the other hand, produces a faint and patchy result. A thin, even coat is precisely what you are aiming for every time.
Press a child’s hand or foot firmly and evenly into the paint. Make sure every part of the surface is fully coated. Then press it onto the pillowcase with steady, even pressure. Do not rock or slide the hand or foot sideways. Simply lift it straight up to reveal a clean, crisp print underneath.
Check this out: How to Create a No-Sew Fleece Blanket With Your Kids in One Hour
Creative Ways to Use Handprints
A single handprint is lovely on its own. A whole composition of handprints, however, is genuinely stunning. Therefore, here are some ideas for turning basic handprints into something far more elaborate and meaningful.
Turn handprints into animals. A handprint with fingers spread wide becomes a turkey, a peacock, or a lion. A handprint with the thumb pointing up and fingers pressed together becomes a fish swimming across the fabric. A curved handprint with the right additions becomes a graceful swan. Let kids look at their prints and decide what shapes they see in them naturally.
Additionally, consider creating a family tree together. Each family member makes their handprint on the pillowcase in a different color. Then add names and dates with a fabric marker beneath each print afterward. This approach turns the pillowcase into a genuine family keepsake that grows more meaningful with every single passing year.
Technique Two: Stamping With Everyday Objects

This technique produces results that honestly look like they came from a professional textile designer. The secret, however, is that almost any household object with an interesting surface can function as a stamp. Consequently, you probably already have everything you need sitting in your kitchen right now.
Cut vegetables are among the very best stamping tools available anywhere. A potato cut cleanly in half produces a perfect oval shape. The cut end of a celery stalk creates a beautiful rose-like rosette that looks surprisingly sophisticated. A halved apple reveals a natural star pattern inside. A corn cob rolled across the fabric creates the most incredible repeating textured pattern you have ever seen on a pillowcase.
Beyond vegetables, bottle caps, corks, sponge shapes, crumpled paper, bubble wrap, leaves, lace fabric, and even the textured bottom of a shoe can all be pressed into paint and stamped onto fabric. The variety of patterns and textures you can create with ordinary household objects is genuinely astonishing.
This one pairs perfectly: How to Make Pressed Flower Art That Will Last for Years
How to Organize a Stamping Session
The key to a successful and enjoyable stamping session is good organization beforehand. Set up your work area with separate paint plates for each color you plan to use. Have a damp cloth nearby for wiping stamps cleanly between color changes. Most importantly, encourage kids to plan their design loosely before they make a single stamp.
Encourage them to think about pattern and repetition specifically. A completely random scattering of stamps can look busy and chaotic on a finished pillowcase. A repeated pattern, however, even a simple alternating two-stamp pattern, looks intentional and genuinely beautiful. Show them a few quick examples of simple repeating patterns and then step back and let them design their own version entirely.
Furthermore, combining different stamp shapes within a cohesive color palette creates results that look remarkably sophisticated. A pillowcase stamped entirely in shades of blue and green using a variety of different textures has a gorgeous, coordinated feel even though all the individual shapes are completely different from each other.
Technique Three: Tape Resist Geometric Patterns
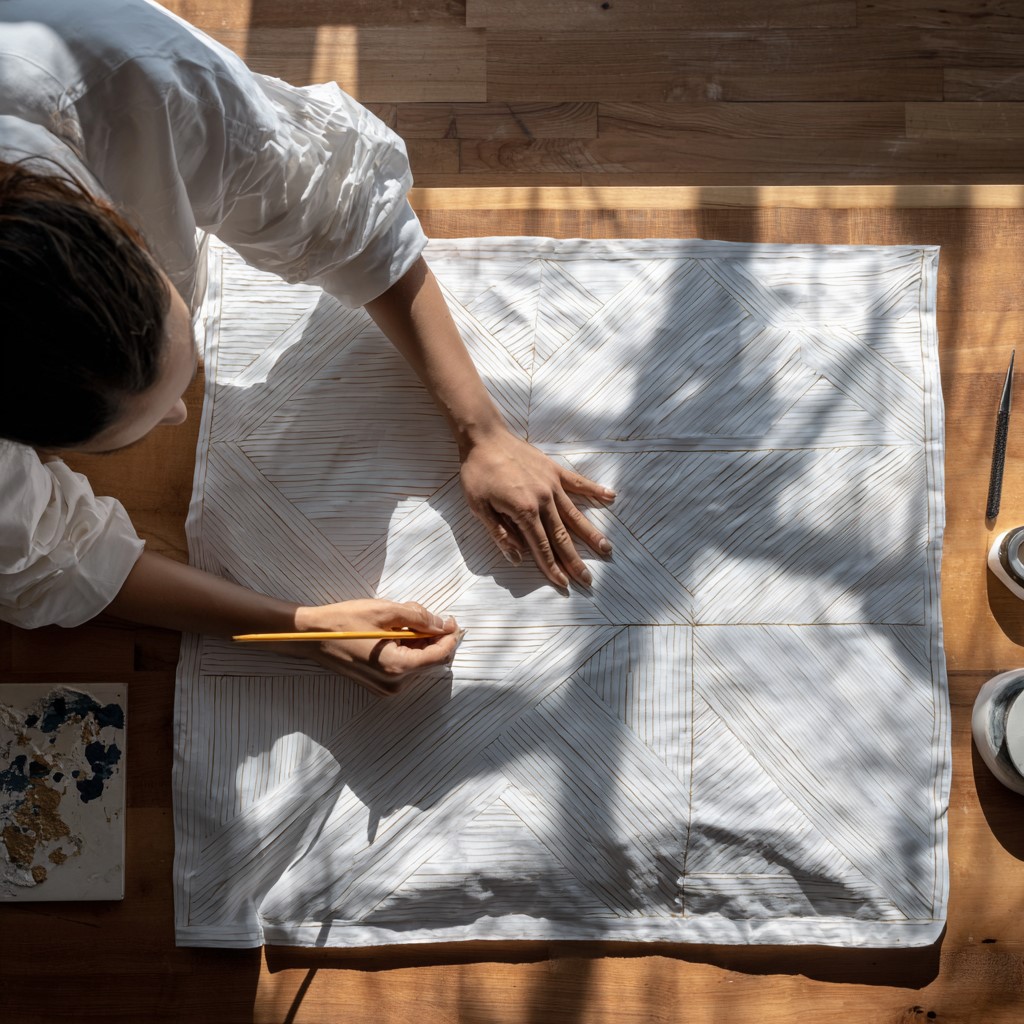
This is honestly the technique that produces the most consistently impressive looking results of everything we are covering today. And remarkably, it requires almost no artistic skill at all. The tape essentially does all the difficult work for you.
Start with your clean, prepared pillowcase laid perfectly flat on your work surface. Use painter’s tape or masking tape to create a geometric pattern across the fabric surface. Stripes, chevrons, triangles, diamonds, and grid patterns all work beautifully with this technique. Press the tape down firmly along all edges so absolutely no paint can seep underneath the edges.
Now paint freely and generously over the entire taped surface using one or more colors. You can use a single solid color for a clean, graphic, modern look. Alternatively, you can use multiple colors in different sections for a more vibrant, patchwork effect. Sponge rollers are particularly great for this specific technique because they apply paint evenly and quickly across large areas.
You might want to bookmark this: How to Make Homemade Bubble Solution That Actually Creates Giant Bubbles
The Satisfying Reveal Moment
Let the paint dry completely before you touch the tape at all. This step requires genuine patience. Peeling tape away from wet paint pulls the color up with it and ruins the clean lines you worked carefully to create. Be patient and let everything dry thoroughly.
Once the paint is fully and completely dry, peel the tape away slowly and deliberately. Pull it back at a low angle rather than yanking it sharply straight up. What is revealed underneath is crisp, clean white lines cutting precisely through the color. The geometric pattern looks exact and intentional. Kids are genuinely amazed by this reveal moment every single time without exception.
Moreover, once your first layer is dry and the tape is removed, you can add a second layer of tape in a completely different direction and paint again in a contrasting color. This layering process creates complex, overlapping geometric patterns that look intricate even though each individual step remained simple throughout.
Technique Four: Fabric Tie Dye Effect
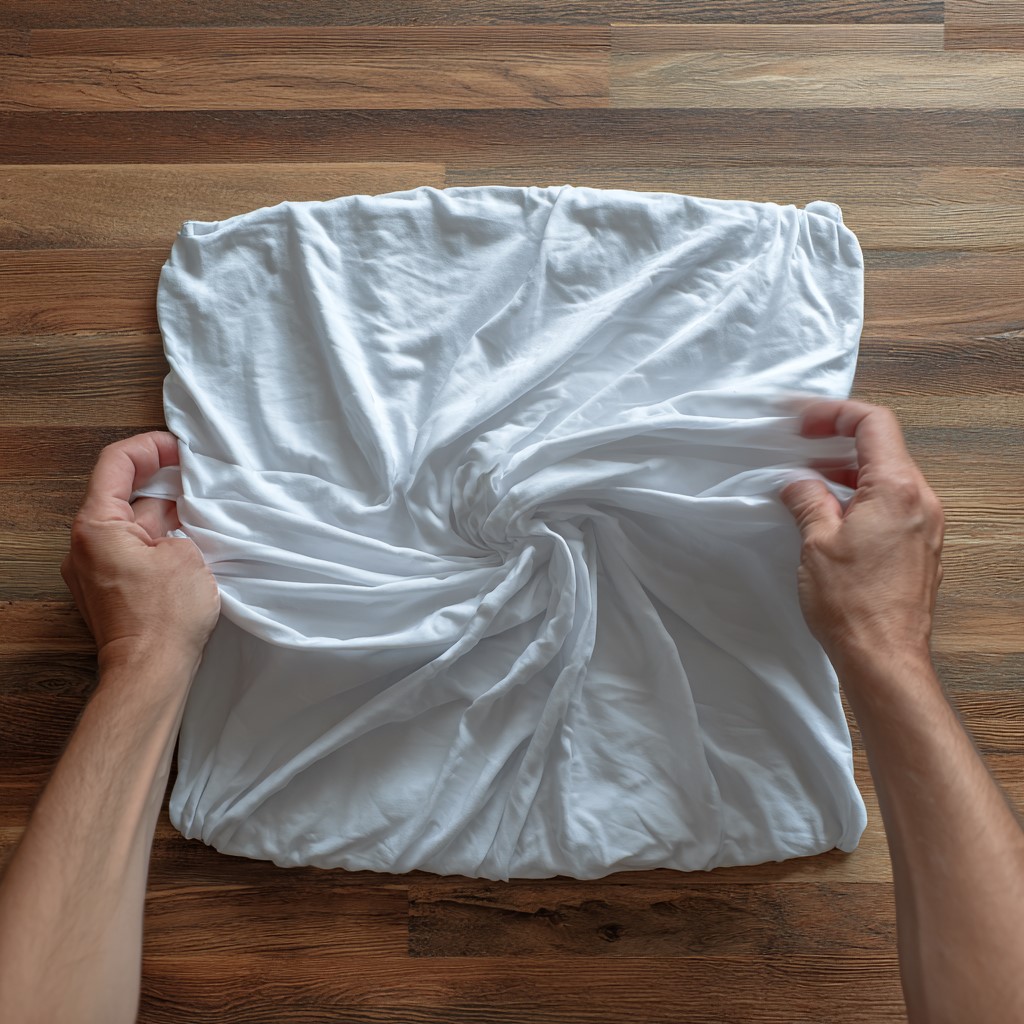
Tie dye on a pillowcase is a classic technique for very good reason. It is joyful, wonderfully unpredictable, and almost always produces something genuinely beautiful regardless of what you do. Additionally, the process itself is exciting for kids because there is a real and satisfying element of surprise waiting in the reveal.
Traditional tie dye involves binding sections of wet fabric with rubber bands and applying actual dye. However, for a simpler and more accessible version using fabric paint rather than dye, try this approach instead.
Lay your pillowcase completely flat. Scrunch, fold, or twist sections of the fabric and secure each gathered bunch firmly with a rubber band. The way you manipulate and fold the fabric determines the pattern you ultimately get. Scrunching the whole pillowcase into a loose ball and wrapping rubber bands randomly around it creates an all-over crinkle pattern. Folding the fabric in an accordion fold and binding it tightly creates clean horizontal stripes. Pinching the very center and twisting outward creates the beloved classic spiral.
This is worth a look: How to Make a DIY Fairy Garden With Your Daughter on a Lazy Saturday
Getting the Best Tie Dye Results
Mix your fabric paint with a small amount of water to thin it slightly before applying. Using a squeeze bottle or a wide brush, apply different colors to different sections of the bound fabric generously. Let colors touch and bleed into each other naturally at the edges for beautiful soft blended transitions between shades.
Wrap the painted pillowcase loosely in plastic wrap and let it sit undisturbed for at least two hours. This resting time gives the paint the opportunity to fully penetrate the fabric fibers deeply. Then rinse under cool running water until the water runs completely clear, remove the rubber bands carefully, and unfold slowly.
The reveal is genuinely one of the most exciting moments in any craft session. Kids gasp out loud every single time. Therefore, make sure everyone gathers around for the unwrapping moment because it deserves an audience.
Technique Five: Free Drawing and Illustration
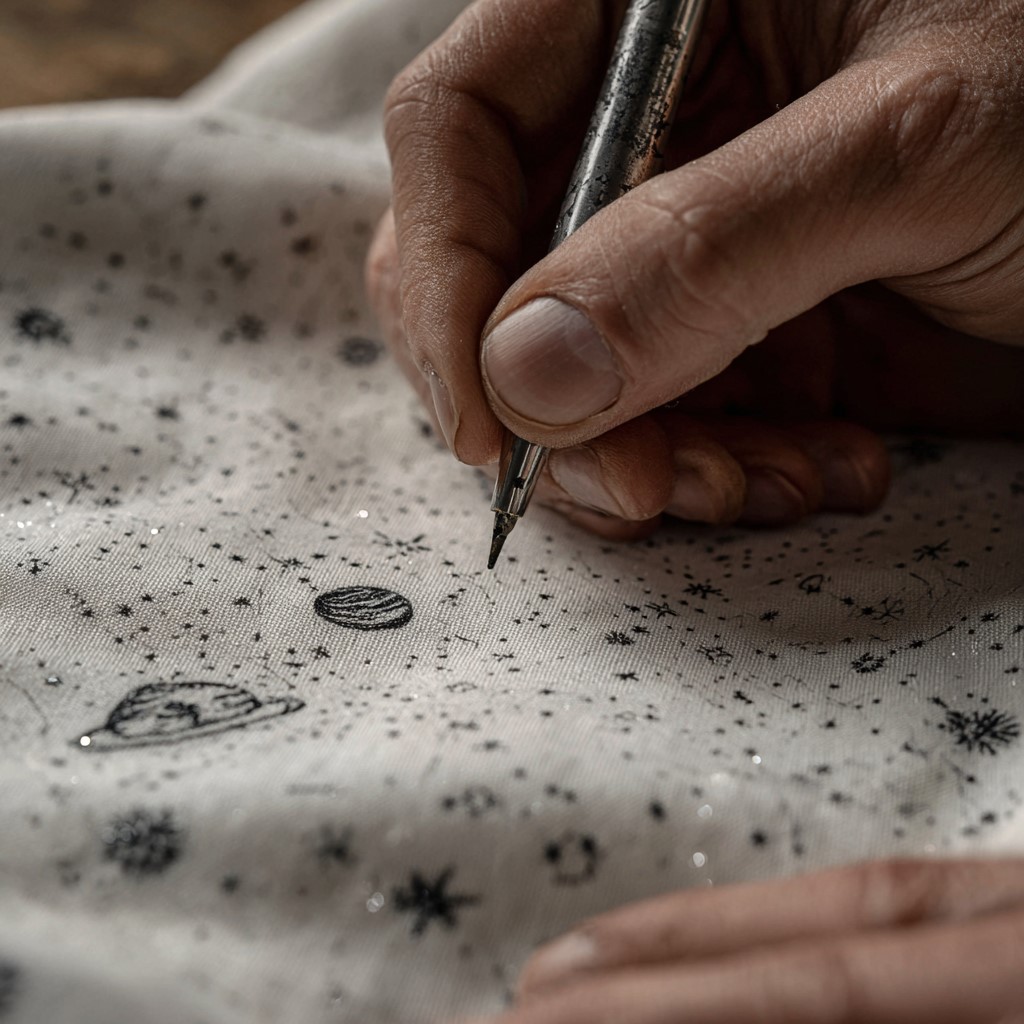
Sometimes the most meaningful approach is also the simplest one available. Give a child a set of fabric markers and a plain white pillowcase and simply let them draw whatever they want.
This technique works especially beautifully for older kids and teenagers who have a more developed sense of what they personally want to create. A child who loves astronomy might cover their pillowcase in stars, planets, and hand-drawn constellations. A child who loves animals might draw their favourite creatures across the whole surface in loving detail. A child who connects deeply with words might fill the pillowcase with favourite quotes, song lyrics, and meaningful phrases written in their own handwriting.
Helping Kids Plan Their Design
The key to making free drawing look intentional rather than scattered is encouraging kids to think about the whole surface before making a single mark. Ask them where the main image will go. Will it be centered on the fabric? Tucked into a corner? Repeated across the entire surface in a pattern? Having even a loose plan means the finished design feels considered and deliberate rather than random.
Fabric markers give a beautiful, clean line that looks almost like professional screen printing on the finished fabric. Combined with a few painted sections for bold color blocking, the results can be genuinely stunning. Furthermore, fabric markers allow for a level of fine detail that no brush can replicate, which makes older kids feel genuinely capable and artistically competent throughout the process.
If you need more craft inspiration, check this: The Easiest Kids Friendship Bracelet Tutorial for Complete Beginners
Combining Multiple Techniques on One Pillowcase
Here is something I really want to encourage you to try with your kids. Do not limit yourself to just one technique per pillowcase. Some of the most beautiful results come specifically from combining two or three different approaches thoughtfully on the same surface.
Try this particular combination as a starting point. Begin with a tape resist geometric border running around the entire edge of the pillowcase. Then fill the center section with a handprint tree, using handprint leaves in warm autumn colors branching from a painted brown trunk. Finally, use fabric markers to add the child’s name and the date neatly in the border area. The result is layered, deeply personal, and genuinely impressive to anyone who sees it.
Another Combination Worth Trying
Alternatively, try stamping an all-over background pattern across the whole pillowcase in a light, soft color first. Then use fabric markers to draw detailed illustrations directly over the top of the stamped background once it dries. The stamping underneath creates visual texture and depth behind the drawings. The combination looks rich, layered, and intentional in a way that a single technique alone simply cannot achieve.
The more techniques you thoughtfully layer together, the more unique and completely irreplaceable the finished piece becomes. Therefore, encourage kids specifically to think of their pillowcase as something they are building in stages over time rather than completing all at once in a single sitting.
This craft idea is just as fun: How to Do Easy Block Printing With Kids Using Sponges and Foam
Heat Setting Your Finished Pillowcase
This step is genuinely critical to everything working long term. Consequently, I want to make absolutely sure you do not skip it in the excitement of finishing the painting. Heat setting is precisely what transforms your fabric paint from something that might wash off into something permanently bonded to the fabric fibers for years.
First, let your paint dry completely and thoroughly. Do not rush this waiting period at all. Depending on how thickly the paint was applied, full drying can take anywhere from one hour to overnight. Thin layers dry noticeably faster. Thicker applications genuinely need more time to cure properly.
Once the paint is completely and fully dry, turn the pillowcase inside out carefully. Place a thin cotton cloth or a piece of plain white scrap fabric over the painted areas to protect them from direct iron contact during the heat setting process.
Set your iron to the cotton setting without any steam. Press firmly and deliberately over each painted section for thirty to sixty seconds each. Move the iron slowly across the surface. Make sure every single painted area receives adequate direct heat throughout the process.
Want more like this? See: A Parent’s Guide to Starting a Mini Craft Corner for Your Kids at Home
Why Heat Setting Matters So Much
This heat setting process causes the paint pigments to fuse permanently and deeply with the fabric fibers at a molecular level. After heat setting properly, your design can be washed repeatedly without fading, cracking, or peeling away from the surface. Without this essential step, even the highest quality fabric paint will eventually deteriorate and look shabby with regular washing. So take the extra few minutes. It is absolutely worth it.
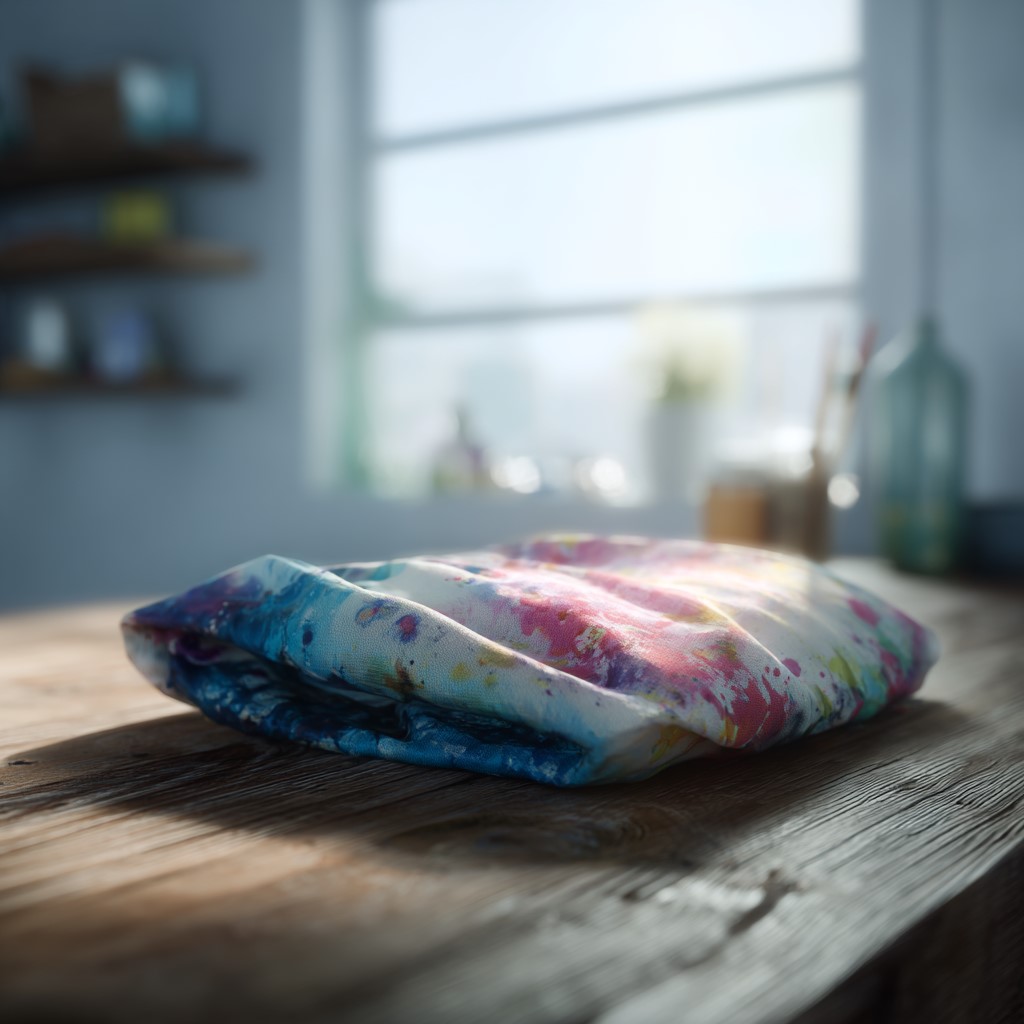
Caring for Your Finished Pillowcase
A little consistent care goes a very long way in keeping your child’s artwork looking vivid and beautiful for many years to come.
Wash the finished pillowcase inside out in cold water on a gentle cycle every time. Cold water is significantly gentler on fabric paint than warm or hot water. Turning it inside out protects the painted surface from abrasion against other items during the wash cycle.
Avoid washing with harsh detergents or any bleach whatsoever. A mild gentle detergent is genuinely all you need. Skip the fabric softener entirely because it gradually breaks down the bond between paint and fiber over multiple wash cycles.
Tumble dry on a low heat setting or air dry flat whenever possible. High heat in the dryer can cause some fabric paints to become slightly brittle and prone to cracking over time. Low and slow is always the better approach for any painted fabric item.
With proper and consistent care, a well-made fabric painted pillowcase genuinely lasts for years and years. I have personally seen pillowcases made by kids that still look absolutely beautiful five or six years later. That kind of genuine longevity makes every bit of the effort completely worthwhile.
Ideas for Making This a Gifting Project
One of the things that makes this craft particularly and uniquely special is how beautifully it translates into a deeply meaningful handmade gift for someone important.
A grandparent receiving a pillowcase covered in their grandchild’s handprints is going to treasure that gift far more genuinely than anything purchased from any store. A new baby receiving a pillowcase decorated lovingly by an older sibling has something completely irreplaceable waiting in their nursery from day one. A teacher receiving a class pillowcase covered in every student’s handprint at the end of the school year has a keepsake they will genuinely keep for their entire teaching career.
Keep the creativity going here: 20 Fun Air Dry Clay Crafts for Kids
Thinking About the Right Design for the Right Person
Think carefully about the people in your child’s life who would be deeply moved by something handmade and sincerely personal. Then think about what specific design would be most meaningful for that particular person. The combination of those two thoughtful decisions produces gifts that genuinely matter and are never forgotten.
Furthermore, involve your child in the decision making throughout. Ask them what their grandparent loves. Ask them what colors their teacher always wears. Ask them what would make their baby sibling smile someday when they are old enough to understand. That process of thinking about another person’s joy while making something with your hands is one of the most beautiful things a child can learn.
One Last Thought Before You Start
Here is what I ultimately want you to take away from this entire post. A plain white pillowcase is one of the most democratic canvases in the world. It costs almost nothing. It requires absolutely no prior skill. It accepts color generously and holds it beautifully. And it turns into something a child will see and touch every single day of their life going forward.
There is something quietly powerful about that. About taking a completely ordinary object and pouring genuine creativity and love into it until it becomes something extraordinary and personal. That transformation is available to every child regardless of artistic talent, experience, or age.
So go find a plain white pillowcase in your linen closet. Set up the table properly. Open the fabric paint with your kids. And let them make something they will be genuinely proud to sleep on tonight and every night after.
Because the best art is not always the kind that hangs on walls in frames. Sometimes it is the kind that tucks you in gently at night, made by small hands that are already learning that creativity and love are essentially the same thing.
Leave a Reply